
Hearing voices is a sign of impending mental collapse…
So I started to worry when I heard the first whispers. The voice said, “Learn to make a custom firesteel.” So, I learned to make custom-handled firesteels.
And the voice was satisfied…
But now the voice is back. And this time it intones, “Learn to make custom knife handles.”
Whoa! Stop. No way.
That’s not going to happen. I don’t have fancy tools. And I don’t have much free time. Most importantly, I don’t have any woodworking skills! Why should I waste money on materials when I’m just going to botch the job? Yet another project for my Drawer of Bushcraft Mistakes No One Will Ever See.
And the voice receded…
But then I saw an advertisement in a monthly newsletter. It was for a blade kit to make an Alaskan ulu.
And the voice returned…
Let’s make a handle for an Alaskan Ulu
When I can’t get out in nature, I like to practice bushcraft skills at home. There are lots of skills you can practice. The ones I like best let me make something I can use on my wilderness trips.
In this article, I’ll show you how to assemble an Alaskan ulu using an inexpensive blade kit and wood you select. You can use it around the home, or take it with you for kitchen use on multi-day trips.
What exactly is an Ulu?
An ulu is a cutting tool crafted by Native Alaskan people for more than 5,000 years. Women primarily used it to skin game and clean fish. But the ulu was so utilitarian that it was used for a variety of tasks in daily life – even to trim children’s hair!
The blade was traditionally slate, with handles made from caribou antler, muskox horn, or walrus ivory. Bone handles were sometimes carved and wood was used where it was available. Modern ulus are primarily made from stainless steel with wood handles.
Today, many people use ulus in the kitchen to slice meats and vegetables. The knife’s rocking motion concentrates the cutting force on the center of the blade. It creates twice the downward force compared to modern cutlery. And the motion is less likely to move what you’re cutting compared to the longitudinal motion of a knife. The ulu pins the material being cut, making it easier to use with one hand.
How much will it cost me?
I’m frugal!
I have an aversion to spending money, and I abhor wasting it. So I never want to spend big bucks on materials
But this ulu project is inexpensive and fun to try. So even if your finished ulu is not “perfect,” you should feel fine with the result.
So how inexpensive is it to build your own ulu? I was able to build mine for $12.49. It all started when I saw this advertisement in Woodcraft’s monthly flyer. Woodcraft is a chain of woodworking supply stores.
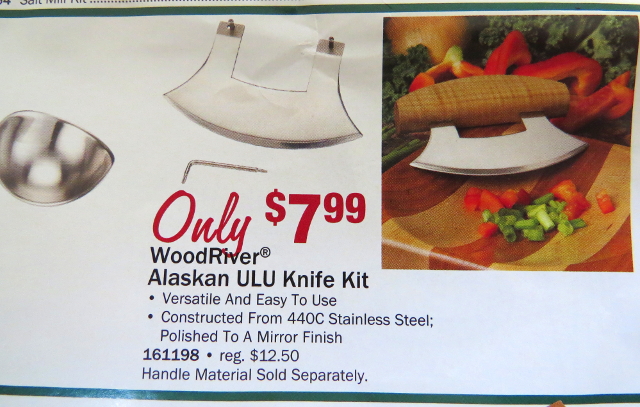
For $7.99, what did I have to lose?
I figure that at $7.99, it’s worth the purchase price just for the experience of putting it together. And for me, it’s a low-cost trial to see if I would enjoy making a custom-handle for a knife one day.
I was able to complete the project using these materials. Some of these links are affiliate links:
- Ulu knife blade/kit (Amazon link, not Woodcraft)
- Knife scales (Purpleheart 3/8″ x 1-1/2″ x 5″ Knife Scale 2-piece)
- ¼-inch Chisel
- Wood-file
- Sandpaper
- Super glue or epoxy
- Urethane (optional)
- Coping saw (optional)
My total cost for the ulu is below:
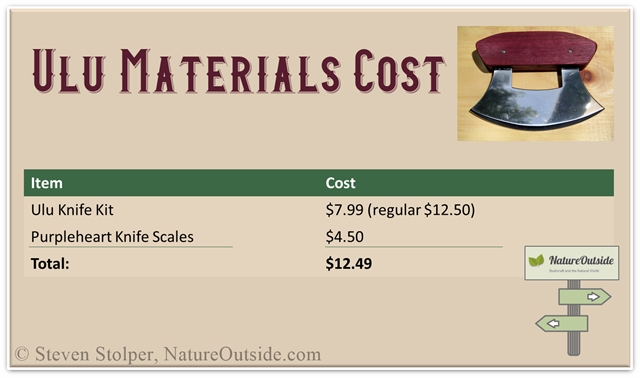
My Alaskan ulu cost $12.49 in materials!
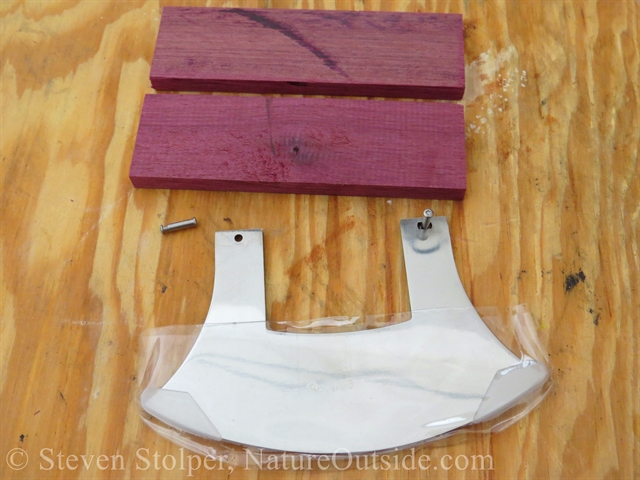
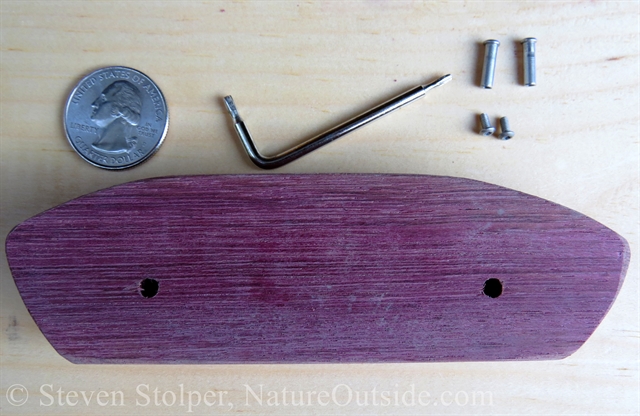
The Blade Kit
The Blade Kit contains a stainless steel ulu blade, two small Corby Bolts, and an Allen wrench.
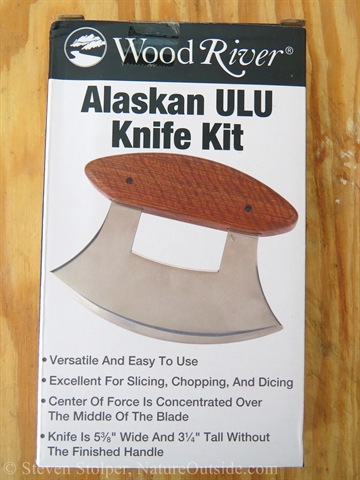
It’s a cool little kit!
Knife Scales
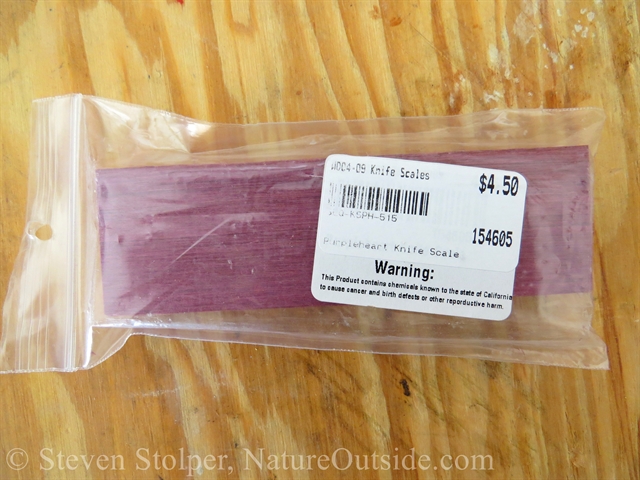
Purpleheart knife scales
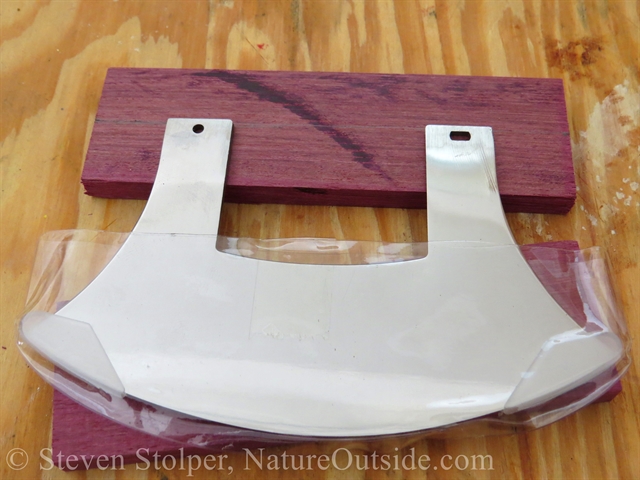
To make the kit, you need to provide your own handle material.
I wanted a “fun” ulu, so I chose knife scales made from Purpleheart. This is an unusual wood that adds a whimsical touch to my ulu. Sometimes called Amaranth, it is a hardwood found in Latin America. After it’s cut, the wood turns a deep, beautiful eggplant color!
Purpleheart is durable and has a straight grain. It’s dramatic color makes it popular for inlays and accents.
However, there is a disadvantage to using Purpleheart. With exposure to UV light, the wood becomes dark brown with hints of purple. If I choose, I can slow the transformation by coating the handle with a UV inhibiting urethane. But I plan to let it age naturally.

I love the whimsical color of the Purpleheart knife scales.
Making the Ulu Step-by-Step
Below are the steps I used to make the handle and mount it to the blade. Note that I make a mistake assembling the handle, and the instructions show what to do differently. My mistake was beginning to shape the scales before gluing them together. I found that after you glue the scales together, it is much easier to shape them uniformly.
Tracing the Handle
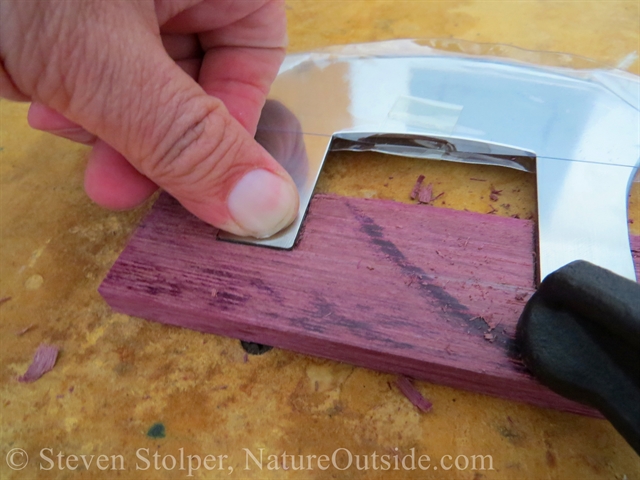
The first step is to trace lines onto the wood that show where to remove material to fit the handle. You also need to mark where to drill holes to mount the handle with the bolts. This is done with a pencil.
Start by drawing a line half-way up the scale. Lay the top of the blade against this line and trace its outline. Make certain the blade is centered with respect to the length of the scales.
This photo shows the inside of the two scales.
I trace the outline of the blade so I can create mortises and drill the holes for the bolts

Tracing complete.
Fitting the Blade
Use a chisel to remove the wood from where the blade will lie. Remove about half the depth of the blade from each scale. This creates a mortise in each scale into which the blade fits.
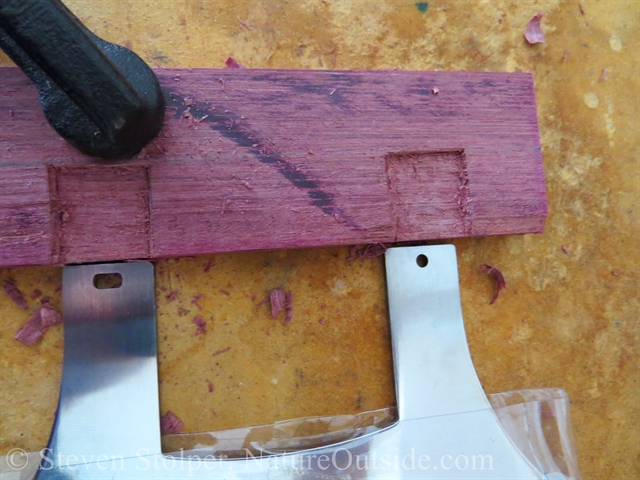
You can see how the mortise accommodates the blade. The depth of the mortise is half the depth of the blade
I check the fit by eye.
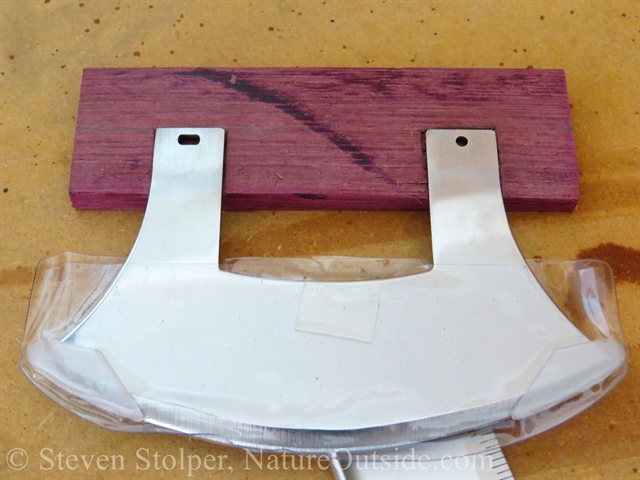
It’s not a perfect fit. But it’s pretty good for my first time.
Drill the holes
After you finish removing the material for the blade, drill the holes. From the inside out, drill 1/8” holes using a brad point drill bit. Then flip the scales over. From the outside drill a 5/32” hole into the 1/8” hole. But only drill it 5/32” deep! This creates countersinks for the bolts.
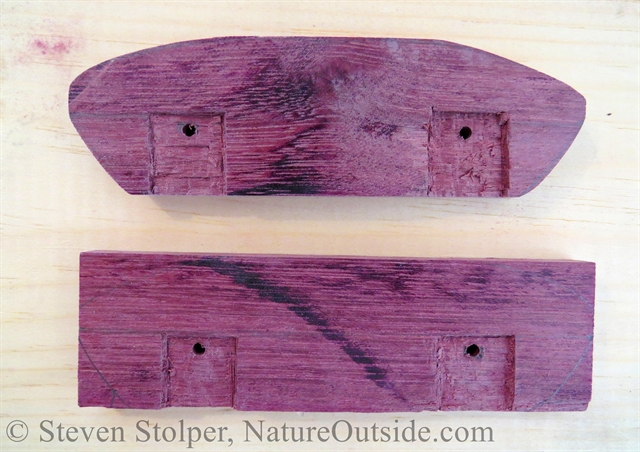
I’ve drilled the holes. Beginning to shape one of the scales before they were glued together was a mistake.
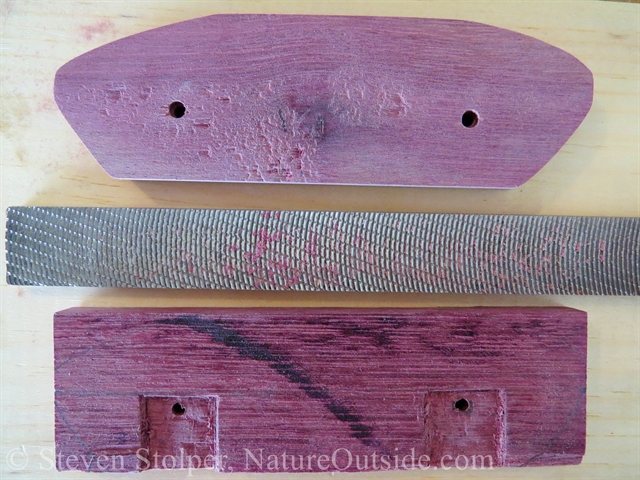
The outer surface (top) and the inner surface (bottom) of the scales. I used a file to shape the scales.
Gluing the Handle
Glue the scales together. Make sure to keep the holes you drilled aligned. You also need to keep the mortises aligned. Leave the glue to dry overnight.
Gluing the scales. The clamp keeps them from moving while the glue dries.
Shaping the Handle
Dry-fit the blade into the handle to make certain everything aligns. Be careful not to cut yourself! Remove the blade and set it aside.
Draw an outline of your handle shape on one of the scales. Use a wood file and sandpaper to shape the handle as you desire. I also used a coping saw to remove large chunks of wood from the handle to rough-out the shape.
I mistakenly shaped one of the scales before I glued the handle together. What I realized is that, once the scales are glued, it is easier to obtain a uniform shape on both scales.
Finish the Wood
If you wish to coat your handle with varnish or urethane, do it now and allow it to dry overnight.
Final Assembly
The handle is ready to be mounted to the blade.
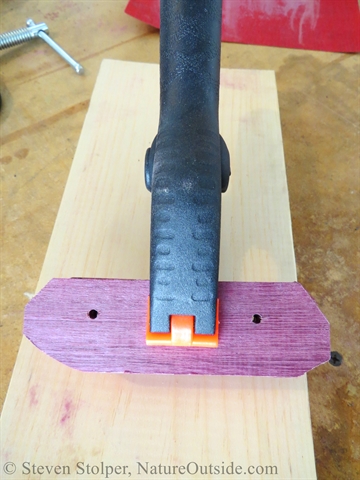
Coat the top of the blade (that will go inside the handle) with epoxy. I did not place any epoxy above the holes in the blade because I didn’t want the epoxy to get forced into the holes when I insert the blade into the handle.
Insert the blade into the handle, making sure the holes align. Be careful not to cut yourself when handling the blade!
Then insert the bolts and tighten with the Allen wrench that comes with the kit.
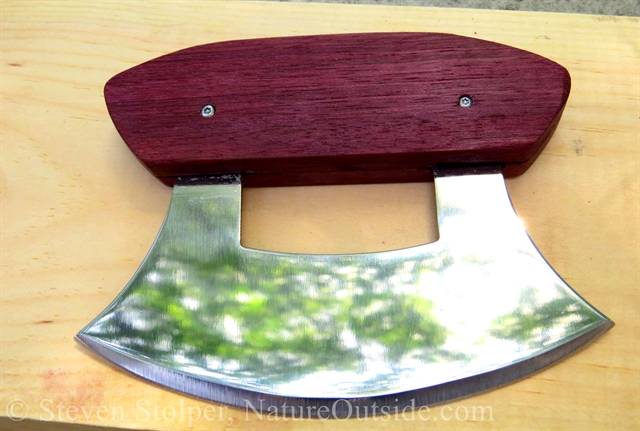
My Purple Ulu
Viola!
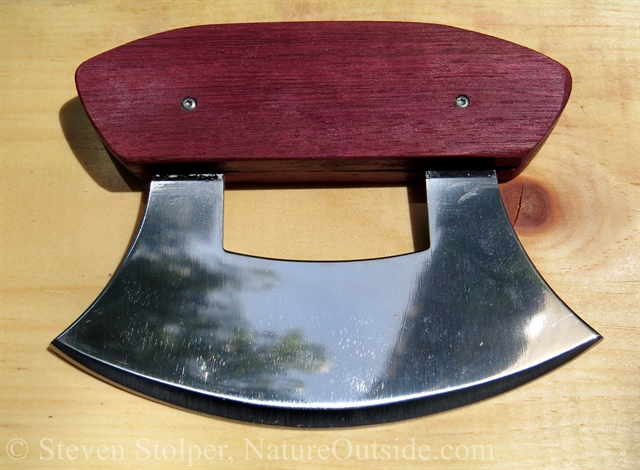
The finished ulu!
This was a fun project! And I now have a working ulu for less than $15!
Online Instructions
I’ve found Woodcraft’s instructions for making an ulu using the kit. They’re online in PDF format. Click here to view the PDF instructions.
You can Make an Ulu Too
Happy Ulu Making! How many uses will you think of for your ulu?
If you’ve made an ulu, send me a picture and I’ll post it in this article. You can contact me using the “Contact” page on this website.
Related Articles on NatureOutside
How to Make a Custom Firesteel without Fancy Tools
How to Make a Deerskin Pouch – 5 Easy Steps!
For fun facts and useful tips, join the free Bushcraft Newsletter.


Very cool. Great description on construction. Hal
Thanks, Hal! I’m glad you enjoyed the article.
Can a guy with big hands use this Ulu comfortably?
I think so, Frank. My hands are medium size so I don’t know for certain. I hold it in an “overhand” grip from the top. So the handle is plenty wide. I curl my fingers underneath to take a firm grip of the tool. If you hold it like I do, it should fit large hands.
Also, since you create the handle yourself, you can fashion a handle that fits your hands.
now the blade on your link on Amazon is $23.98. I guess it is a pretty popular kit! I bought not too long ago at Lamson knives in Massachusetts. I don’t remember what I paid for it but it is made in Massachusetts and I use it all the time. I would buy another ulu blade if it was more reasonably priced because my husband would love a project to make the handle for it, but that might have to wait for another sale price. Great article. thank you
Thank you for your comment, Vicky! I’m glad you enjoyed the article.
Prices do fluctuate and you can find the kit from a number of sources. One may have a better price than the one I linked to. I hope you find a good blade at a reasonable price.