
Have you seen those slick custom-handled firesteels? The ones made from beautiful burl woods with exotic grains? Perhaps you want one to match the handle of your bushcraft knife?
In past articles, I’ve written how firesteels are incredibly useful tools in the bush. I covered proper firesteel technique, including how to use one if you’re injured. In this article, I want to show how you can make your own custom-handled firesteel to carry with you on your hikes.
This article contains affiliate links.
What is a firesteel?
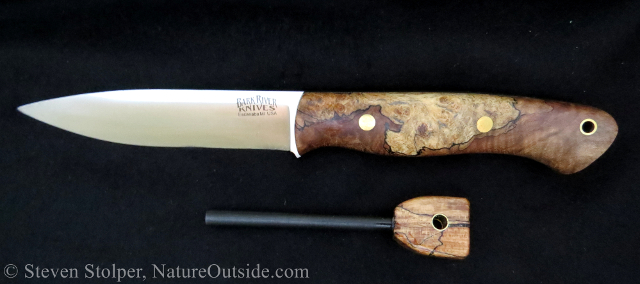
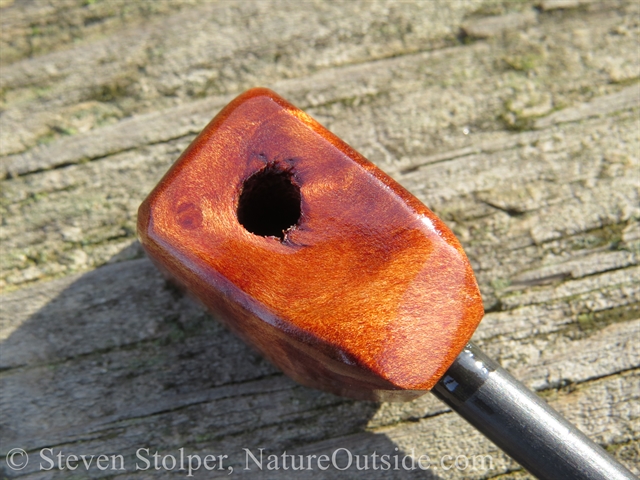
Bushcraft knife with spalted maple burl handles. The firesteel is also spalted maple.
Firesteels start fires. Like other ignition sources (i.e. matches and lighters) their job is to start your tinder burning. The firesteel consists of a metal rod usually attached to a small handle.
The metal is a cerium alloy mixed with an iron alloy to provide strength. This combined alloy is called mischmetal. Early firesteels had a slightly different formulation, called ferrocerium.
Mischmetal has pyrophoricity. A pyrophoric substance (from the Greek “fire-bearing”) ignites spontaneously in air at or below 55 °C (130 °F). When you scrape a sharp surface against a firesteel, it gives off hot sparks.
And when I say “hot” I mean HOT! This is not your father’s magnesium block. When scraped, a firesteel produces molten sparks of 3000°C (5,500°F)!
The beauty of the firesteel is that it survives emersion in water. It is reliable and easy to carry. And you can purchase mass-market firesteels, like the Light My Fire brand, for about $15.
You can see why they’re such useful tools!
Why make your own?
Carrying custom equipment in the woods really excites me. When I showed you how to make a deerskin pouch, I wrote about the thrill and satisfaction you get when you use equipment that you yourself have crafted. Distinctive gear is a way to express your unique personality as an outdoorsman. And the most inexpensive and rewarding way to get custom-made gear is to make it yourself.
I admire good craftsmanship. And there are people out there making exquisitely handled firesteels. But, alas, my eyes are bigger than my budget. Custom firesteels sell for as much as $100. On my limited budget, purchasing these splendid firesteels is not in the cards.
The alternative is to make my own.
My Big Problems
When I decided to make my own custom firesteels, I immediately encountered a number of problems.
Lack of tools
I found a number of videos on YouTube that show people making their own handles. I include one in this article, below. But in these videos they use a band saw, drill press, belt sander, and other tools I just don’t have. In fact, the only power tool I own is a hand-held power drill.
I lived in an apartment for many years and just didn’t need many power tools. And they’re expensive!
So I decided to figure out how to make custom firesteels without fancy tools.
Lack of skill
At this point in my life, I have no problem admitting my faults. I’m not skilled with my hands. In fact, I’m a bumbling, bungling, butterfingered wood worker. I have trouble visualizing in 3D, and I often need help understanding how pieces of a mechanical system move. Mechanical engineers are gods to me!
I prefer to spend my time animal tracking instead of trying to improve my feeble woodworking skills. But I recently decided I’d no longer allow my lack of skill to prevent me from trying projects like this one.
Fear of failure
I worried that my firesteels would look like crap! If you watch television or social media, it looks like everybody is good at everything. You see all the shiny, perfect things they make. How would I feel when my efforts fell short?
Over the years, I found that it just doesn’t matter how my work compares to others. It’s only important that I’m happy. And fortunately, my standards are remarkably low! 🙂
I also realize that my friends love gifts even if they’re not perfect. They understand that they’re handmade, and the effort that goes into them. So they will never laugh at my efforts.
Besides, if my firesteel looks terrible, I can just consign it to my Drawer of Bushcraft Mistakes No One Will Ever See.
So don’t worry that your firesteel won’t be good enough, I guarantee you’ll love it!
A Look at Custom Firesteels
Before we start the step-by-step, I want to show you what you can make. It’s a beautiful day. So let’s go on a short hike.
Several days ago, I climbed to the top of a tall hill in the Sunol Regional Wilderness. A strange sight met my eyes. Far below, in a grassy glen, I saw a lone picnic table by the edge of a wooded ravine. It’s the perfect place to talk about firesteels. So, come along as I try to find it.

Crossing Alameda Creek
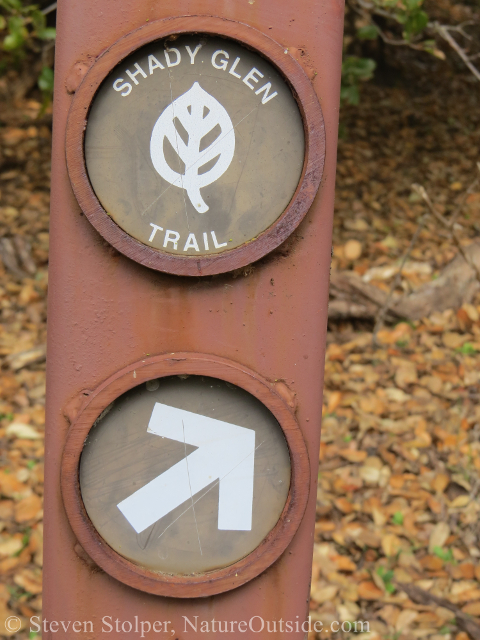
Shady Glen — That looks promising!
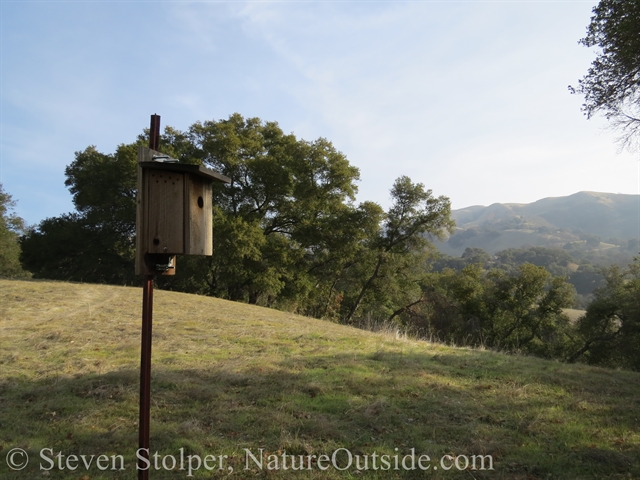
Passing a nest box in the glen
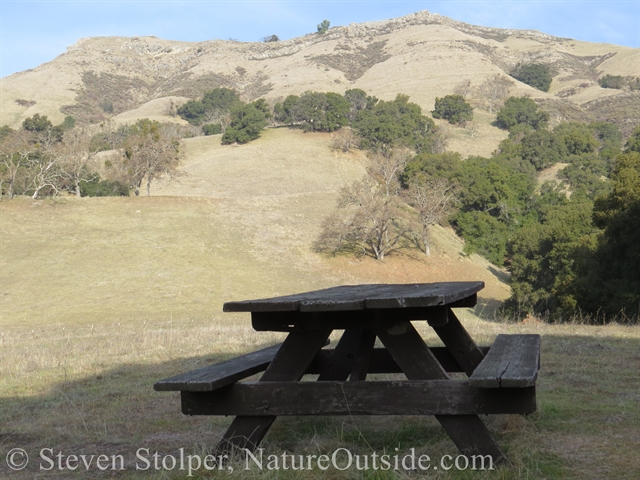
Found the picnic table! The hill I viewed it from is in the background.
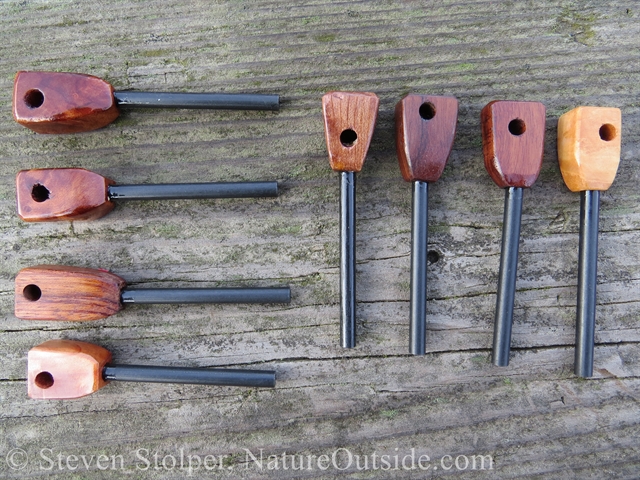
Let’s take a look at some firesteel shapes and sizes. There are no set rules on handle size and shape. The following are pictures of early prototypes. The instructions below were written after I refined my technique. But I want to show you that you have a wide latitude with shape, size, color, and lanyard hole location.
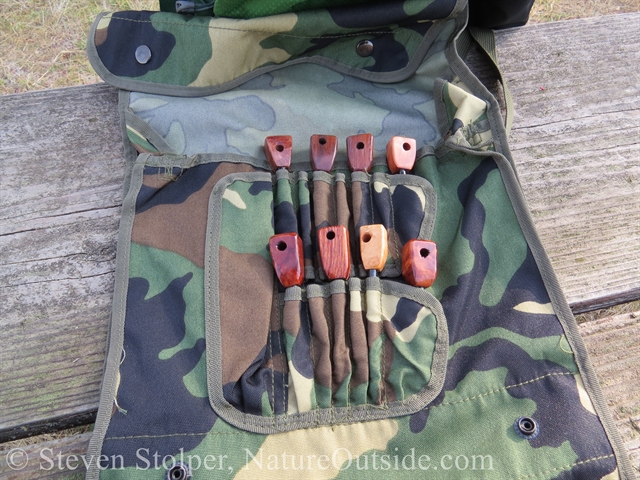
I carry firesteels I made in the pencil-holders of an old map pouch
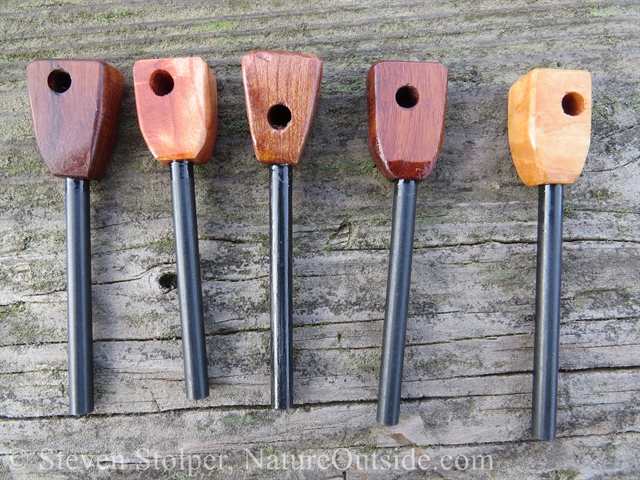
I’ve experimented with different shapes – some angular and some curved. I also placed the lanyard hole in different locations to see how that affected the appearance.
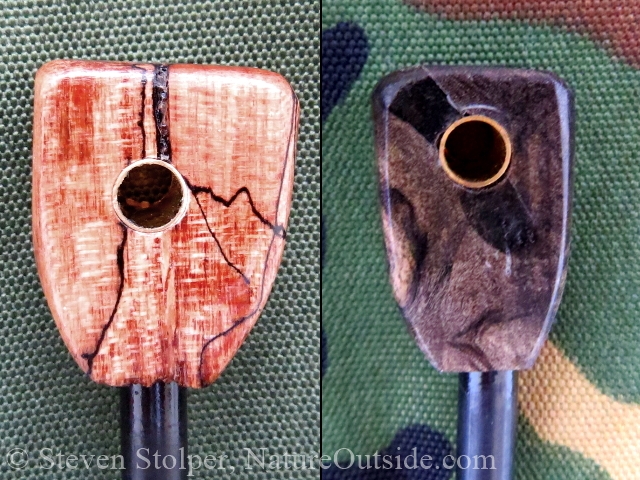
These are all made from Redwood Burl, a tree that grows locally. Notice the variation in color and grain. The left two came from the same un-stabilized burl. The right two came from the same piece of stabilized burl.
Initially, I had problems drilling the lanyard holes. I improved my technique, which I share below. (Redwood burl)
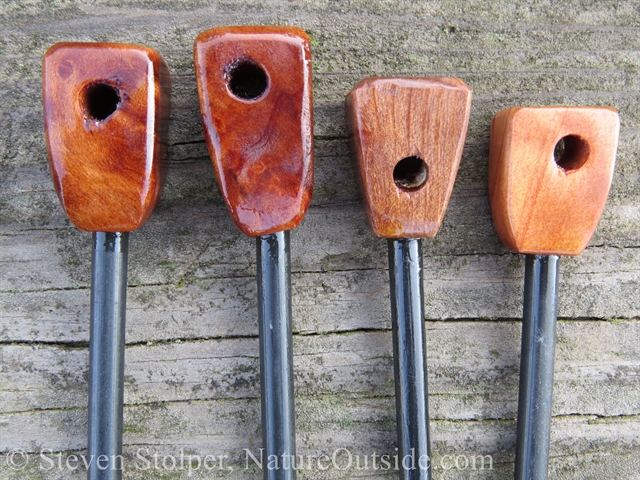
I experimented with two handle sizes. These are the large-handled ones. The left one is made from Bubinga and the right two from Redwood burl
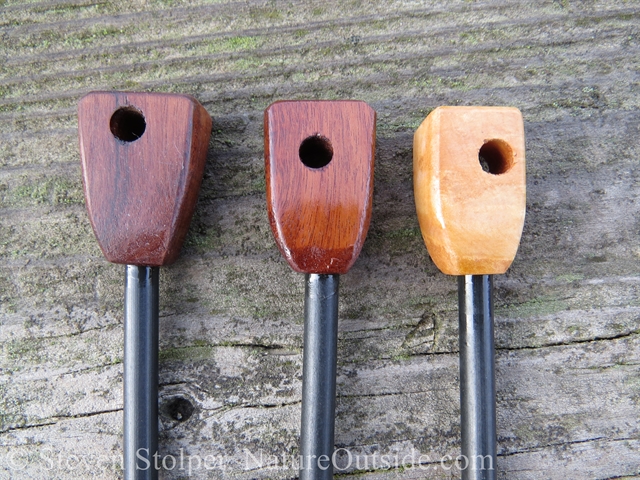
Here are smaller handles. Notice how I’m experimenting with angular and curved shapes. I am also trying different lengths and lanyard hole locations. Rosewood (L) Redwood (C) Maple Burl (R)

I made a California buckeye burl firesteel to match a black leather knife sheath
So, let’s get back to the workshop (my garage) so I can share the step-by-step instructions. But as I gather the firesteels for the hike back, I feel as if I’m being watched.

Maybe he wants a custom firesteel?
How to Make a Custom Firesteel Step-by-step
The process we’ll follow is simple.
- Cut a block of wood (from a pen turning blank)
- Trim it to the rough shape we want
- Sand the surfaces flat
- Drill holes
- Sand to the final shape
- Glue the firesteel blank
- Seal or finish the wood
At the end of this article, I will cover putting in a brass lanyard hole.
Before we begin
In the steps that follow, I choose to wear an N95 Respirator. These are inexpensive facemasks that protect you from inhaling fine sawdust. I recommend you wear one as well. Health always comes first, and you’ll miss it once it’s gone. You can’t un-ring a bell, so take steps to preserve your health.
1. Select your wood
For this example, I will use pen turning blanks. Most measure 3/4″ square x 5″ long. They’re offered in softwoods, hardwoods, and stabilized and unstabilized burl. Burls have grains in many directions. It’s what makes the wood so beautiful. But this also weakens the wood and creates voids that can crack. So burls are often stabilized by injecting them with resin under pressure.
I started experimenting with inexpensive pen blanks, made from softwoods that are easier to work with. I slowly graduated to more expensive woods and finally exhibition grade burls.
Most of the pictures you’ll see are my earliest attempts to make handles. So the pen blanks I use are relatively inexpensive.
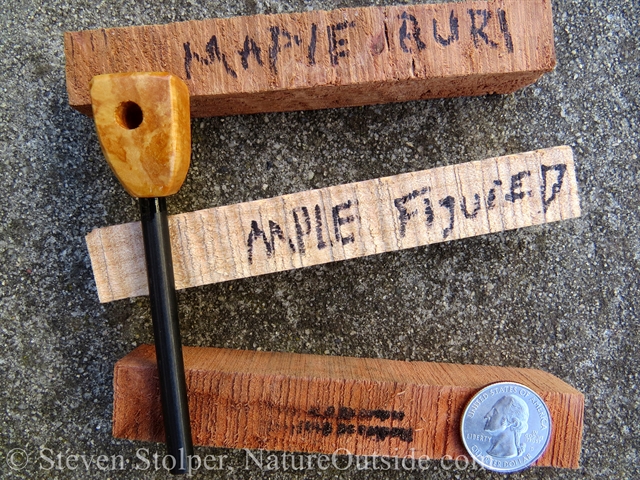
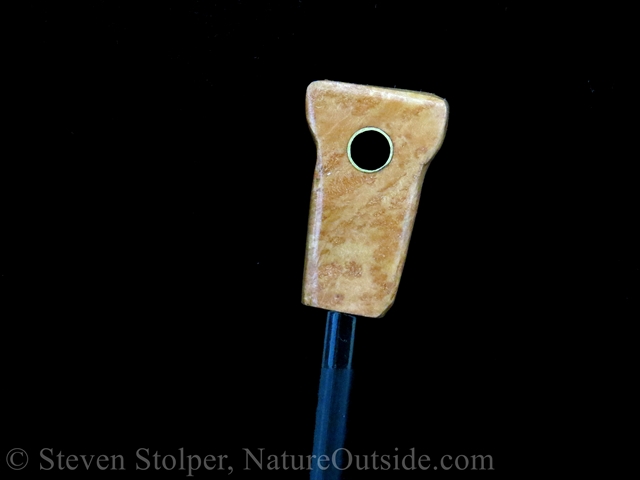
Inexpensive pen blanks – Maple burl (top), figured maple, and redwood burl (bottom). The firesteel shown is made from maple burl.
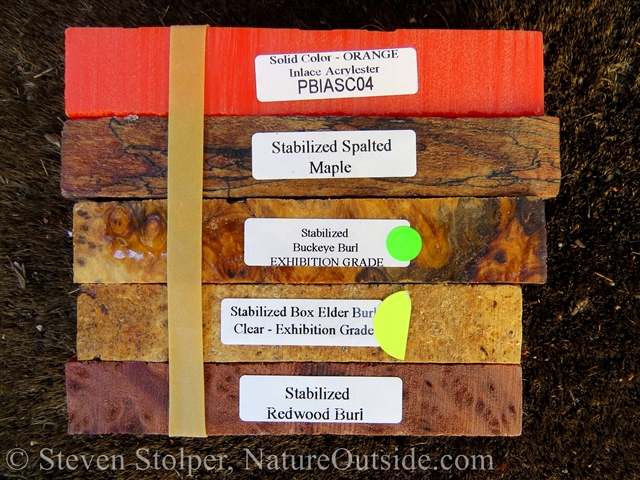
More expensive burls and an acrylic blank
2. Select your firesteel rod blanks
Many websites sell firesteel rods. But beware of cheap imports. One reason they are cheap is because they use less of the pyrophoric material. As a result, they make lame sparks!
Buy from a reputable vendor. You’ll find that the blanks sold by some vendors are softer than others. Soft rods will create amazing sparks. But they will have a shorter lifespan. Harder blanks will last longer but throw more subdued sparks. Choosing one or the other is a matter of preference.
The diameter and the length of the rod is also something you need to choose. I use ¼” diameter rods that measure 3½” long. Keep in mind that part of the firesteel is embedded in the handle.
3. Cut to Length
Cut a block from the pen blank. This will become your handle. I usually cut a block measuring 1.25″ – 1.3” long using a coping saw. I use this small hand-held saw in the next step as well.
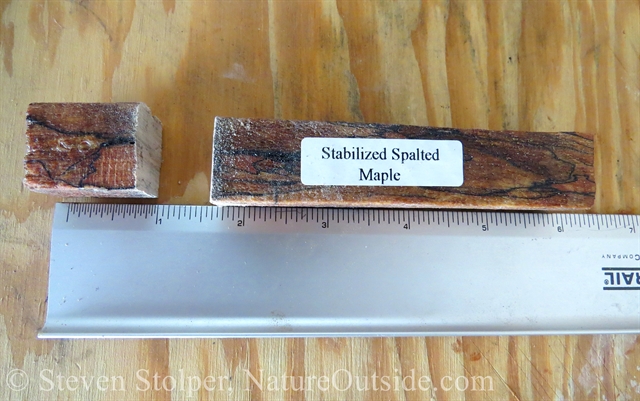
The block cut to length
4. Cut to width
Choose which sides of the block will become the top and bottom of your handle. Find the most attractive side. We’ll trim material from the side opposite this one.
How much to trim is a judgement call. I leave ¼” width for the rod and at least 1/8” on either side of it. So, the trimmed block will have a thickness of ½” or wider.
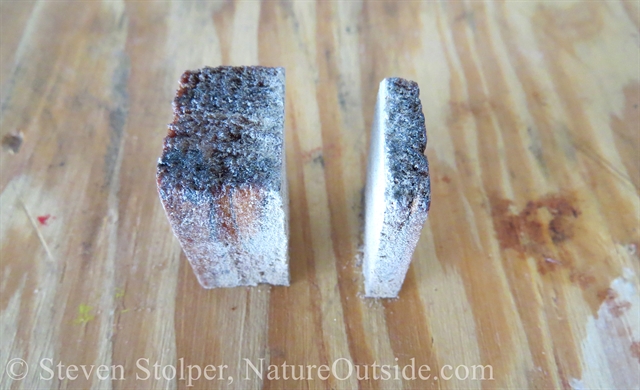
The trimmed block
5. Flatten all sides
Use a flat file to flatten all six sides. Examine the grain. You get the best results rubbing the block on the file with the grain.
Holding the wood block carefully in your fingers, push or pull it down the length of the file in the direction that the teeth cut into it. Then lift the block and return it to its starting position to repeat. Concentrate on removing high spots on the surface of the wood.
If the file looks like it is becoming clogged, you can turn it over if it is a double-sided file with the same type of teeth on the opposite side. You can also clean the file using an inexpensive wire brush or file card.
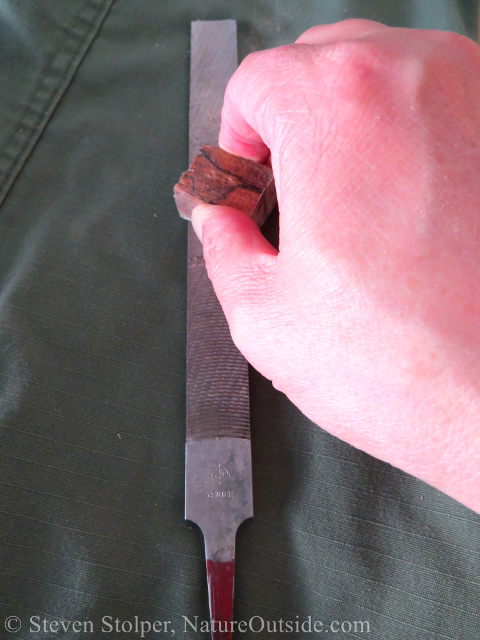
Flattening the block. I put an old shirt or pair of pants underneath to catch the saw dust
6. Drill hole for firesteel rod
Now, drill the hole for the firesteel rod in the bottom of the block. I use ¼” diameter rods so I drill a ¼” diameter hole.
First, use a ruler and pencil to mark an “X” from opposing corners of the bottom face of the block. The lines should intersect in the center of the face. This is where to drill.
Clamp the block to a bench or table top. If your power drill has a level indicator, use it. To keep the drill from “walking,” use a brad point drill bit. This allows you to better place the hole.
Measure approximately ¼” to ½” up the drill bit and place a piece of masking tape. This provides a visual indication of how far you have drilled into the bottom of the block.
Drill the hole approximately ½” into the block. Don’t worry if the hole is not perfectly centered. We can address that when we sand the sides of the block. Also, if your hole is not aligned with the axis of the block, don’t worry too much about it. If it does bother you, consider investing in a jig or tabletop drill press.
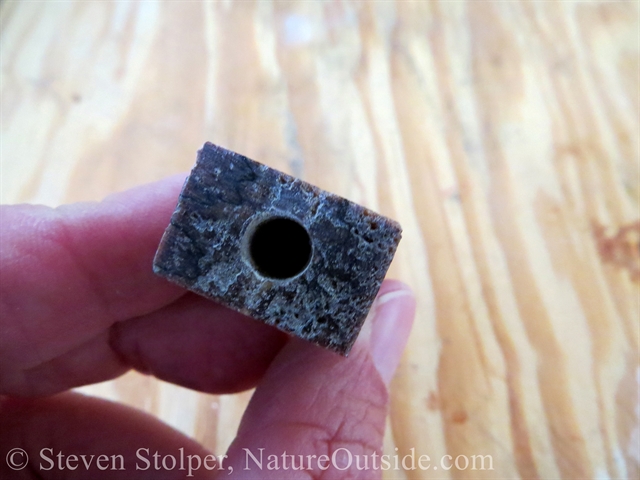
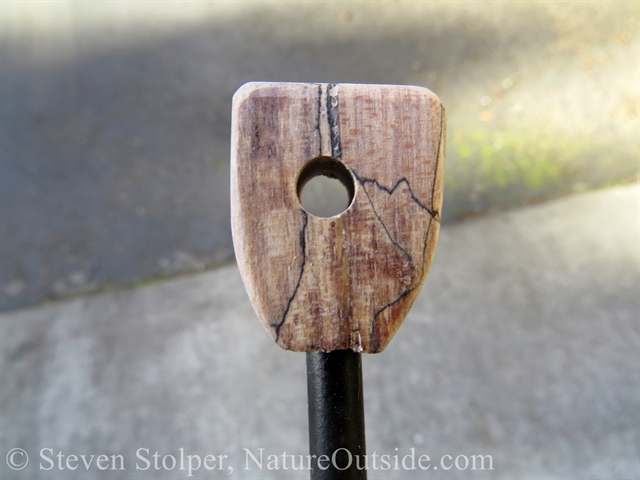
Hole in bottom of block for firesteel rod
7. Drill hole for lanyard
This hole is optional. But I like to have one because I use the lanyard to secure my firesteel to my knife sheath.
I drill the hole ¼” in diameter partly for convenience. I can use the same drill bit I used for the firesteel hole. But this size also allows me to use 550 paracord for my lanyard. Paracord is my favorite cordage.
Draw a line down the middle of one of the faces from top to bottom. Decide where you want to put the hole. Do you want it in the center? Or, do you want it slightly toward the top? Draw a line across the face to the other side. You drill the hole where this line intersects the vertical line. Make sure the hole will be at least ½” from the bottom so you do not drill into the hole you made for the firesteel blank.
Here’s a tip: It’s very important to place wood underneath the block when you drill the lanyard hole. If you don’t do this, you end up with a jagged, torn, exit hole in the bottom side. It took me several tries to realize this.
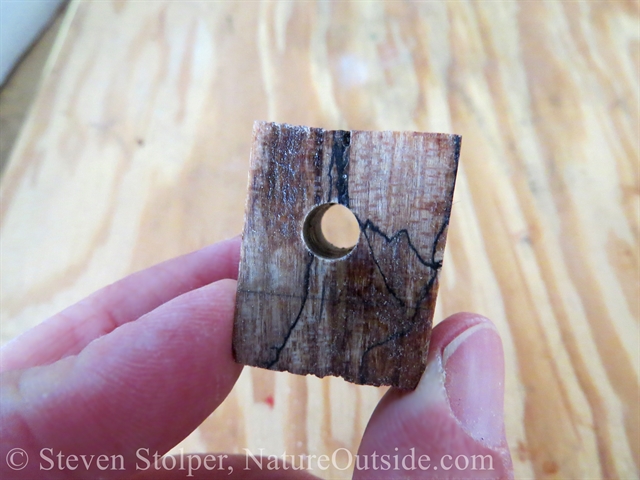
Hole for lanyard
8. Shape sides with file
You can use a template to draw the shape of your handle onto the block. I generally use a convex shape. But I will begin experimenting with compound curves in the future.
Use a file to remove material until you get to the lines you drew. I start by holding the block at a steep angle. Then I decrease the angle to remove a greater swath of material. It is easier to do than to explain. You’ll have to experiment for yourself.
Sometimes my shapes are angular and other times curvy. Choose a shape that appeals to you.
Watch the position of the hole you drilled for the rod. You want to remove material from the sides so that the hole remains centered in the bottom face.
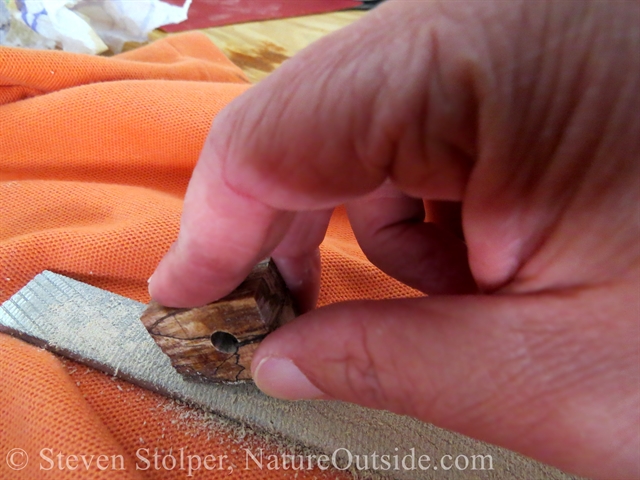
Filing the sides. I’m filing at a steep angle and will shallow it out on subsequent strokes.
9. Sand the surface
At this point, I sand all six sides by rubbing the block onto 440 grit sandpaper. I do the front and rear, top and bottom, and the sides.
The handle feels better in the hand if there are no sharp edges. So I sand almost every edge so it is rounded and feels good to the touch. I do not sand the bottom edges inward toward where the firesteel attaches to the handle. This is because the 90-degree edges at the bottom give an aesthetically pleasing look. But do what looks best to you. On other handles, I have filed/sanded the bottom edges all the way to the edge of the firesteel hole.
Keeping with the “no sharp edges” theme, I sand all the corners to round them off. This is especially important for the top of the handle that fits in your palm.
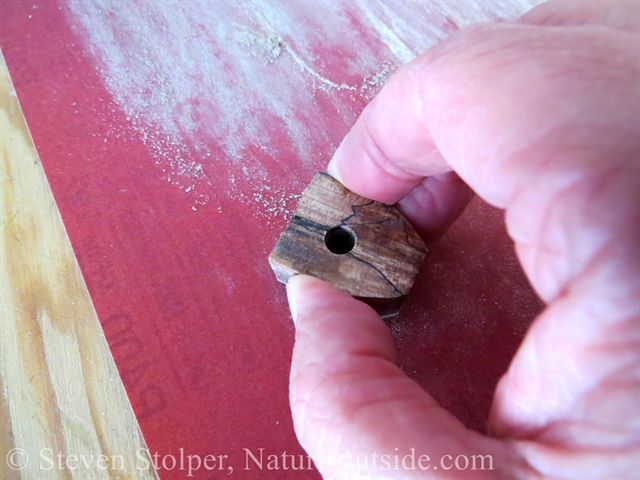
Sanding the handle
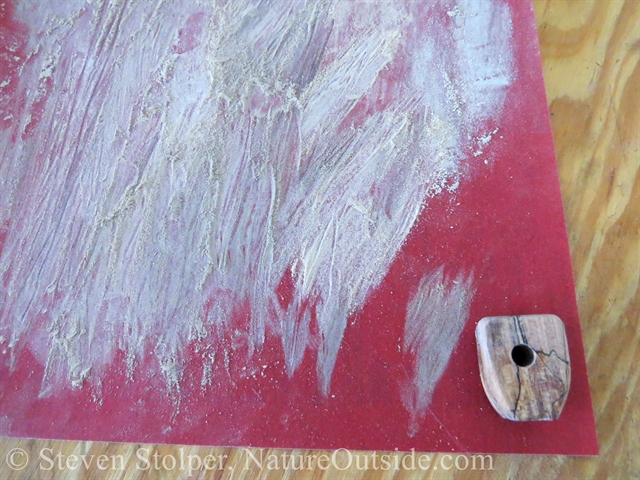
Sanding complete. Notice all the material I removed from the handle.
10. Glue the firesteel
Put a few drops of superglue or epoxy into the firesteel hole. Then insert the firesteel rod. Allow to dry for the time recommended for your adhesive. Often, the rods will stick in the hole by friction alone. But gluing it assures it can stand up to abuse.
Handle on rod. The spalting and voids are part of the wood.
11. Finish the wood (optional)
Wipe down the handle with a damp cloth to remove sawdust and any dirt. Let dry.
I prefer to finish my handles in urethane (matte finish). I do this for several reasons. It protects the handle from the elements, particularly water. It gives the handle a “wet” look. And most of all… because I happen to have a can laying around my home.
Grasping the rod by the far end, dip the entire handle into the can of urethane. Lift it out and rotate the firesteel to ensure an even coat. Hold the firesteel over the can to recover excess that drips from the handle. Wipe away the excess (any puddles) with a high-density sponge or brush.
I have a drying area. It consists of a spring clamp to hold the firesteel over denim ripped from a pair of old jeans. As it dries, ensure there are no “puddles” on the handle. Wipe away excess urethane. Blow into the lanyard hole to remove any urethane bubbles that form in it.
Sometimes, I will wait eight hours and repeat the process to get a glossier finish.
If you don’t like my approach, feel free to brush the finish onto the handle in a traditional manner.
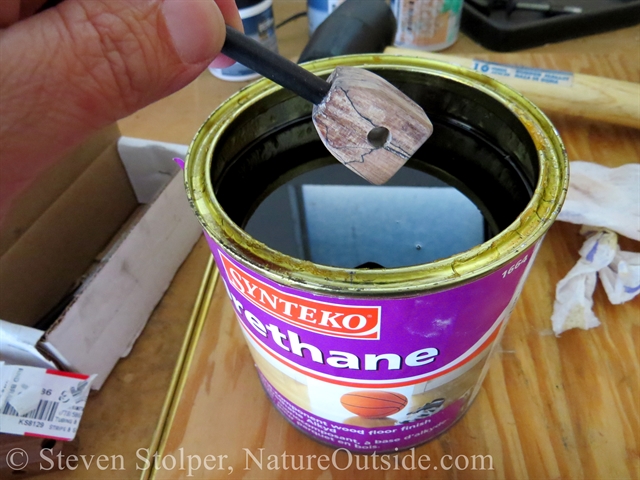
Dipping the handle in the urethane
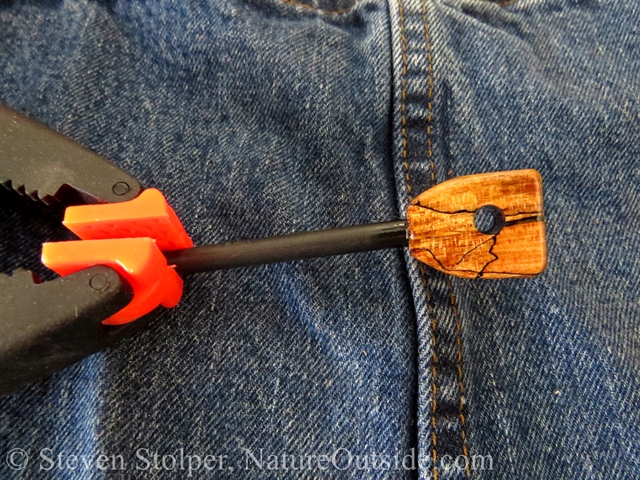
Drying area
How I Plan to Improve
That’s all there is! Now you can make your own custom firesteel.
However, the journey is not over. At least not for me. Here are a few ways I plan to get better at making them.
Drill press
I’m going to invest in an inexpensive table-top drill press. It will help me drill precise holes time after time. The biggest goofs I make are drilling the holes for the rod and lanyard.
Brass lanyard hole
To embellish my firesteels, I plan to use brass tubing to highlight the lanyard holes. It gives it a cleaner, more professional look. Besides, who can resist firesteel bling!
Currently, I measure and cut ¼” brass tubing with a hacksaw. Then I hammer it into the hole using a rubber mallet and a cylinder used to set leather snaps.
But this approach has several drawbacks. If I don’t measure the tube precisely, it is either too long or too short. If it is too long, I cannot sand the face of the handle because I have already finished it with urethane.
Brass tubing highlights the lanyard hole. Spalted maple burl and buckeye burl.
UPDATE: I found a method that yields good results. I insert the tubing before I finish the handle, just after I flatten the sides and drill the holes. Before I insert the brass tube, I sand the ends so they are smooth and flat. I insert the tube using a rubber mallet and either a cylindrical awl or the snap setting cylinder. I sand the faces flush with the ends of the tube. I then apply the urethane without masking the tube. The coating does not seem to stick to the brass. To be safe, I blow air through the tube to remove any urethane that may be inside.
Compound curves
All the handles I make are convex. I plan to use a half-circular file to experiment with more complex shapes.
UPDATE: I tried using the half-circular file to make more curvy handles. I found I didn’t like the look. Here’s an example below:
More complex curves in a Maple Burl handle. I found I didn’t like the shape.
I Finally Find my Shape!
UPDATE: After much experimentation, I finally found the shape most pleasing to my eye. My future firesteel handles will probably share this shape. It’s angular with rounded edges. Here it is in California Buckeye Burl:

I finally find my shape! My future firesteels will probably take this form. The handle shown is made from California Buckeye Burl.
Consistency! Consistency!
Every firesteel I make is unique. I like that! But I also want the workmanship to be consistently high. Right now, I give my firesteels to friends as gifts. They’re very forgiving. But I enjoy making firesteels so much, I may decide to sell them at an affordable price for those who can not spend for commercially produced ones. To do this, I need to have consistently high quality workmanship. Admittedly, this is difficult to do without fancy tools.
So I plan to practice and improve so I can produce consistent quality.
What if you do have fancy tools?
If you have some of the fancy tools, it makes the job easier. There are several YouTube videos that show people making firesteels using a table saw and vise. Check them out if you already own these tools.
You can make them too!
The point of this article is to show that you can make a really nice custom firesteel without the need for an expensive investment in tools. If you make one using techniques in this article, send me a photo and I will post it here.
Do you have any suggestions for improvement? Leave a comment below.
Related Articles on NatureOutside
How to Make a Deerskin Pouch – 5 Easy Steps!
For fun facts and useful tips, join the free Bushcraft Newsletter.


Nice article Steven. Some of the wood you use is really nice to look at.
Thanks, Stan!
Thank you, Steven. This is exactly what I was looking for!!! I’ll get the couple of tools I’m missing and I’ll give it a try!
Let me know how it turns out, Diego!
hi really interested to know what you used to join the handle was it glue?
Matthew, I use Gorilla brand super glue. I place a drop in the hole before inserting the rod into the handle. Don’t use too much, or residue will emerge from the hole and you will need to wipe it off.
I make custom Fire Steel sets with handles made from Fatwood and also supply a piece of Fatwood for making your fine tinder shavings along with the set. I have to use Fir Fatwood as it’s what I have available where I live. . After I have cut and dressed the handle and fatwood piece, I drill holes in one end of each piece and then lace it with a piece of Paracord to keep them together. When I put the Ferro Rod into the handle, I drill the hole and then insert the ferro rod immediately. In this way you do not need to use any type of glue as the hot Pitch in the fatwood glues the rod into the handle. As for a Striker, you are on your own if you want to supply one with your set. I have found something that works very well. but is not readily available. I make them from well used Metal Cutting Band saw Blades acquired from a machine shop garbage bin. The reason people like my sets is that you don’t have to go looking for your small tinder.
Randy, thank you for sharing your method for making firesteels. It makes a lot of sense to use Fatwood handles and attach a piece of it to the firesteel. I wasn’t aware that the pitch in the Fatwood would be enough to secure the firesteel rod. That’s great information!