
Imagine using your own custom-made gear in the wilderness.
Picture the excitement and satisfaction when you reach for equipment that you yourself have crafted.
Distinctive gear is a way to express your unique personality as an outdoorsman. And the most inexpensive and rewarding way to get custom-made gear is to make it yourself.
Why be ordinary? Making your own outdoor gear is exciting and fun. And it is much easier than you think.
The Deerskin Pouch
I am going to show you how to make a deerskin pouch to add to your equipment. I have carried one in my daypack every day for the last five years. The deerskin pouch serves the same purpose as a nylon stuff sack. But with much more pizzazz!
I use the pouch when foraging for wild edibles. It stores enough acorns for one loaf of orange acorn bread.
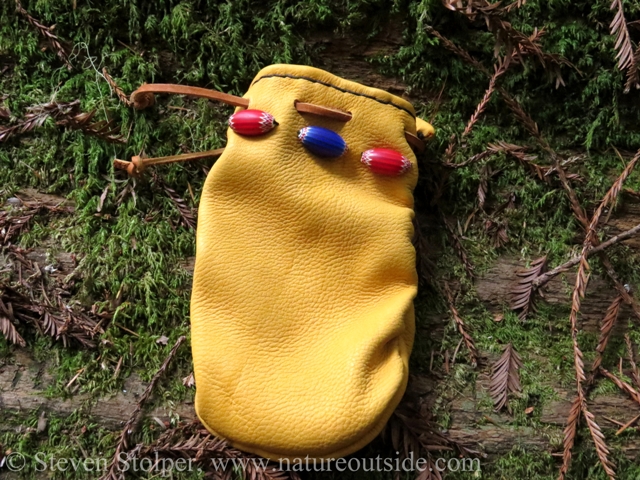
Why should you bother making a deerskin pouch? It’s easier to trot to the store and buy a nylon stuff sack. To answer that question you need to hold one in your hands. Admire the classic shape. Drink in the lustrous gold color. Caress the soft, pliant leather.
Deerskin is luxurious to the touch and buttery soft. But it is surprisingly tough and abrasion resistant. It feels cool in summer and warm in winter. It is lightweight and breathable. And deerskin stays soft even after getting wet repeatedly.
Deerskin is easy to care for. It is not necessary to treat it to protect it from water. But you should always let the leather air-dry if it becomes wet.
Learn by Doing
Many people refuse to make their own equipment because they fear making mistakes. Don’t let that stop you! Mistakes are going to happen and they are OK. They teach us so we do better next time.
Ironically, I myself have this problem. In my professional life I hate making mistakes! But in bushcraft, I give myself permission to make them. I tell myself that the result is not imperfect, it’s handmade!
Stretch Yourself
Part of learning is stretching your abilities. The mistakes we make allow us to surpass ourselves the next time. So the instructions below teach you how to make two pouches! You can choose to make a simple pouch like the one I’ve carried for years. Or, you can choose to make a more elaborate one decorated with beads, finished edges, and a leather patch.
If this is your first deerskin pouch, make the simple one. If you are more ambitious, make the fancy one. I marked the additional steps to make the fancy pouch as “Optional Step.” You may skip any or all the optional steps to make the pouch you like.
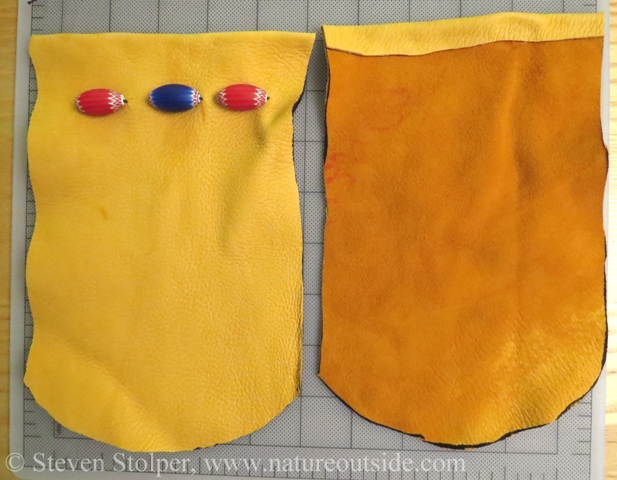
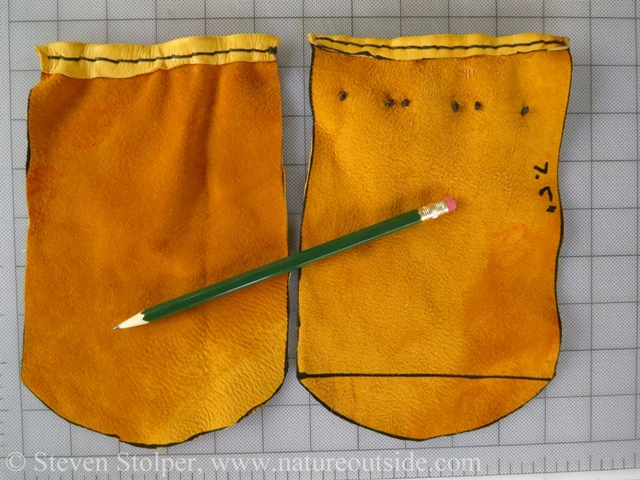
Here are the two pouches side by side:
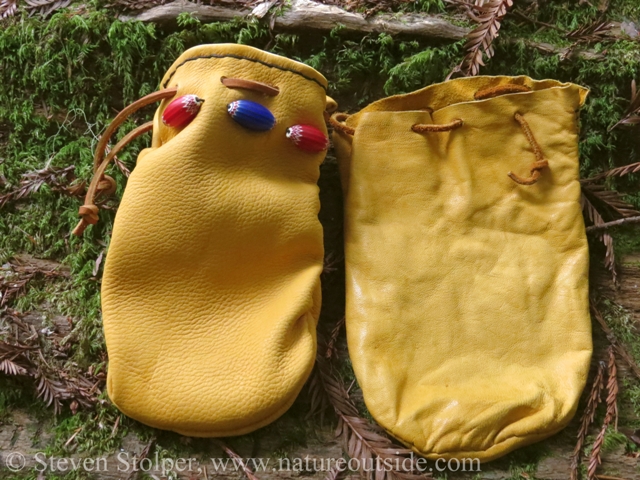
The new pouch (l) and the one I have carried for years (r).
The fancier pouch has beading and the top lip folded over and sewn. It has a leather patch with my maker’s mark sewn to the back (not shown in picture).
No matter which pouch you make, follow the same 5 basic steps:
- Cut the shapes
- Sew the shapes together
- Punch the holes
- Flip Right-side Out
- Add the Lace
Materials
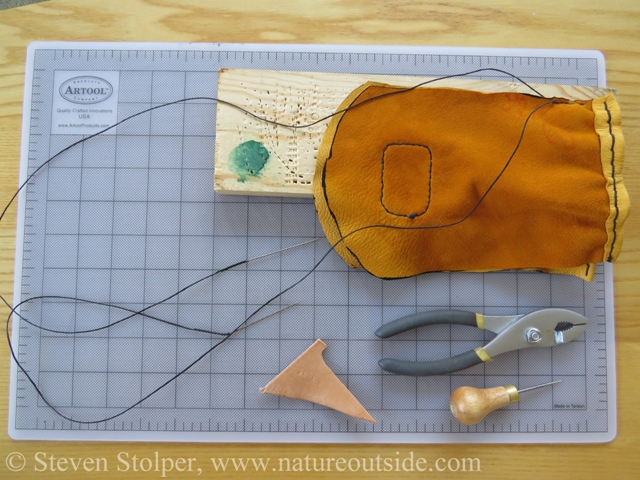
Here are the materials you need. I will show pictures of all the equipment as we go through the steps.
- Deerskin
- Straight edge
- Salad bowl
- Sharpie marker
- Scissors
- Awl
- Size 0 harness needles
- Waxed nylon thread (black)
- Pro latigo lace (5/32″ tan)
- Mallet
- Hole punch
- Small length of 1”x4” wood (as backing when using awl)
- Wax (optional)
- Beads (optional)
- Leather for patch (optional)
Many of these materials are available at local craft stores. Another place to find them is at Tandy Leather, a chain of leather supply stores in the United States.
Step 1: Cut out the Shapes
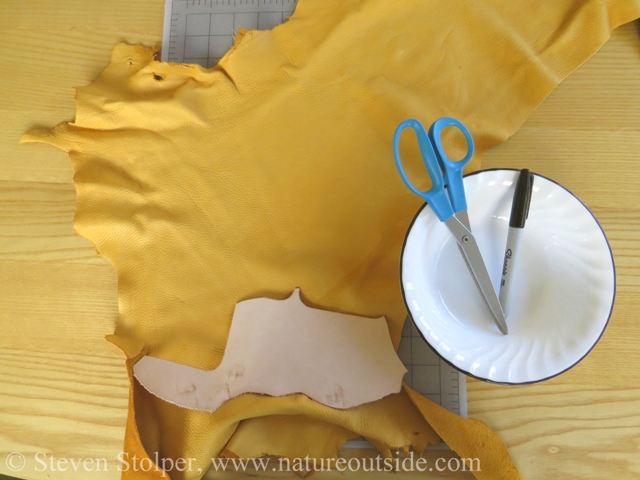
Some of the materials.
The dimensions of the finished bag are approximately 5 inches wide by 7 inches tall.
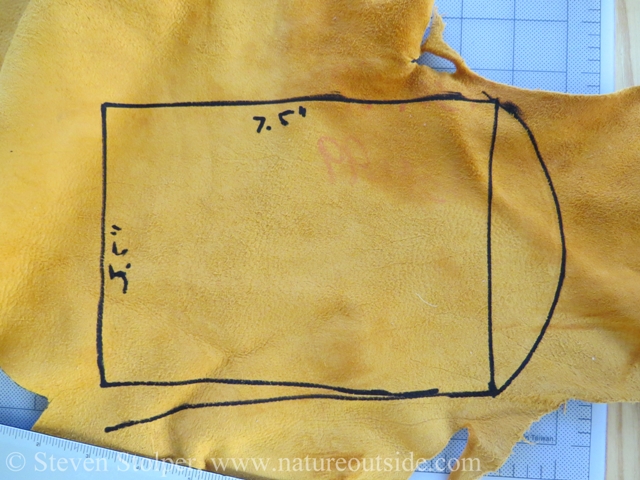
Examine the “skin side” of the leather. Find an area that you want to use for the outside of your pouch. Turn the leather over to the “flesh side.” Use a straight-edge to trace a 5.5” x 7.5” rectangle with a sharpie marker. The extra half inch in each dimension allows us to sew the pouch later.
When you make the rectangle, be careful not to stretch the material. In the picture below, you can see I stretched the material accidentally when drawing one of my lines. I had to redo it.
Another approach is to make a template from cardboard or foam-board. If you lay the template flat and trace around it, you avoid stretching the material. Plus you can use template to make future pouches. I think it is easier to make the template than to draw free-hand on the leather. But I was a little bit lazy.
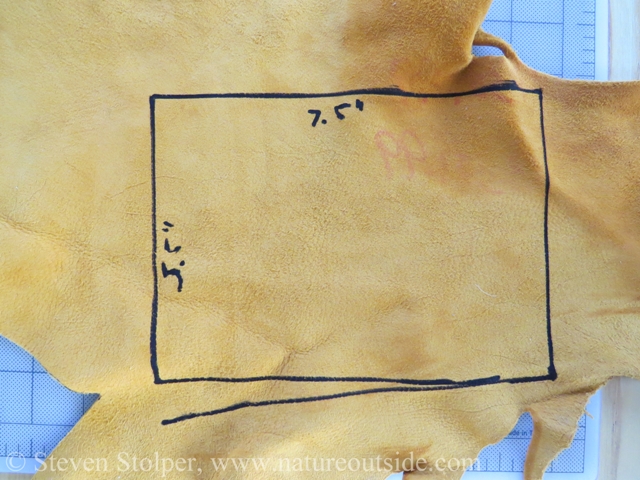
Using a straight edge to draw a 5.5”x7.5” rectangle. Notice that I stretched the leather accidentally and had to redo one of the lines. Using a template avoids this mistake.
I use a salad bowl to make the bottom of the bag. Place the bowl, upside-down, so the lip of the bow intersects both corners of a short side of the rectangle. Trace the arc with the marker, connecting the two corners. Again, you would follow this same step when making a template.
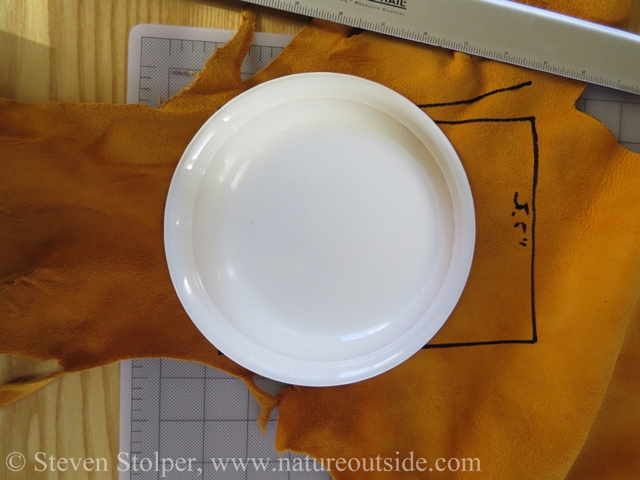
Notice the two corners of my rectangle poking out from under the salad bowl (left).
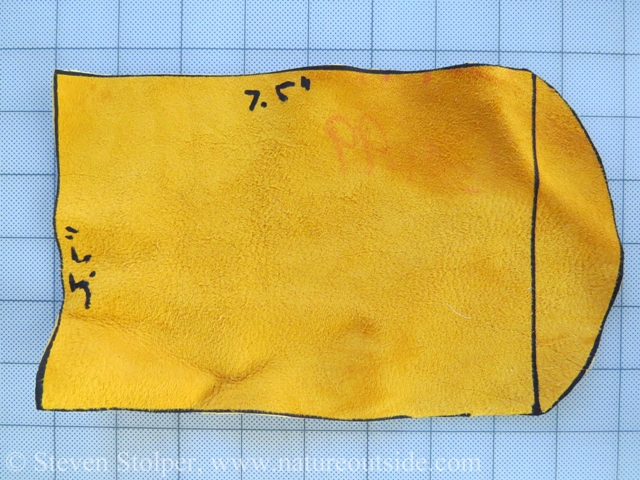
Remember, do all your drawing on the flesh side of the leather. Here is the finished shape:
The completed shape on the flesh side of the deerskin. Metal straight-edge shown bottom left.
The beauty of deerskin is you can use regular scissors to cut it. Cut out the shape with sharp scissors.
The cut-out shape.
To make the second shape, place the cutout flesh-side-up onto the flesh side of the deerskin. Trace around your first shape (or your template) and cut out the second half of the bag. This is what it looks like when done.
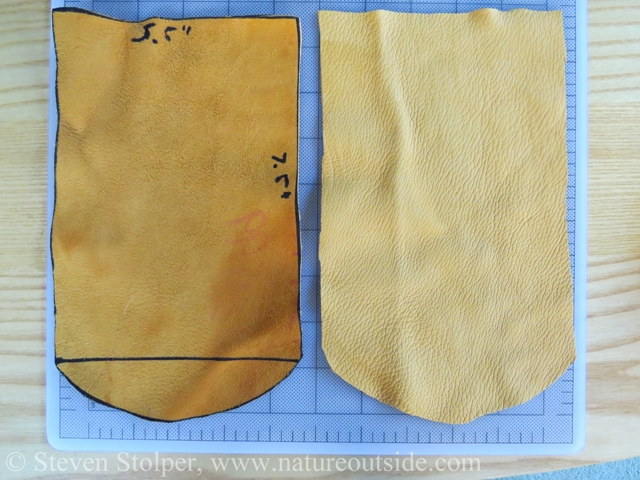
Both shapes cut out.
Optional Step: Decorate with Beads
We must decorate the outside of the pouch before we sew the two halves together. It is difficult to decorate it after the halves are joined.
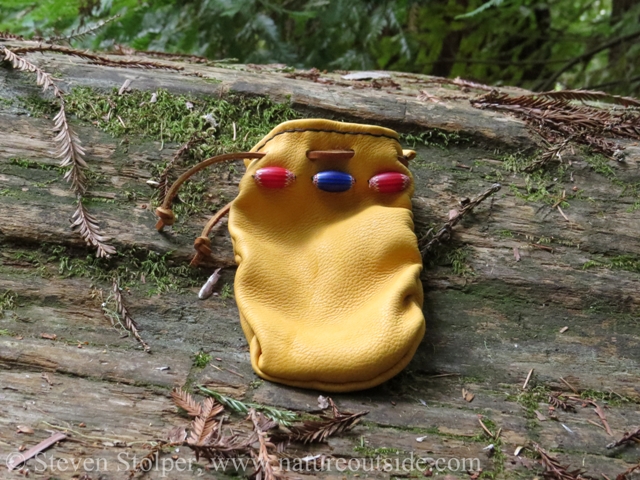
I decided to decorate my pouch with glossy 23mm rice chevron beads. But you should pick beads that express your individual aesthetic. I sewed three of the large beads individually to the side of the pouch. I did this using black nylon waxed thread.
I placed the beads near the top of the bag. But I will do it differently in the future. Since the beads are near the top of the pouch, they are pulled inward when I cinch the top. This may reduce durability. For the next bag, I will place them lower. They will stretch outward when the pouch is full.
I used my straight edge and marker to make 4 pairs of black dots distributed evenly across the bag. But I left ample room from the edges. The margin from the edge looks good and provides space to join the two halves of the bag together. Each of the dots in a pair are separated from each other by the length of a bead.
I use an awl to poke holes through the dots. Then I sew the beads to the pouch.
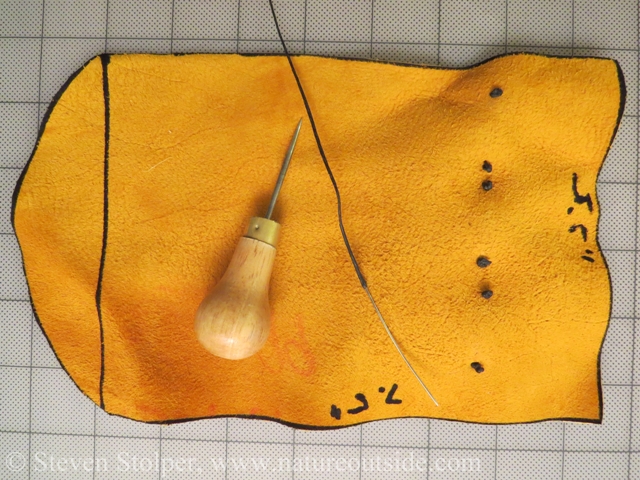
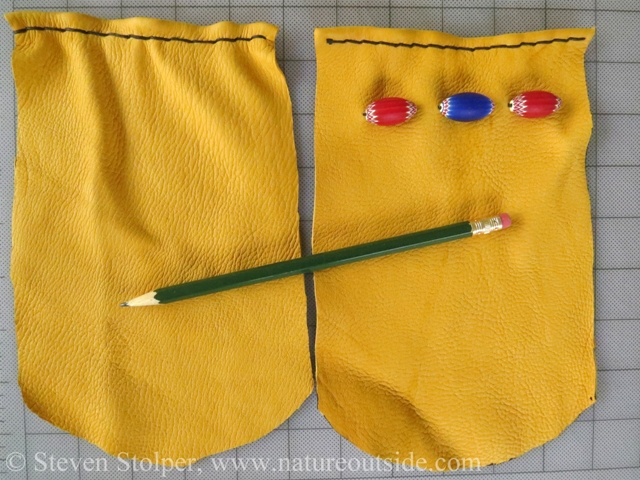
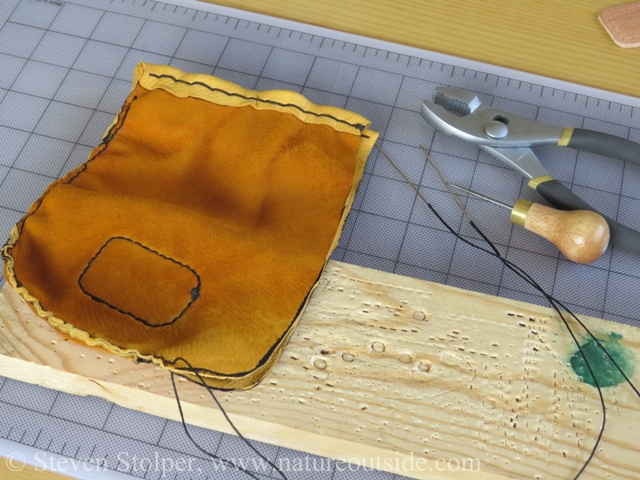
The back of the bag after the beads attached. The beads are longer than the space between pairs of dots. Pictured is the awl, harness needle, and waxed nylon thread.
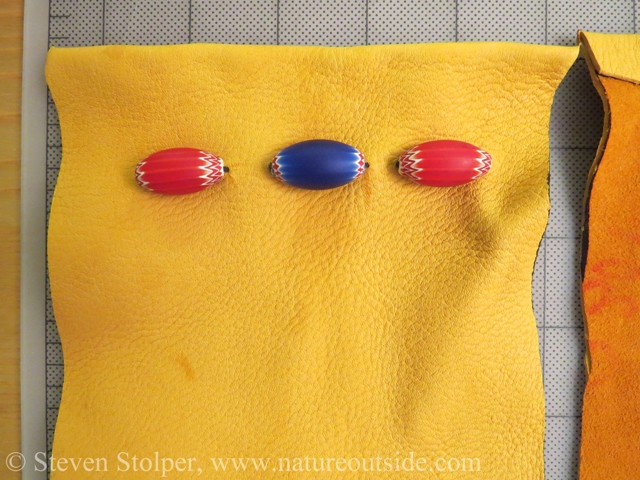
The beads attached to the pouch.
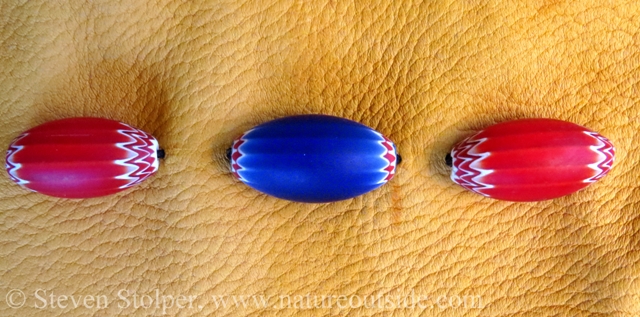
A close-up of the beads.
Optional Step: Sew the Top Edge
You can make the top edge of the bag a little fancier by folding it over and sewing it. I did this in two phases.
It is easier to sew the edge if it is already fixed in place while you stitch. So put a thin line of leather weld just below and parallel to the top edge of the pouch. Fold the top edge toward the flesh side and hold it in place until the glue begins to dry. Put the half aside and repeat the step with the other half of the pouch.
It is important when you glue the edge that you fold the edge down evenly. When the pouch is complete, you will be able to see the folded material inside the edge. When I folded the edge, I did not take enough care to fold it down evenly. I could have trimmed the folded material later, but elected to leave it. It did not matter enough to trim it.
The top edge is glued but not sewn.
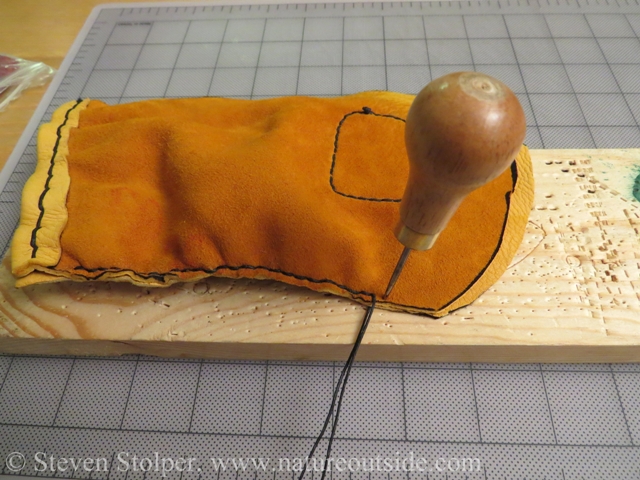
Once the glue dries, lay the top of the half, skin side up, onto the 1”x4” wood. Use an awl to make your first hole at one end of the folded edge. Thread two needles, one at each end of a length of thread. The thread must be at least twice as long as the top edge of the pouch. Run one of the needles through the hole until there is an equal length of thread on each side. Make the next hole and saddle stitch the thread through it. Repeat making holes and saddle stitching until you reach the far end of the folded edge. I leave about ¼” between holes.
If you encounter difficulty getting your needle through a hole, there are several tricks you can use to make it easier. You can push on the top of the needle using a piece of scrap vegetable tanned leather. This lets you apply force to the back of the needle without hurting your thumb. Remember to rotate the thread to the side of the needle before pushing on the edge.
Once the needle is through the hole, you can use a pair of flat pliers to grasp the needle an pull it through. It is important to hold the deerskin flat when you do this.
The top edge is sewn, viewed from the flesh side.
The top edge is sewn, viewed from the skin side.
When you reach the opposite end of the folded edge, tie a double knot in the thread on the inside of the pouch. Trim the excess thread and rub the knot with some wax to help the knot hold.
Optional Step: Decorate with Patch
I wanted to put my name on my pouch. So I made a patch out of thin vegetable tanned leather. I fashioned a template from foam board and used it to trim the leather. An edge polisher <link> smoothed the edges. I cut a recessed groove for the thread with a groover before punching holes with an awl for sewing. When this was done, I stamped my “makers mark” into the leather and dyed it black. I finished the leather with acrylic resolene to protect it from moisture.
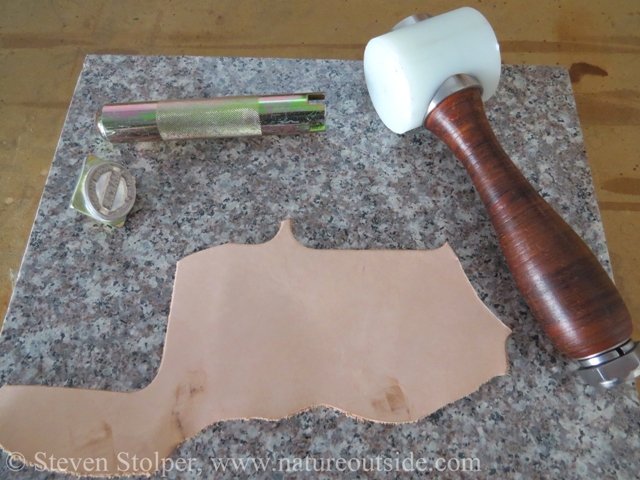
Making my mark.
Once the dye has dried, I stitched the patch onto the side of the pouch without the beads. I placed the patch near the bottom.
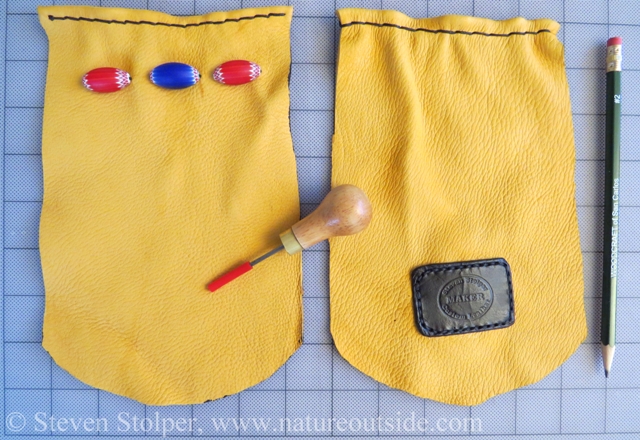
You can see the patch on the back side of the pouch.
Step 2: Sew the Pieces
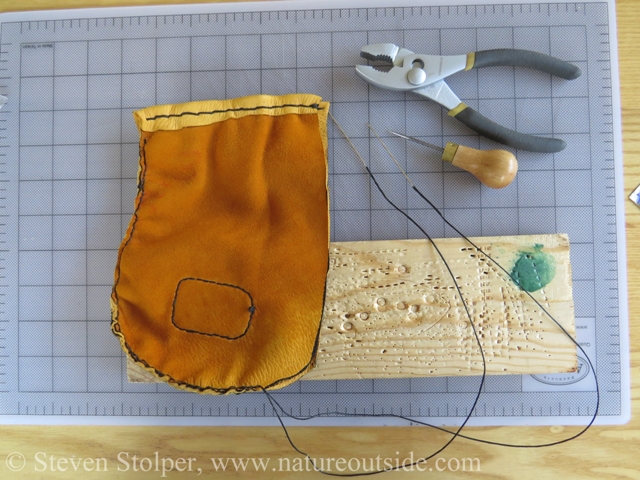
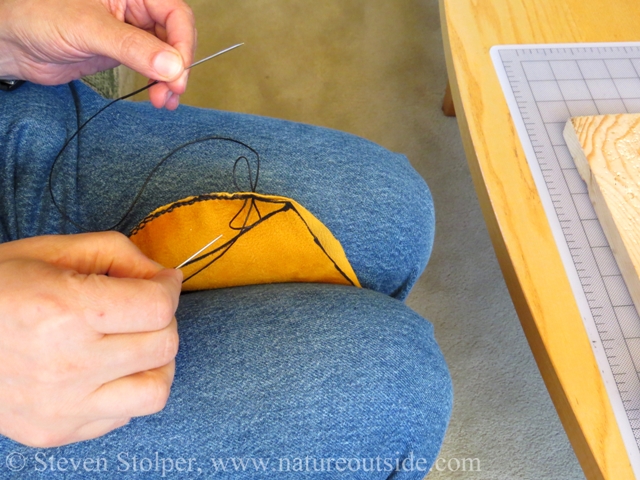
Now the fun begins! Mate the two halves of the pouch so that the flesh sides are out. The skin side of each bag should be in contact with each other. Any beads or patches are on the inside. This is very important! We sew the halves together inside-out. When the pouch is turned right-side out, we will not be able to see the stitching.
Sewing the halves together.
Start sewing just below the folded top edge, in one corner of the pouch. Place the pouch on the 1”x4” wood with the side you are sewing closest to you. Always place the same half of the pouch on top so your stitches are uniform.
Make your first hole using the awl. Drive the awl through both halves of the pouch and into the soft wood. The hole should be ¼” from the edge of the pouch where the halves meet. When I sew other materials, I punch several holes before stitching, since it is more efficient. But deerskin stretches. So I only punch one hole at a time, after sewing the previous hole, so that the holes through the halves align.
Thread two needles, one at each end of a length of thread. The thread should be three times as long as the circumference of the pouch. Run one of the needles through the hole until there is an equal length of thread on each side. Make the next hole and saddle stitch the thread through it. Repeat making holes and saddle stitching around the circumference of the pouch. Stop when you reach the far end, below the folded edge.
Your holes/stitches should be about 3/8” apart. Try to be uniform. But if you make a mistake don’t worry. Nobody will see the stitches – they will be on the inside of the pouch!
Making the next hole with the awl.
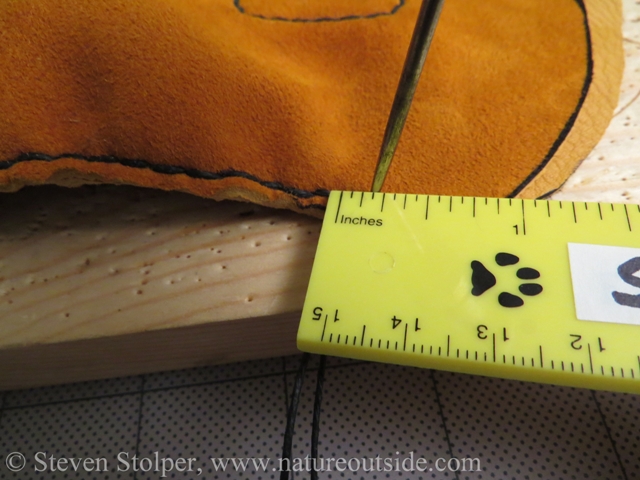
I made my holes 3/16” apart. Fewer holes mean less work stitching. But more stitches are usually stronger.
Guide the needles through each hole. If you find it tough to get a needle through, rotate the thread from the top of the needle and push it through with a piece of vegetable tanned leather to cushion your thumb. You can pull it through using a pair of flat pliers. Keep the deerskin from stretching while you pull.
Stitching progresses around the circumference of the pouch.
A closer look at the stitching.
Pull each stitch “medium tight.” If you pull too tight you will blouse the material. Over years of use, I notice that the stitches loosen a bit. So with this pouch, I pulled the stitches more tightly than normal, to see what affect it has on appearance and durability. I suspect that the deerskin will stretch with use to compensate for the blousing I caused. We will see…
Stitching the pouch.
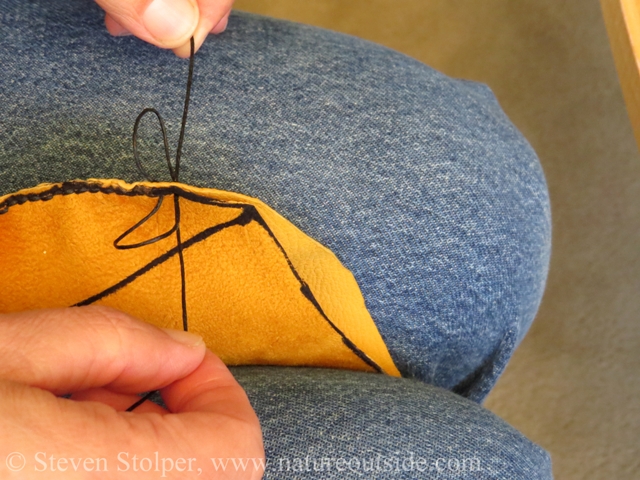
Make each stitch one at a time. Pull the threads simultaneously to tighten.
When you mate the halves to sew, you may notice that they are not exactly the same size. You have two options. You can sew along the edge of the smaller half. This will reduce the size of the pouch but will result in a very uniform seam. You trim the excess material after you finish sewing.
The other option is to manipulate the halves as you sew so that you sew through each half near its edge. This preserves the size of the pouch, but the seam will “wander” toward the smaller half of the pouch. For this pouch, I elected to do this to see if the pouch would stretch with use to create a more uniform seam. I also wanted to see what effect it had on the appearance of the pouch.
When you complete your sewing, knot the thread, trim the remaining thread, and rub the knot on the wax to help it hold.
Step 3: Punch the Holes
If you have folded-over the edge, you need to punch the holes for the lacing before you flip the bag right-side out. This is so that you punch them below the edge of the folded-over lip.
To make the lacing work, you must punch an even number of holes. Visualize the lacing going in-out, in-out, etc. You want the thread to be out along the back side of the bag where it crosses the seam. You also want the lace to emerge near the other seam of the pouch where you can tie it. An even number of holes makes this possible. I used 4 holes on this pouch.
Place the pouch flat on the wood. Make sure the wood is on a solid surface that can absorb your mallet blows. Use a ruler and pen to mark the locations of the holes on one side of the pouch. Punch the holes through both sides of the pouch so they are uniform on each side.
Step 4: Flip Right-side Out
Now for the unveiling! Reach into the pouch and flip it right-side out. Be careful not to dislodge the beads.
We’re almost there!
Step 5: Lace
Weave the lace through the holes. Decide how much extra lace you want available to tie the pouch closed. I like to tie an overhand knot at each end of the lace.
Your bag should look like this:
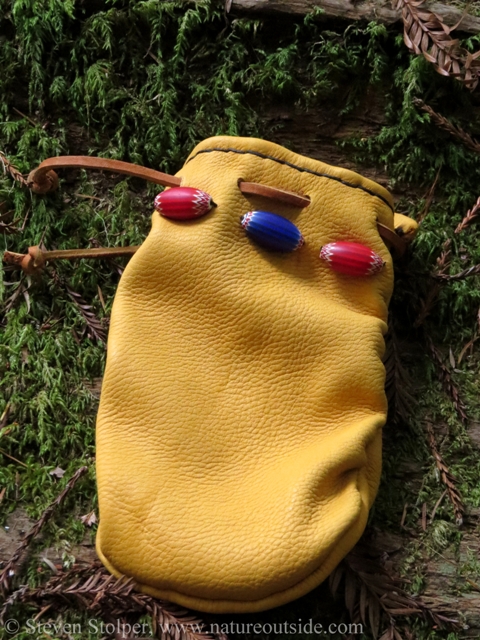
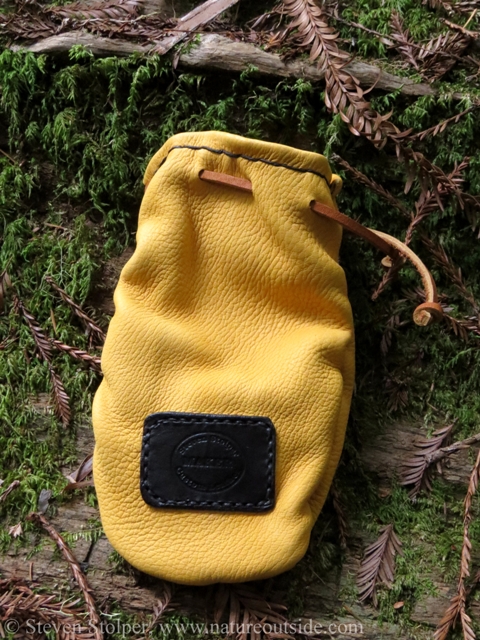
The finished pouch (front).
The finished pouch (rear).
Enjoy!
Your leather pouch is durable and will last for many years.
However you pouch turns out, take pride in it. Don’t worry if it is not perfect – Remember, it’s handmade!
The pouch in its natural habitat.
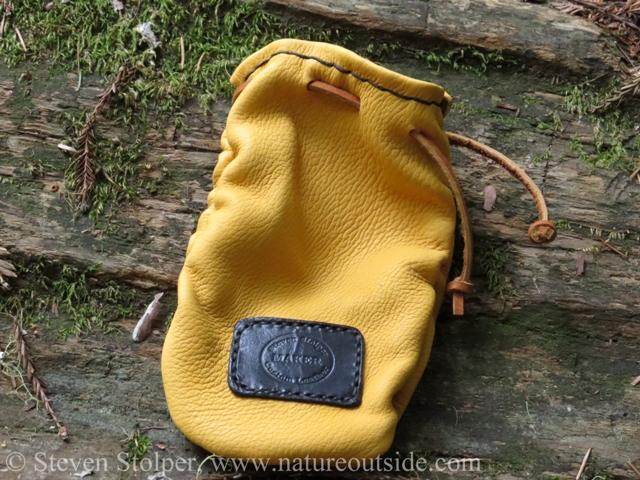
The back of the pouch.
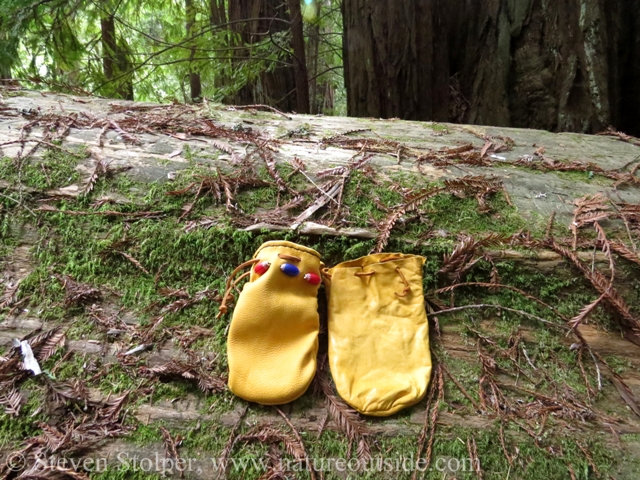
Both the simple and fancy pouches enjoy the fresh air.
Enter to Win This Pouch!
I have decided to give away the “fancy” pouch I made for this post. Anyone who receives my free Email Newsletter is eligible to win. If you would like the chance to win this deerskin pouch, enter the contest by subscribing to the newsletter.
This giveaway has ended. But you can become eligible for the next giveaway by signing up for the free NatureOutside Email Newsletter at the upper right of this page.
Other Gear Tutorials
Don’t be a Fool, Carry this Tool – A Store Discount Card and Duct Tape!
For fun facts and useful tips, join the free Bushcraft Newsletter.


you helped me with number of holes to punch… even is the answer and thank you
Sheryl, I’m glad the article helped you out. I assume you’re referring to the number of holes to punch for lacing the top. Good luck with your pouch!