
Do you want to be a hit with your children? To delight your grandson or granddaughter? To be popular with the neighborhood kids? Bushcraft can help you do it!
It is acorn month at NatureOutside, and we have talked about how to process acorns into delicious food. But bushcraft is not just about obtaining food and water from the wilderness. It is a pursuit that can enrich all aspects of your life, if you let it.
Bushcraft should amuse and delight. It should allow you to express your creativity. So here is a small project where you can use simple bushcraft skills to create fun children’s toys.
Acorn Tops and the Holidays
The acorn harvest coincides with the start of the holiday season. Isn’t it amazing how time flies? So let’s use acorns to make a simple but fun toy. I make these spinning tops around Thanksgiving and it always seems to get me into the “bushcrafty” holiday spirit.
An Ancient Toy
Not long ago, I was privileged to attend a gathering of the descendents of the Ohlone Peoples. The Ohlone were the indigenous inhabitants of much of Northern California. I saw, heard, and learned many amazing things that day.
An Ohlone woman showed me how to make tops (the children’s toys) from tanoak acorns. She was very patient in explaining the technique and answering my questions. I am extremely grateful for the time she spent describing how she made them. The following instructions are how I make the toys, based upon the information I learned from her.
What You will Need
Here are the materials:
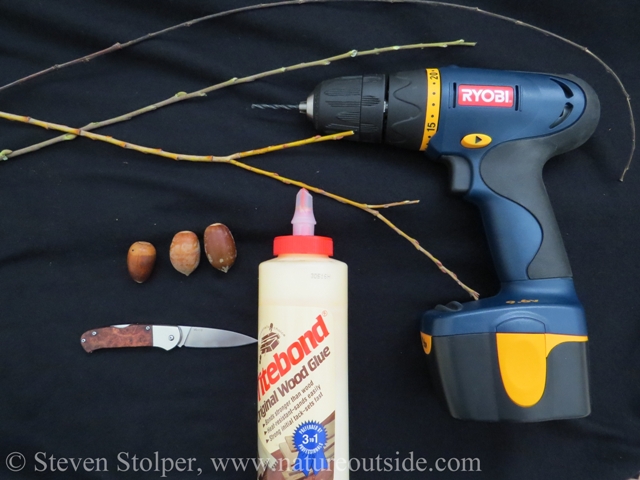
Tools and materials you will need
- Acorns (in this case, two are tanoak and one is live oak)
- willow branches (twigs – dead seem to work better than live)
- A knife
- A drill
- Wood glue (white)
Select the Acorns
The acorns I select are usually not suitable for food. You can see the exit hole of an acorn weevil on the left-most acorn.
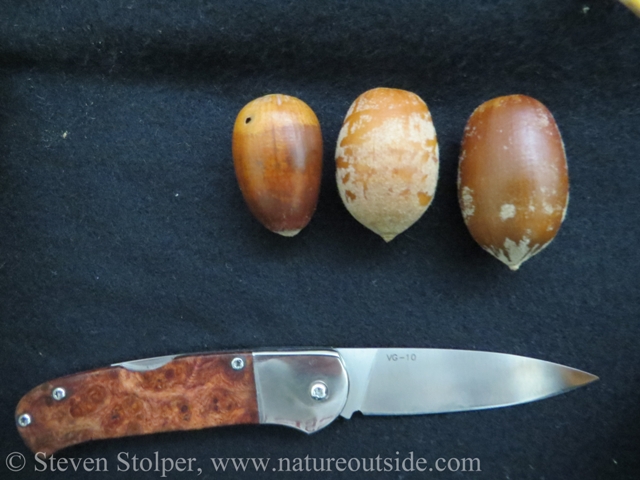
Acorns – notice the exit hole in left-most
But it is important that the acorn is symmetric, and not deformed in any way. I also make sure that there is “meat” inside the acorn and that it is not hollow. This helps to hold the stem on the acorn-top and it will spin better.
Drill a Hole
If the caps are still attached to the acorns, remove them. Use the drill to make a hole in the center of the top of the acorn. Select a very small drill bit to do this. Centering the hole in the top is important. If the hole is off-center, the toy will tend to nutate when you spin it. But if you accidentally drill the hole off-center do not discard the acorn! Even toys with off center holes work well.
For safety and control, do not exert much downward force on the drill. Once it breaks through the shell, it will want to surge downward into the nutmeat. Do not drill more than one half to one inch into the acorn. Be careful and safe when drilling.
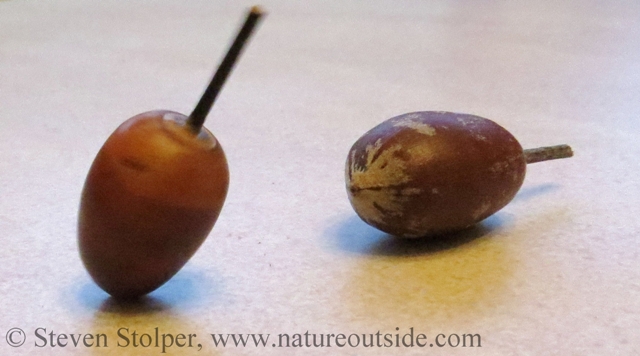
Insert the Stem
Select a willow twig and choose a 1.5-2 inch segment along the twig that matches the diameter of the hole. I always drill the hole first and then size the twig to the hole. It is easier to trim a twig than a hole. 🙂
When you find the segment, use your knife to score around the circumference of the twig at one end of the segment. If the twig is dead, you should be able to snap it easily at the score. Repeat this with the other side of the segment.
I like to leave the bark on the willow twig. It looks rustic and contrasts appealingly with the color of the acorn. If you want to remove the bark you can. But be very careful not to snap the twig in the process.
Insert the twig into the hole in the center of the acorn. Does it fit? If it is too big, you have the option to trim the twig to fit the hole. If it is too small, select another segment of the twig that better matches the size of the hole.
You will often find that friction keeps the twig in place. But I like to ensure the toy will last. Remove the twig and dip the end into the wood glue. Then insert it back into the acorn. Frequently, glue will emerge from the hole and run down the side of the acorn. I mop up the glue. But leave a “cap” of glue surrounding the willow twig where it meets the acorn. The glue cap will help hold the twig in place. The glue becomes transparent when it sets, so the cap is barely noticeable.
Let the glue dry. I like to work outside, so I just lay the acorns along the rim of a flower pot. The plant in the picture is Yerba Buena. I like to keep native plants around the home (but that is another post).
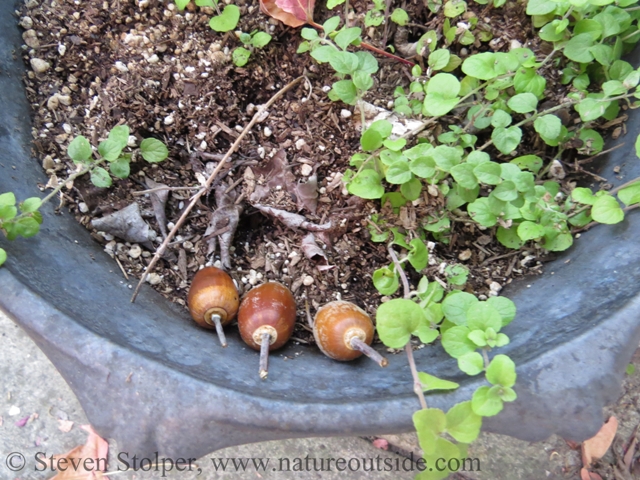
Drying in the sun (Yerba Buena)
I also like to dry them by standing them up in the handgrip of a plastic cutting board.
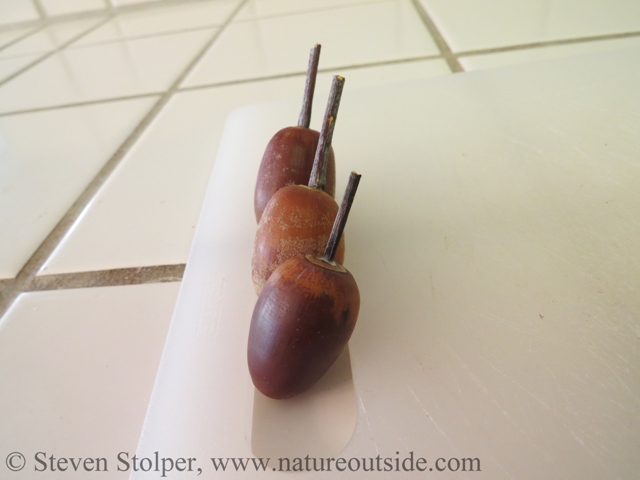
Drying inside on cutting board
Now it is spinning time!!!
If the acorns are not uniformly colored, they will make nice patterns while they spin. This may be hard to pick up from the pictures.
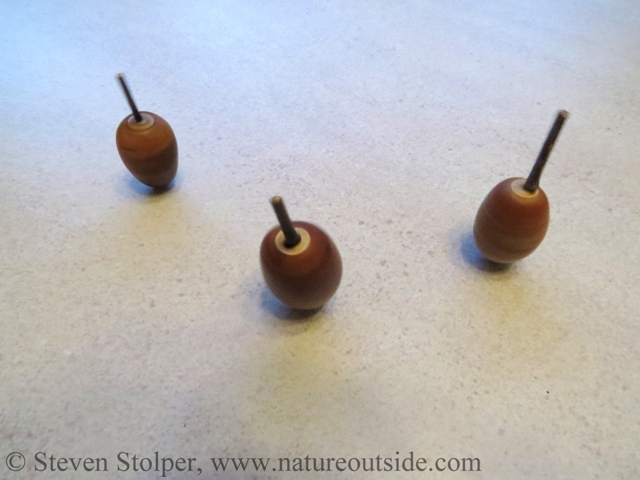
Spinning acorn tops

Acorn tops spin for a surprisingly long time
And now for my standard reminder… wait for it… 🙂
I hope you find this post useful. Making these toys is fun and easy. And they are fun to play with because they really spin!!! 🙂
Try it yourself and write a comment below to let me know how it goes!
Here are other Acorn Articles on NatureOutside
How to Make Acorns into Food (Part 1)
How to Make Acorns into Food (Part 2)
How to Make Acorns into Food (Part 3)
How to Make Orange Acorn Bread
If you liked this article you might also enjoy others in the skills section or the Parent’s Corner.


These are cute and adorable to give as wee gifts thanks
I’m glad i stumbled onto your site cheers
Cynthia — They are a lot of fun to make, too. Enjoy!
I have a lot of red oak acorns I’m hoping they will work and will try this today thank you!
Have fun, Sandy!
I appreciate your concise directions – to the point, a reason for an action thrown in, and you include little details that are important! I get impatient with posts that blather on and on. Just want the meat of it! So, thank you! This is lovely,
I’m glad you liked the article, Jean. I’ll also keep this in mind when I write future posts.