
QUAIL!!!
I stomped the brake pedal as quail streamed across the road. My sedan lurched and checked its steep descent down the coastal mountain. The car idled, motionless, as the California Quail (Callipepla californica) continued their crossing.
I should be able to see Tomales Bay, my goal far below. But the early morning fog was like a plush theater curtain, revealing 20 feet of stage and no more.
My headlights were useless. They couldn’t penetrate the fog. But I kept them on to alert oncoming vehicles of my presence on the treacherous hairpins. The road was barely wide enough for two cars to pass. On one side stood a rock face and on the other a heart-stopping plunge into the mist below.
California Quail are handsome creatures. A large male stopped on the pavement as the rest of his flock sprinted across. His large topknot dangled over his masked countenance. He presided over his flock like a school crossing guard, gorgeous in slate blue, tan, and chestnut.
The male eyed my vehicle warily. But the staring contest didn’t last long. With a burst of speed he joined his family in the bushes lining the road.
I continued through the 8:00 AM mist toward Heart’s Desire.
Heart’s Desire
What a fantastic name for a beach! Its pebbly golden sand decorates Tomales Bay, which separates the Point Reyes Peninsula from mainland California. The cove is on the eastern shore of the north-running peninsula. So it is sheltered from the Pacific’s winds by a high mountain ridge.

Annotated National Parks Service map
The infamous San Andreas Fault lies directly beneath the 12-mile bay. The great rift in the Earth’s crust separates the peninsula from the rest of the continent. Geologists determined that the rocks overlooking the beach originated in the Tehachapi Mountains, more than 300 miles southeast of its present location! During the 1906 San Francisco Earthquake, the land west of the fault moved more than 20 feet northward!
The peninsula is 40 miles north of the Golden Gate Bridge. But it has been kept wild by its human residents who had the foresight to protect much of the area from development. One of our most wonderful (and anonymous) National Seashores occupies a huge swath of this land.
The Coast Miwok lived here for more than 8,000 years. They fished the bay’s tranquil waters and hunted game in the lush forest. Sir Fancis Drake laid claim to the entire area for England in 1579 (as he sailed by). And 25 years later Spanish explorer Don Sebastian Vizcaino gave the area its current name.
Despite the early hour I was comfortably warm in my shorts and fleece pullover. As I stepped onto the beach I was awed by the beauty of this place. Through the fog I could make out another flock of quail picking its way over the sand. The birds ignored the small group of humans gathered at two picnic tables to one side of the beach.
I headed immediately for the people. I was eager for the day to begin.
My Heart’s Desire
For years I have wanted to build a tule boat. To say it’s been a dream of mine is no exaggeration. The idea of building a boat from grass just blows my mind! How did the Ohlone who lived in my area build such marvelous vessels? What kind of knowledge do you need to build a boat from plants?
I say “grass” but Tule (Schoenoplectus acutus) is actually a bulrush and a member of the sedge family. It is found throughout wetlands in North America except for the southeast. If you can find unspoiled marshes, wetlands, or shallow lakes, you will find this plant. It is water dwelling and grows as high as 10 feet tall! Like its companion, Cattail, it often emerges from shallow water. I have seen areas so densely packed with tule that I am reminded of dense tropical jungle. But like all wetland plants, it is now more difficult to find because we have destroyed so much of its habitat.
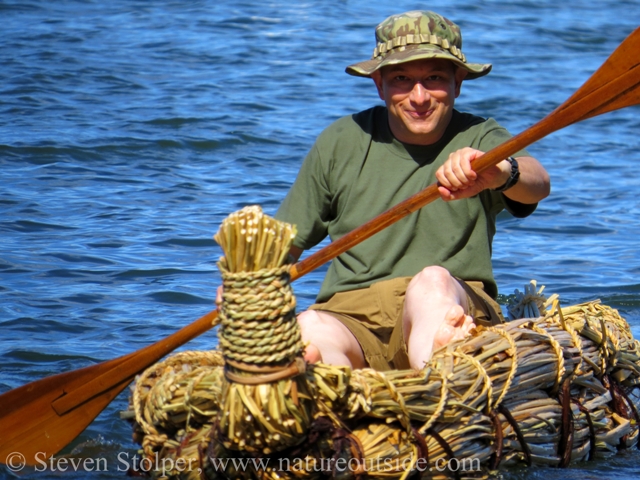
Technically the boats we were building are rafts. They are not watertight. Tule stems contain air pockets much like closed cell foam. We exploit the plant’s natural buoyancy by bundling them into the structure of our vessels to make them float. So our boats will ride atop the water.
Getting Started
Whenever I want to learn something I look for a class to take. I learn best when an expert shows me how and then lets me try the skill myself. So I leapt at the chance to take a tule boat building class with Charles Kennard.
Charlie teaches central California-Indian-technique twined and coiled baskets as well as several European techniques including weaving bee-hives. He has been giving presentations and workshops on traditional basketry for more than a decade. His full-size tule boats are in the collections of the Oakland Museum, the California Academy of Sciences, and other institutions. Charlie is active in habitat restoration and also a professional photographer. It was Charlie who taught me how to make pine needle baskets. He also helped me improve my sorrowful willow basketry skills.
When I arrived, Charlie was laying out the tule we would use for the class. It was an impressive amount of material that would furnish us with two boats.
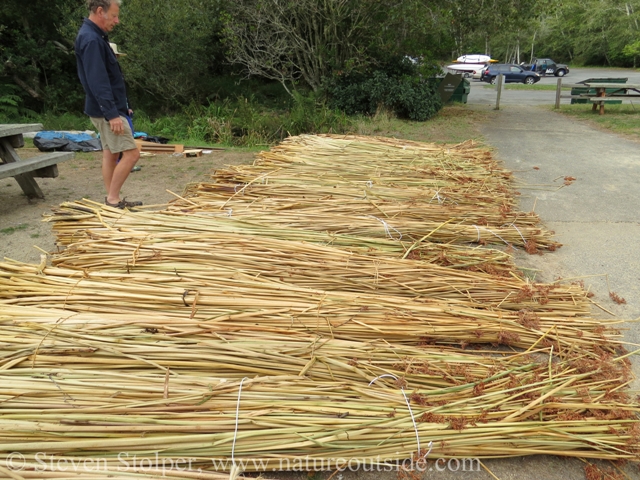
Charlie surveys the Tule. Will it be enough?
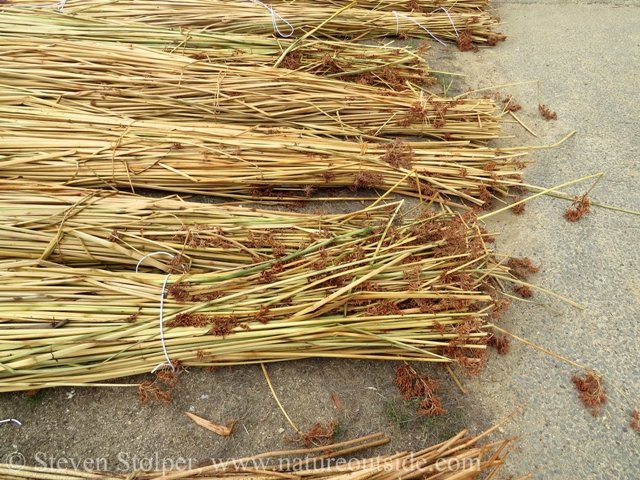
The Tule have already flowered.
A lot of effort went into preparing the tule. So often with traditional skills the work to gather and prepare the materials exceeds the crafting itself. Charlie collected the tule using a Japanese harvesting tool. He then dried the tule in the sun, turning it every day. This is the “fast” approach that dries the tule in three to four days. You can dry your tule in the shade and you will only have to turn it once. But the drying process takes much longer.
Charlie made small models of tule boats from various parts of the world. I had no idea that people outside California made tule boats. But several well traveled students mentioned that they had ridden in boats made of tule when they visited Lake Titicaca in Peru.
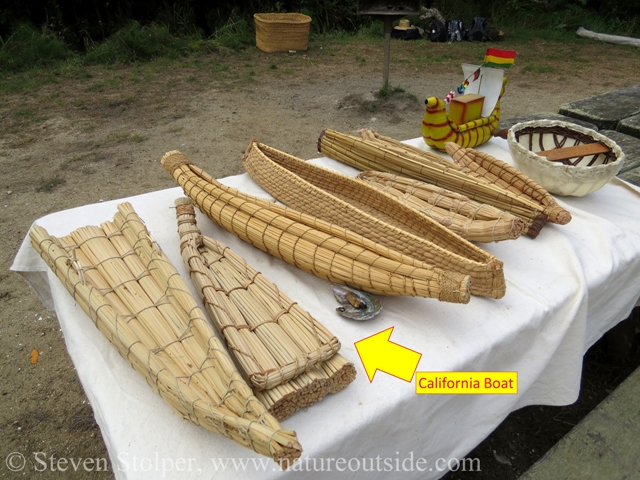
Charlie had models of various tule boats and a coracle. We built the two leftmost boats. I worked primarily on the California design boat.
Giving Thanks
One of the participants, Sky, had built a Tule boat before. Sky is descended from Native Californians and his ancestors lived on a rancheria after the Spanish mission system ended.
Before we started building, Sky led a small opening ceremony. It was an opportunity for us to be mindful of the gifts we had received and to thank Earth for providing the materials we were using.
We lit smudge made from Angelica (California angelica) and placed the glowing plant on an abalone shell at the center of our small circle. You can see it on the table in the picture above. The fragrant smoke seemed to bring clarity in the early morning and helped me to concentrate on the proceedings.
Sky sang two songs in both his native language and English. The English translation brought meaning to the melodies. His strong clear voice carried over the misty beach accompanied by the rythmic clicking of his clapper sticks. He asked Eagle to watch over us and we responded with the affirmation “Ho!” used in the same way as “I agree” or “amen.” I enjoyed his singing. And the short ceremony placed us in a positive and open frame of mind.
Trimming and Bundling
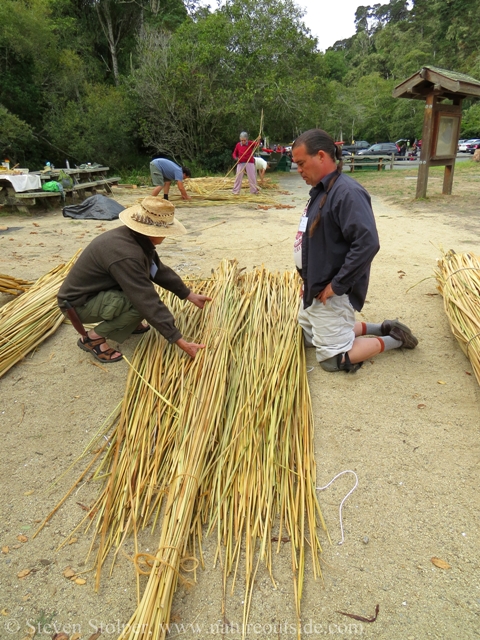
The first step in building our boat is to assemble six equal-size bundles of tule. As we do this we trim off the flowers and remove kinked stems from the bundles. I used my knife for trimming but many people used hand pruners.
If we find Cattails we remove them, too. They are not boyant like tule. Essentially, we are trying to remove any less buoyant material from our tule bundles.
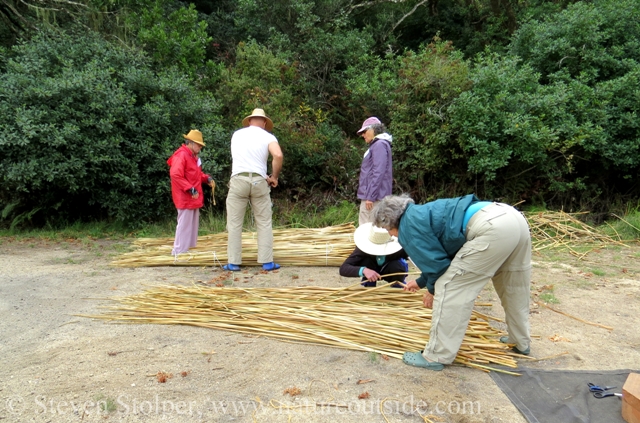
Assembling the bundles. We removed kinked stems, trimmed the flowers, and separated the cattails.
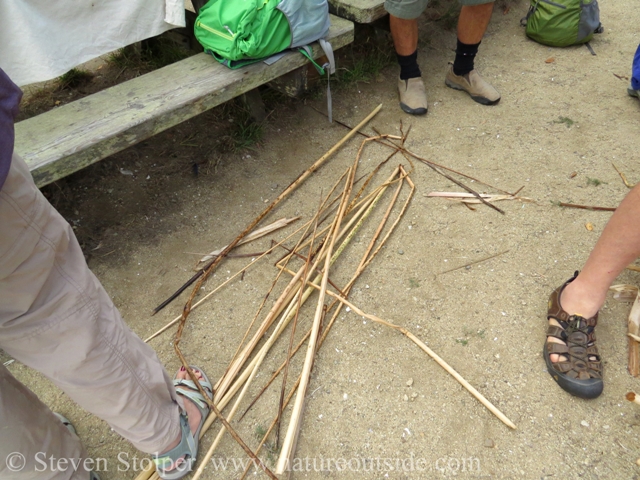
Discarded material.
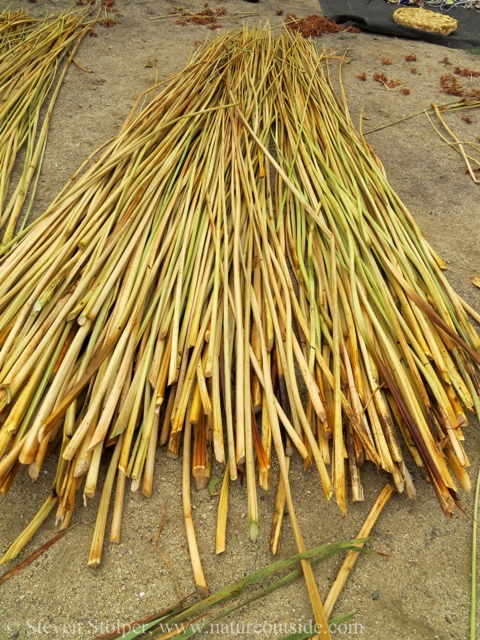
Nicely trimmed tule
Once we assembled a bundle, we stood it on its thick end to align the bottoms of the stems. The plants were roughly the same height and the bundles surprisingly uniform. We bound the bundles temporarily with twine or insulated wire to make them easier to handle.

Standing the tule bundles on end aligns the ends of the stems. We bound them temporarily with twine or white insulated wire.
Six into Three
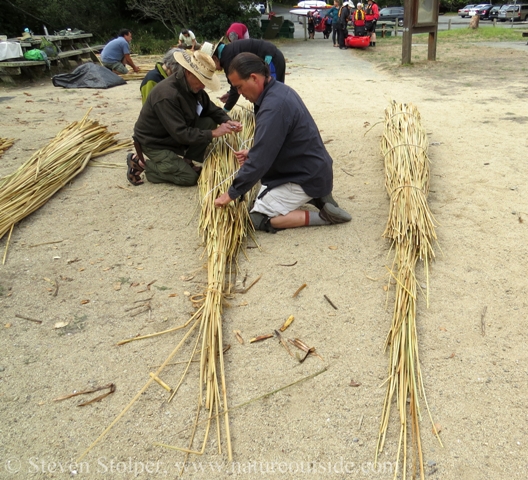
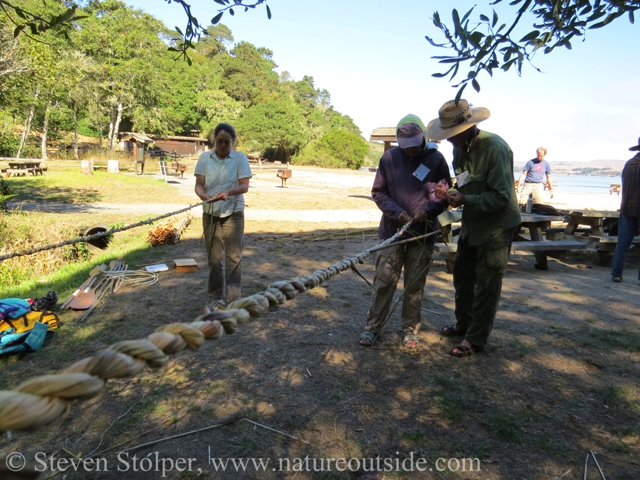
The next step is to combine our six bundles into three. The tule is not as long as the boat we are trying to build, so we must extend them. We thinned three of the bundles and transferred their material to the other three. This created three thick bundles and three thinner ones. We tried to keep the bundles of each size equal.
We placed the thin bundles into the center of the larger bundles. Then we slid the thin bundles forward to form a nice taper. At that point we re-bound the larger bundle around the thinner one. The new bundle is a half again longer than the originals and has a nice taper.
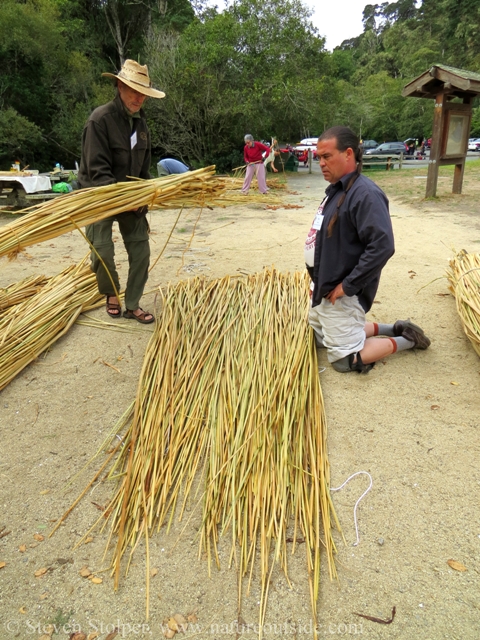
Jim (L) and Sky (R) insert a thin bundle into a thick one. They untied the thick bundle so that the thin one can be placed in its center.
Jim slides the thin bundle to his right to extend the thick one.
The team temporarily binds the new bundle with twine and white insulated wire.
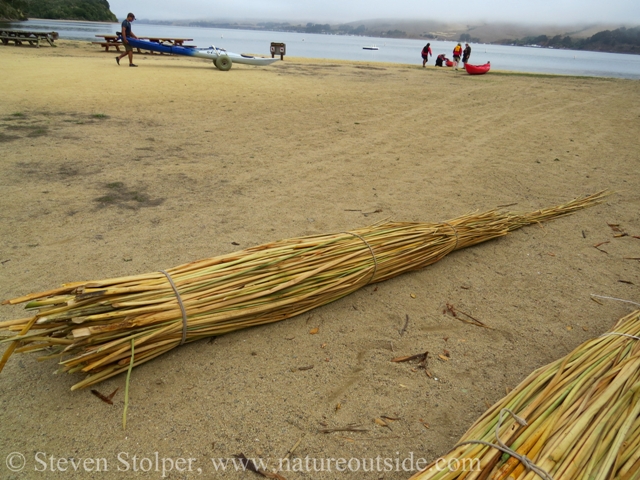
The completed tule bundle. The fog and mist begin to lift.
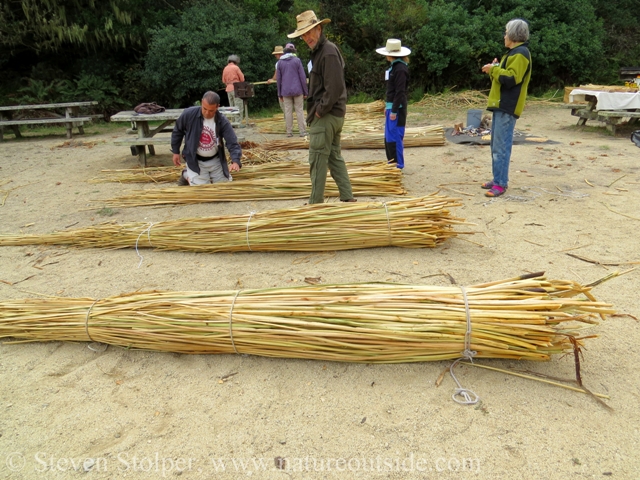
The team works on the third and final bundle.
It is important to use an odd number of bundles to build the boat. If you choose an even number it guarantees the paddler will be uncomfortable. He’ll be sitting in the center of the boat in the crack between two bundles. With an odd number of bundles the paddler sits on the bulge created by the center bundle. This is much easier for the paddler! We chose three bundles for our boat because it gave us the size we wanted.
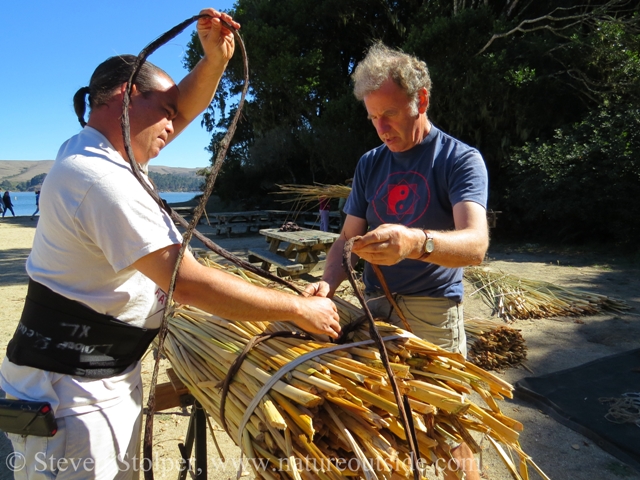
Tying the Knot
Our next task was to permanently bind our three large bundles. We used California wild grape vines (Vitis californica) as our bindings. California wild grape grows in wet areas throughout western North America. Charlie had soaked the vines to make them pliable and then bound them into coils. He left the bark on to provide additional friction for our knots.
We marked 22-inch intervals on our bundle using a sharpie marker. At each point we would tie a vine. This ensured that our bindings were uniform across bundles.
Trussing the bundles is straightforward. But like so much in bushcraft, technique makes the difference between ease and frustration.
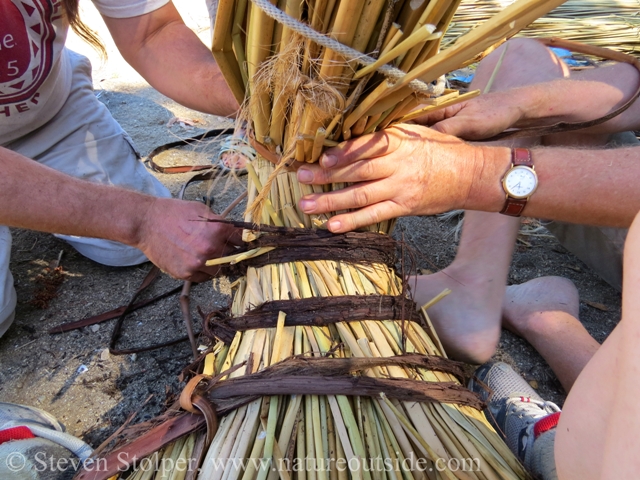
We ran a grapevine underneath the bundle and looped the ends around so they crossed over the top. Two of us sat on opposite sides of the bundle. Charlie thoughtfully provided woven mats to sit on. Grasping the end coming toward me, I braced with one foot on the vine. It’s important to place your foot on the vine and not the tule. The tule stems, full of air pockets, are easily crushed. My partner did the same.
Using our feet for leverage, we pulled simultaneously on our ends to cinch the vine tightly around the bundle. The woody vine is relatively brittle. So it is important to apply force smoothly along the axis of the vine. Bending the vine too much can cause it to snap.
A small downward angle is needed to draw the vine tight. Once snug, my partner held his end while I crossed mine over the vine. The twist was like an overhand knot. At that point, I used a fid made of deer leg bone to deflect the tule underneath the vine. Exploiting the small space, I coaxed the grapevine underneath itself and pulled it tight. I continued to tuck the vine underneath itself and then wrap it around until none was left. Friction now held the vine in place.
I waited while my partner did the same on his side of the bundle. Then we used a hand pruner to trim away excess vine we could not wrap any further.
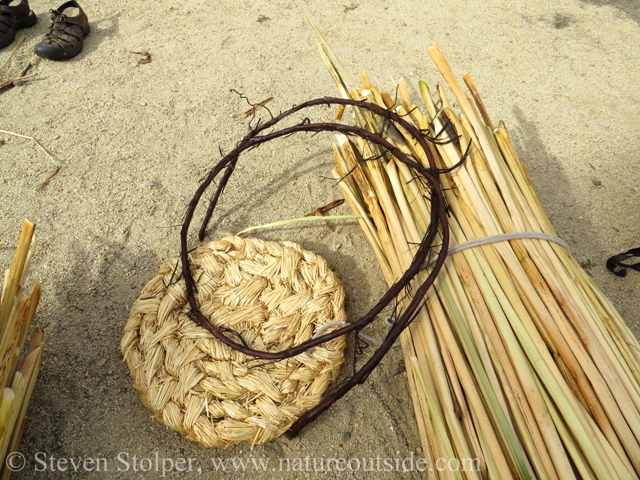
Woven mat and coiled California grapevine.
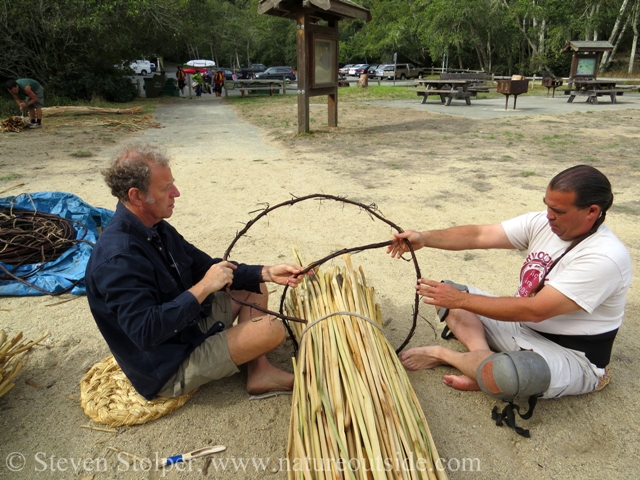
Charlie and Sky exchange ends of the grapevine
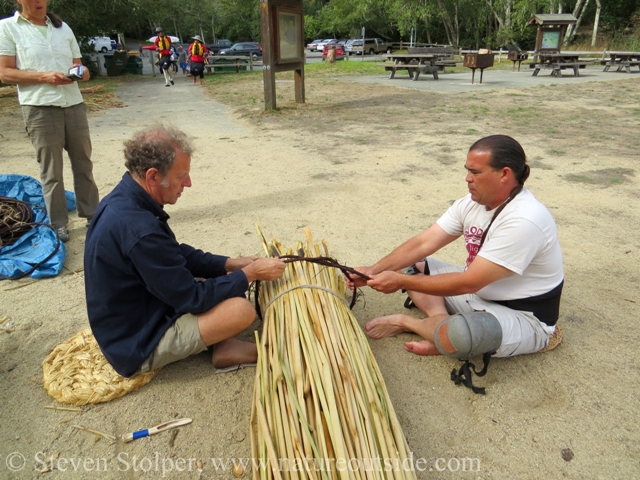
Charlie and Sky twist the vine like an overhand knot. They will brace with one foot on the vine and cinch it tight by pulling on their ends.
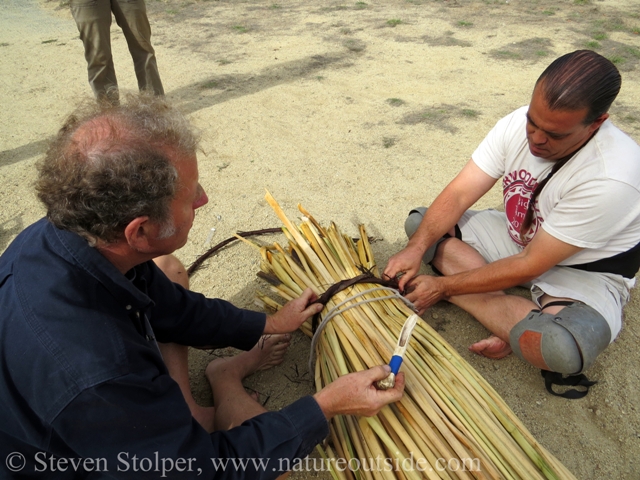
The fid is a useful tool for feeding the vine under itself. It is made from the leg bone of a deer.
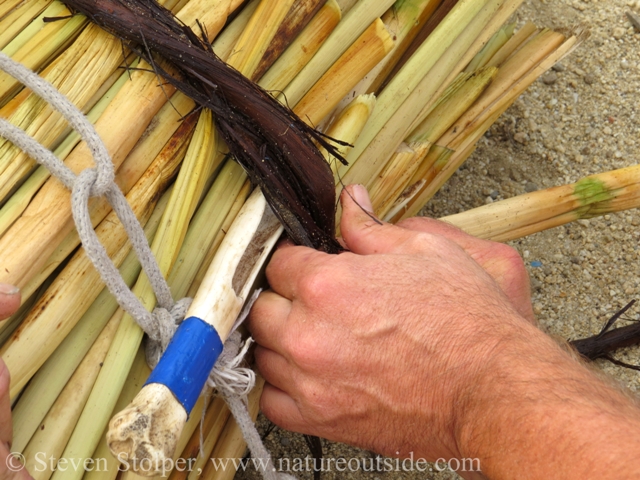
Inserting the fid makes space between the tule and the grapevine. The vine is fed underneath itself into the fid. I like to pin the vine against the fid with my thumb and pull them both at once.
Making Rope
While many of us were trussing bundles. Others were making tule rope. I was amazed how quickly we were able to fabricate about 30 feet of rope. I am familiar with reverse wrapping cordage, but had never seen this type of rigging before.
Rigging for making tule cordage
Making cordage
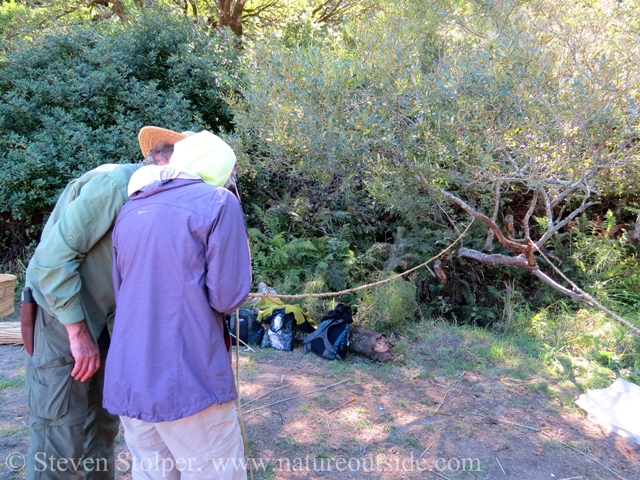
We were able to make long lengths of rope in a very short time
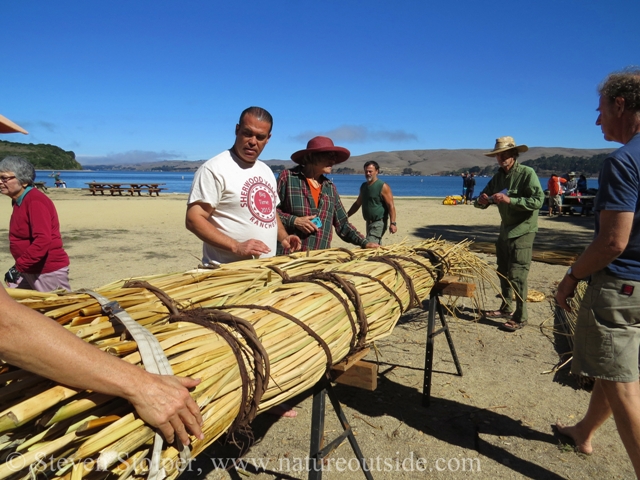
Securing the Bundles
The excitement was palpable as we hefted our bundles onto two saw horses that Charlie brought for the class. We were about to transform our three bundles into one boat.
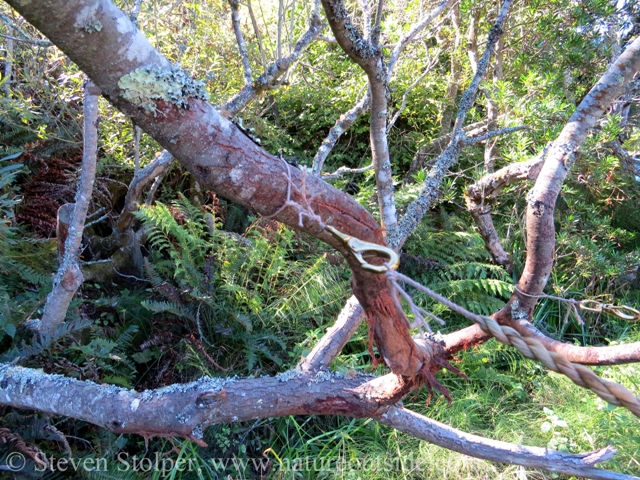
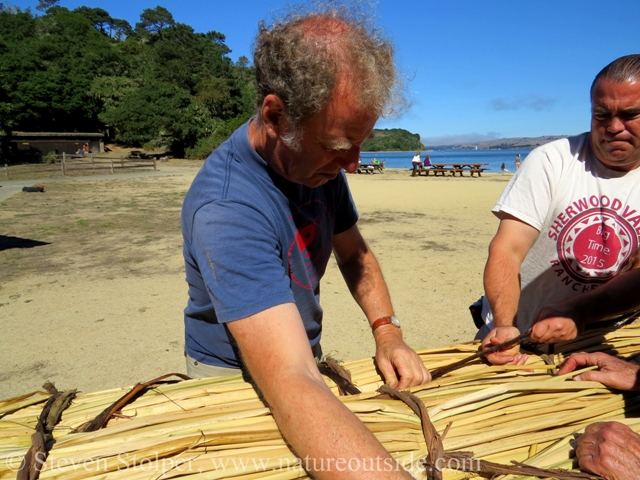
Once again we were going to use California Grapevine. Charlie produced a very long length of vine (20 feet?) that we tied to one of the existing bundles near the stern. The key principle is never pierce or compress a tule bundle! We tied our long vine to one of the grape vines already wrapped around a bundle.
Another important principle is not to cross over any of the existing bindings. When the boat is floating, the long vine will be under tension. If it overlaps any of the existing bindings, it could sever them by rubbing or compression. So we use the fid to weave the long vine through our three bundles so that we never cross any of the existing bindings.
Each time we snaked the vine around a bundle, we passed it through one of its existing bindings. So the vine always pulled on the other vines, never on the tule. We anchored the vine with a hitch. Unfortunately, I was so busy photographing the process that I did not get a chance to try my hand weaving the vine. It was over before I realized it.
When we finished the weaving, we realized we had to change plans. Our “clean” side, the one with the fewest grape vines crossing it, bulged on “top” of the boat and not below the waterline. This was predictable because we laid the boat flat on the saw horses to join the bundles. So if there was a bulge in the center bundle it was going to project upward away from the water. Charlie wanted the bulge below the waterline for added stability. So we simply flipped the boat “upside-down” and made the bottom the top. This gave us the geometry Charlie wanted.
We anchored the long grapevine by tying it to one of the bindings at the stern of the boat.
You weave the grapevine around the bundles so it does not cross any of the existing bindings.
The tule bundles must be cinched tight to keep them from moving relative to each other when on the water. This was the only part of the process that required strength. Notice Sky exerting himself to bind the bundles tightly.
When things don’t work like you expect, flip your thinking… or your boat!
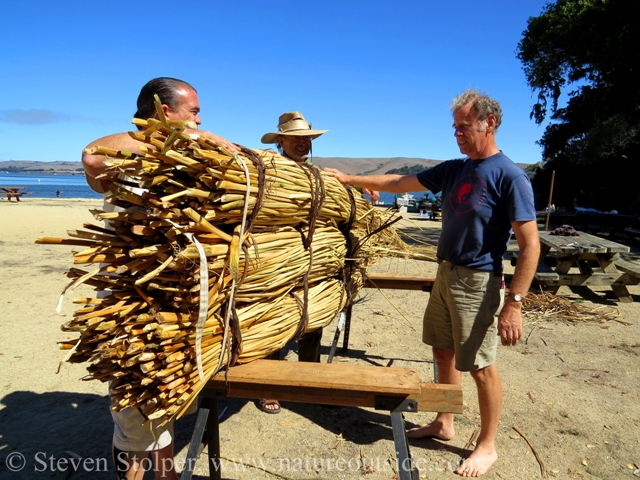
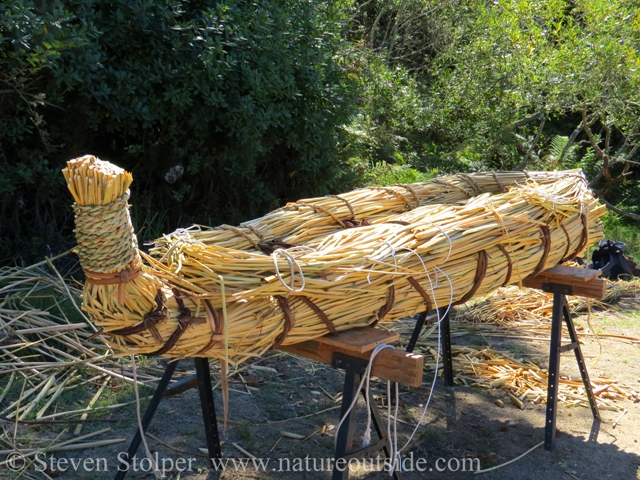
Making the prow
The prow of the boat is very distinctive. Its upturned shape helps it plow through choppy water. It also tapers to a point that gives the boat a pleasing hydrodynamic appearance.
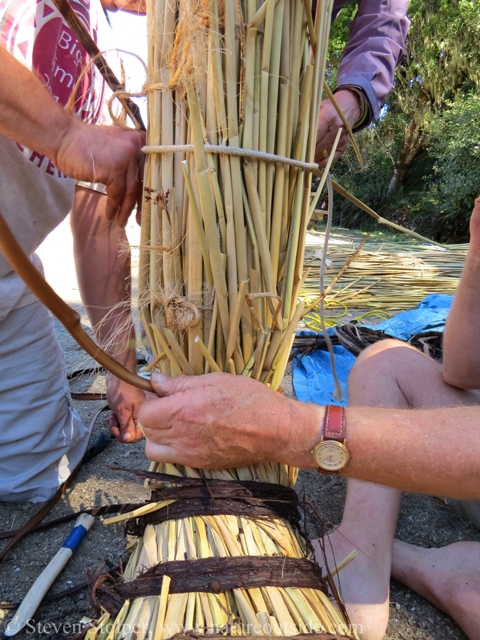
I sat straddling the front of the boat, forward facing, to keep it on the ground as we upturned the bow. We used temporary bindings to gather the tips of our three bundles into a nicely tapered form. Charlie sharpened the end of a grapevine with his knife and plunged the sharpened point of the vine into the bundle between stems. He wrapped the vine around itself to let friction secure it and then, as we gently bent the bow up, he continued wrapping the vine upwards around the prow. We repeated the process until the radius became too small for the brittle grapevine. At that point we continued binding the bow using the tule rope we fabricated earlier in the day.
Once completely wrapped, we cut off excess tule using a large Japanese butcher’s knife.
Tying the prow with grapevine
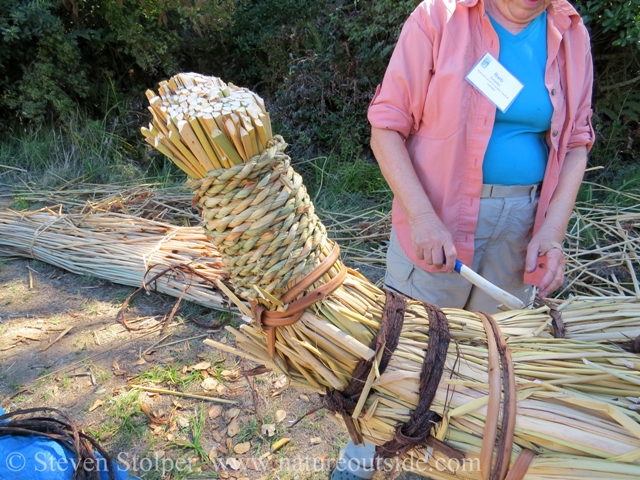
We used tule rope to finish the prow.
Almost Done
We are almost done with our boat! We just need to build the gunwhale, make a comfortable seat, add a critical structural piece, and then go paddling! We’ll do all of those things in my next post…
Building a Tule Boat (Part 2 – The California Boat)
Related Articles on NatureOutside
The Tuibun of Coyote Hills (Part 1)
Use Your Knife – Make a Whimmy Diddle Bushcraft Toy (Video)
For fun facts and useful tips, join the free Bushcraft Newsletter.


The tule takes on such a lovely texture when shaped by hands. The tule rope is particularly interesting.
I definitely agree, Cindy. I like the subtle color variation between tan, gold, and green. I’ve made baskets from tule but I have never seen it used for rope, before this class.
Nice job Steve, it was fun seeing you at the class!
It was fun seeing you as well, Jim! 🙂
I think I saw your boat in the back of a truck in Stinson Beach one day. What a cool thing to do! I love Heart’s Desire Beach and of course the idea of making a tile boat. Greta job!
Thanks, Dino! I believe the boat we made is now in a museum. But it’s possible you saw another just like it.