
Can an inexpensive “military style” daypack deliver value in the field? This is the question I set out to answer when Exos-Gear, a manufacturer of outdoor and urban backpacks asked me to review their Exos-Gear Bravo backpack.
The Exos-Gear Bravo is a “tactical style” daypack. This class of daypacks is characterized by rugged nylon materials, many compartments for organizing equipment, PALS webbing to attach modular pouches, and muted earth-tone colors. These packs are not just for military operators and law enforcement. They make terrific daypacks for animal trackers, birders, and wildlife enthusiasts. They also do well for people needing a tough daypack to haul equipment for trail maintenance or wildlife research.
What is quality?
Quality is how well a product or service does what it is designed to do.
When you purchase inexpensive equipment, you need to think about quality. But what is quality?
Quality is how well a product or service does what it is designed to do.
For example, the Honda Civic is a higher quality car than the Cadillac Escalade. How can this be? The Civic is an inexpensive economy car and the Escalade is an expensive luxury SUV.
The Civic does the job it was designed to do better than the Escalade fulfills its role. Though the luxury car costs $50,000 more than the economy vehicle, it’s of lower quality.
What about a McDonald’s hamburger? I would argue that it is an extremely high quality product. You can visit any McDonald’s in the United States and get the same hamburger – built to the same specifications. And when it comes to satisfying hunger inexpensively, the burger does its job well. Is it filet minion? No. But that’s not what the hamburger was designed to do.
So when I evaluate inexpensive equipment, I ask the following questions:
- What is it designed to do?
- How well does it do its job?
Don’t confuse quality with features. I do expect inexpensive gear to sacrifice features. For example, the Exos-Gear Bravo does not have nylon flaps that cover the outside of its zippers. This is a feature found on more expensive daypacks. Does it make a difference when you use the pack? I don’t believe it does. So bear in mind as you read this review that inexpensive gear can still be high quality.
Exos-Gear Bravo Concept
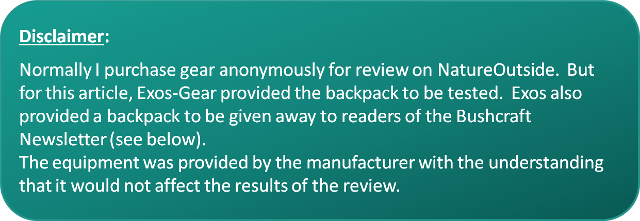
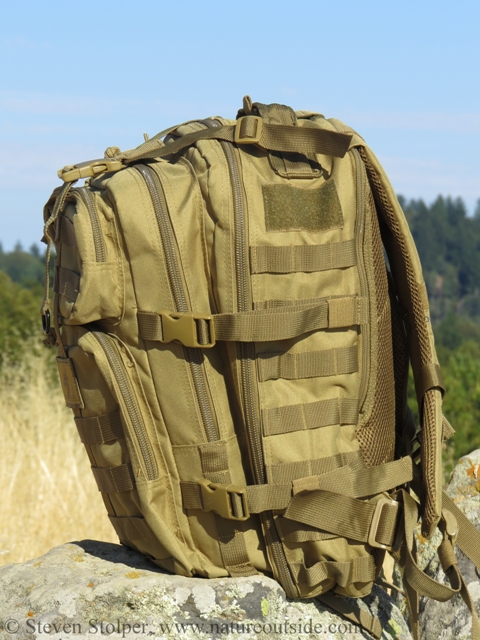
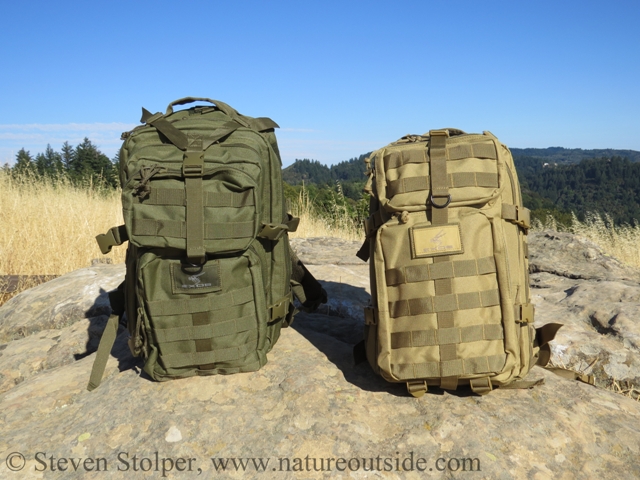
Exos-Gear Bravo in Olive Drab (L) and Coyote Tan (R)
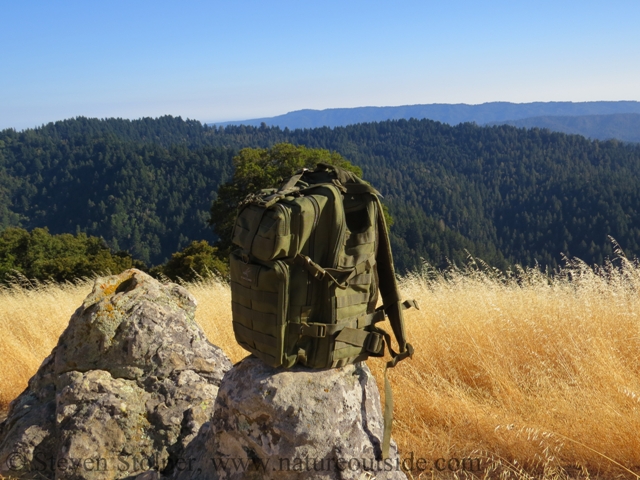
The Exos-Gear Bravo is a “tactical” military style day-and-a-half pack. You can use its roomy interior to carry a noontime feast, or toss in a tarp and secure a sleeping bag to the bottom of the pack using its integrated straps.
Exos-Gear offers the Bravo in black, coyote tan, olive drab, and gray. The pack is adorned with 1-inch PALS (Pouch Attachment Ladder System) webbing so you can attach modular MOLLE (Modular Lightweight Load-carrying Equipment) pouches to its flexible exterior. The United States Army invented PALS as a standard for attaching modular pouches onto load-bearing platforms such as a backpack. So you can choose from a wide variety of pouches to attach to this pack.
The Bravo (34L volume) competes with more expensive packs like the 5.11 Tactical Rush 24 (33L) and the Maxpedition Falcon-III (35L). But the Exos-Gear Bravo costs $64-$100 less!
This makes the Exos-Gear Bravo an intriguing entry into the tactical daypack market.
Exos-Gear Bravo Construction
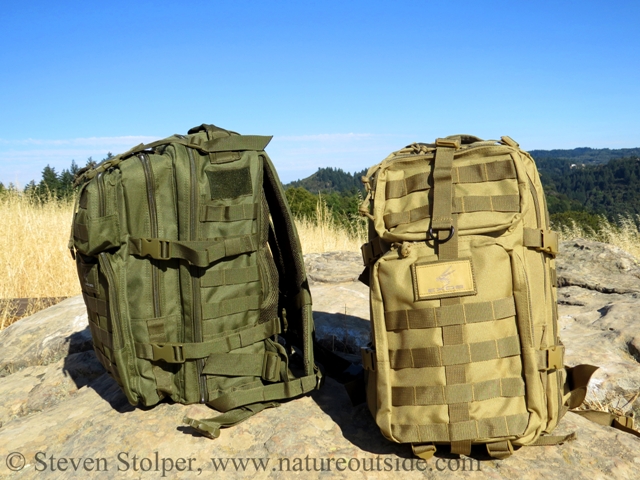
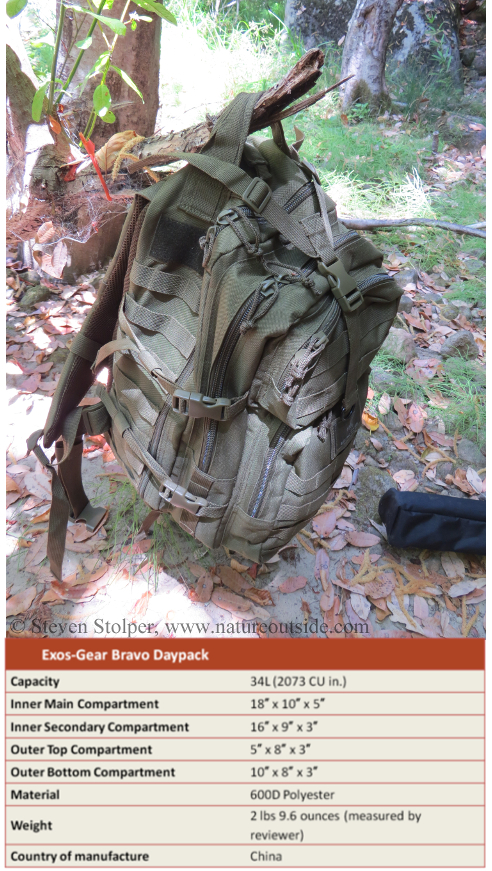
Bravo pack with a Nalgene 1L bottle for size comparison.
The pack has a “wedding cake” construction that provides a main compartment, a second compartment, and two small compartments on the back of the pack. I’ll talk more about storage later in this review.
Exos-Gear chooses to clothe the pack in 600 Denier Polyester. I like the choice. It’s an area where Exos-Gear economizes and saves weight. The Bravo uses a lighter material than its competitors – the Rush 24 (1000D Denier Nylon) and Falcon III (1050-Denier Nylon). But for most dayhiking this should be fine. In fact, the lighter material reduces weight, which is welcome to those of us who don’t regularly carry 30 lbs of gear. The pack withstood both my intentional and unintentional drop tests onto rocks and dusty trails. So I anticipate good durability.
I like the mix of weight, materials, and durability. The large buckles and wide straps are easy to adjust and the beefy carry handle is pleasant to use.
The pack has no rigid suspension components or rigid structural components. This is what you expect from a pack at this price-point. The shoulder straps and back contact area have ventilated mesh padding. I found the padding comfortable even when I carried hard-edged survival gear in the main compartment.
There are Velcro loop pads (3″ x 2″) on either side of the pack, just below the attachment point for the carry handle. I did not use them during testing.
The interiors of the secondary compartment and both small outer compartments are coated with urethane on the outward facing surfaces. This adds some water resistance and makes the pack more rigid.
The Bravo has zippers with nylon cord pulls. They’re not YKK, but I wouldn’t expect them at this price point.
I like the wide removable hipbelt (strap, not padded). You can further adjust the length of the hipbelt at the bottom corners of pack. I I kept the belt cinched tight, which caused a minor problem during testing. One of the corner buckles did not have enough friction to keep the hipbelt from loosening. The belt was slipping through the buckle as I hiked. But this was no problem. I doubled-over the free end of the strap back through the buckle. Problem solved .
Initially this buckle did not have enough friction. I easily solved the problem by taking the free end of the strap and doubling it back through the buckle. It was fine after that.
By the numbers
Let’s take a look at the numbers, provided by the manufacturer. Exos-Gear does not provide the weight of the pack. So I weighed an empty pack on a digital scale.
Storage
Zippered compartments as viewed from the side.
When it comes to storage, the Exos-Gear Bravo rises to the challenge. It swallowed my fleece, food, camera equipment, and survival gear without complaint.
The pack features 4 compartments and a zippered hydration pocket behind the back padding. The Y-shaped compression strap that runs along the back and top of the pack blocks access to the 4 compartments. This compression strap is found on many packs that have this style. You need to unbuckle the strap before you can unzip the four storage compartments. While annoying at first, this quickly becomes second nature. There is one exception however, the outer bottom compartment, which I discuss below.
Let’s take a look at each compartment. Detailed pictures of the interior can be found at the manufacturer’s website.
Inner Main Compartment 18″ x 10″ x 5″
The compartment is sealed by a large zipper (two sliders) that encircles the top and sides of the main compartment. The zipper runs behind the PALS webbing used to attach external pouches to the pack. The interior wall facing the back-padding is urethane coated and has a 10” x 5” (approx) zippered nylon pouch built into it. The rear facing side has a 8” x 9” (approx) mesh pouch. I used the mesh pouch during testing to hold my first aid kit for easy access.
Inner Secondary Compartment 16″ x 9″ x 3″
Honestly, I could do without the secondary compartment. I would prefer a larger main compartment instead. But hyper-organized hikers will appreciate what the secondary compartment offers. A mesh organizer approximately 7” x 5” is attached to the wall it shares with the main compartment. The larger pocket runs about 7”. Two smaller pockets are sewn onto the front of the larger one.
The back of the secondary compartment is urethane lined.
Outer Top Compartment 5″ x 8″ x 3″
This is my favorite compartment. It acts as the “brain” of the pack, providing quick access to commonly used gear through a zipper that runs along the top of the pouch. It is extremely convenient to access when the pack is sitting on the ground. The bottom and back of this pouch is urethane lined.
Outer Bottom Compartment 10″ x 8″ x 3″
This pocket has a nylon organizer sewed into the front panel. The larger pocket is useful. But the smaller pockets sewn onto the larger one are useless for carrying anything wider than pencils. And just how many pencils do you carry with you out in the bush? I would prefer two larger more utilitarian pockets. The back side of the compartment is urethane lined.
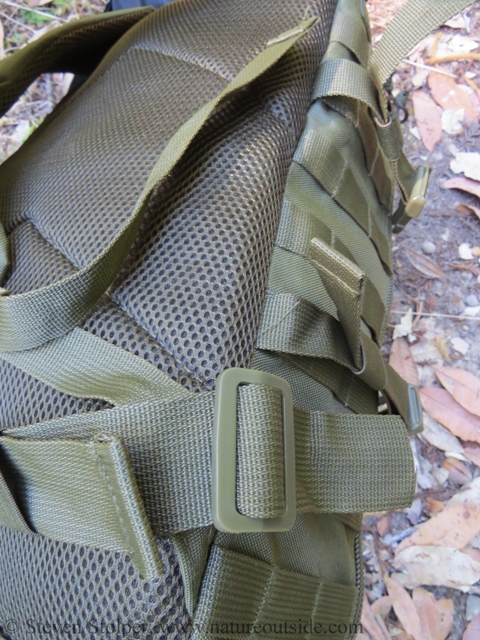
Using this compartment is a pain. The Y-shaped compression strap obscures the zipper, even when the strap is unbuckled. The compression strap runs through the PALS webbing on the back of both the top and bottom outer compartments. Here’s a picture of the problem:

Access to the bottom compartment is made difficult by the Y-shaped compression strap.
If you purchase this pack, I recommend cutting off the D-ring on the end of the Y-shaped compression strap. Slide the male buckle off and then unthread the strap from the PALS webbing on the upper compartment. Replace the male buckle on the strap and melt the end of the fibers you cut.
Now, when you unbuckle the Y-shaped compression strap, it will fall clear of the zipper. Problem solved.
Other Storage
During testing, I used the three integrated straps on the bottom of the pack to secure jackets and other lightweight gear. I also used the compression straps that run front-to-back on the sides of the pack to secure a lightweight camera tripod. I threaded the straps through the tripod’s carrying strap so that if the tripod slipped, the carrying strap would arrest it.
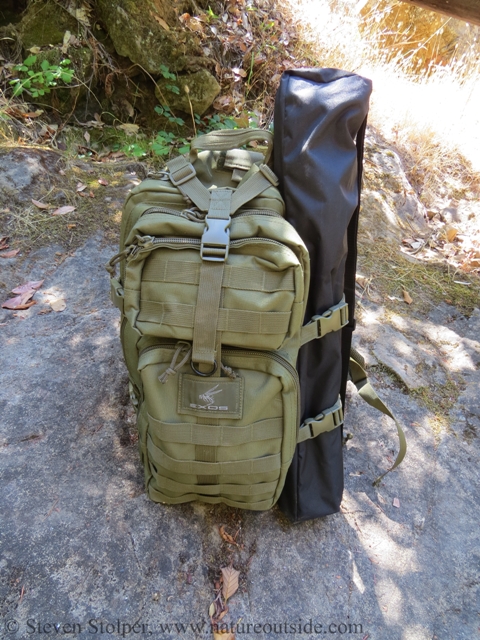
The Bravo easily carried my camera tripod.
Testing Methodology
The site of two unintentional “fall-over” tests. These were followed immediately by “rolling down the dusty trail” tests. The Bravo passed them all.
I carried the Exos-Gear Bravo for 3 months through a variety of terrain. Total distance hiked with the pack is just over 15 miles.
For each hike, I loaded the pack with between 15-20 lbs of clothing and equipment, distributed between the four compartments. I did not use a hydration bladder with the pack.
I dropped the pack (intentionally and unintentionally) onto the trail from heights less than five feet. I tossed the pack from one spot to another using the carry handle.
I attached pouches to the pack to exercise the PALS webbing. I hiked with an external Nalgene-type bottle pocket attached and a pouch for my Bacho Laplander saw.
I also strapped a lightweight camera tripod to the pack using the side compression straps.
Suspension
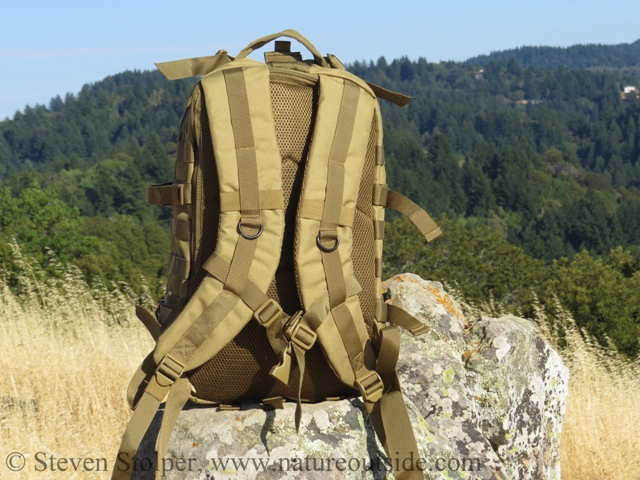
The wide padded shoulder straps made the pack comfortable to carry
The Exos-Gear Bravo has a variety of adjustments to help haul loads of all sizes. It also makes the pack easy to carry. Considering that the Bravo has no rigid suspension components, it did very well in my tests.
The pack has a moisture wicking back pad covered by nylon mesh. The mesh did not seem to promote air circulation around my back, and it limited the effectiveness of the wicking material. The back pad did wick moisture, but I felt it would be more effective without the mesh covering.
I enjoyed the wide padded shoulder straps. They were very comfortable and adjustable. Even with a tripod secured to one side of the pack, the shoulder straps distribute the load evenly over my narrow frame for a pleasurable carrying experience.
The side compression straps work well and were effective in containing bulky loads. But they cinch forward on the pack instead of to the rear. This makes them convenient to adjust, and is typical of this type of pack. But as you pull the compression straps tighter, the extra strap material can impinge on your arm as you hike. This was not a big problem for me, but I would prefer if they cinched toward the rear of the pack.
The two compression straps on each side are positioned toward the top and bottom of the pack to avoid interfering with the attachment of long Molle pouches.
I loved the elastic “strap retainer loops” on the waistbelt and compression straps. They keep the ends of the straps from flopping around while you hike.
I did not not care for the “Y” compression strap, typically found on packs of this type. It proved effective at keeping the load snug against my back. But it interferes with access to the outer bottom compartment, as I mentioned earlier.
Hydration
The pack is designed for a hydration bladder, stored in a compartment directly behind the back pad. It’s a good setup. You can access the pocket using an external zipper instead of squeezing your hands into a crowded main compartment. The sip-tube port is centered between the shoulder straps on top of the pack. A generous Velcro flap keeps the port closed when not in use and allows you to secure the flap around the sip-tube. I did not carry the pack with a hydration bladder.
The pack does not have pockets or mesh for Nalgene-type bottles. If you want a water bottle pocket, you will need to invest in a MOLLE compatible bottle carrier. Invest in a good one. Inexpensive water bottle pouches frequently have poor attachments. If you plan to purchase a water bottle pouch, factor it into the cost of the pack.
Pouch Attachment
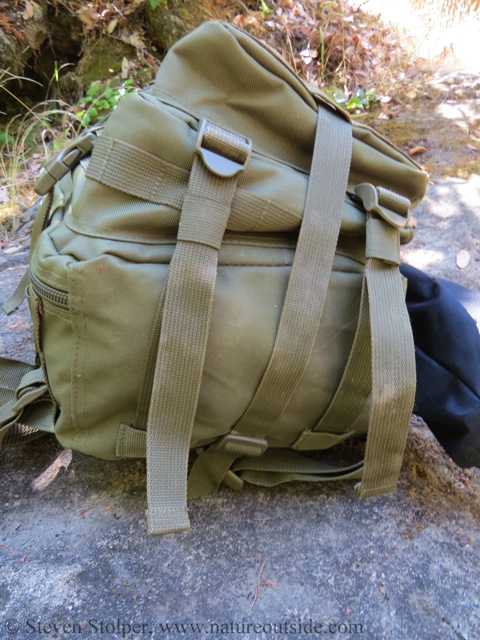
A view of the bottom straps
During testing, I added a water bottle pouch and a saw pouch for my Laplander using the PALS webbing. The pack’s webbing was strong and spaced correctly to accept the pouches. I also carried a camera tripod using the pack’s side compression straps. In all cases, the pack performed like a champ.
The pack has three adjustable straps on the bottom of the pack where you can attach a sleeping bag, sleeping pad, or bedroll.
Carry
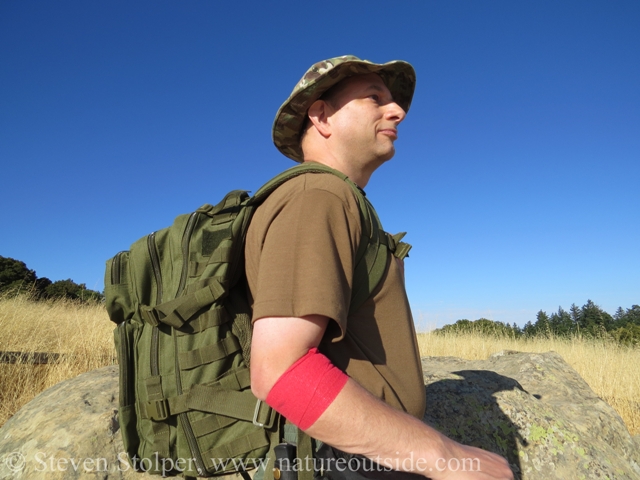
The pack was comfortable to carry in many temperatures and terrain
I found the Exos-Gear Bravo to be a stellar entry-level pack. It carried comfortably, despite my modest body size. I was especially impressed by the generous shoulder straps. Because of its shape, the pack best fits people with medium to large upper torsos. The strap retaining loops kept the loose ends of the adjustment straps from flailing around.
Conclusions
Exos-Gear Bravo backpacks in Olive Drab and Coyote Tan
The Exos-Gear Bravo is a tactical-style daypack that offers good quality at an affordable price. It lacks some of the features and suspension of more expensive packs. But for those looking for a reliable tactical-style daypack that hauls lots of gear, this is the pack for you.
This pack is for you if…
- You want a tactical style daypack and don’t want to spend a fortune
- You want a daypack that can carry bulky loads comfortably
- You want to customize your pack with MOLLE pouches
- You want multiple pouches and compartments to organize gear
Consider other packs if…
- You are a smaller bodied individual. You may find the pack doesn’t carry as well
- You want integrated Nalgene bottle pockets
- You plan to carry heavy (> 20 lbs) over difficult terrain and need an expensive suspension
If you do purchase this pack, please tell me about your experience in the comments below.
Win an Exos-Gear Bravo Backpack

Exos-Gear has generously provided a Bravo backpack in coyote tan as a giveaway to a lucky Bushcraft Newsletter Reader. If you would like to enter the giveaway, subscribe to the free Bushcraft Newsletter using the link below.
This giveaway has ended. But you can become eligible for the next giveaway by signing up for the free Bushcraft Newsletter.
Other Reviews on NatureOutside
Maxpedition Individual First Aid Pouch
Product Review: Black Diamond Orbit LED Lantern
For fun facts and useful tips, join the free Bushcraft Newsletter.


Leave a Comment