

My new sit pad for hiking is Internet-enabled!
No, it doesn’t measure the temperature of each butt cheek and send it to The Cloud. Nor does it have WiFi, Bluetooth, or USB. In fact, it’s decidedly old-school.
But my new sit pad exists because of the Internet. Or, rather it exists because of the creativity and generosity of people on the Internet.
A Cheeky Video
Last month I wrote a small piece on how to build the cross-stick fire. If you watch the video closely, you may notice the fabulous sit pad Taro uses to insulate himself from the frozen ground. Sheep’s wool on one side and nylon on the other, it seems warm and cozy on a crisp winter’s day.
Intrigued, I learned that it was a scrap cut from an old car cover. Maybe it was the marriage of old-school sheepskin and modern nylon. But it captured my imagination and I set out to make one for myself.
So the idea for my sit pad came from the Internet. But that’s not all. I quickly ran into trouble and turned to social media for help. And as I expected, many people volunteered creative and helpful advice.
I’ve written about the consequences of mobile technology in the outdoors. So you may be surprised to hear me praise the Internet and social media.
But you shouldn’t – I’m not a technophobe. After all, I created a bushcraft website! 🙂
Note: This article contains affiliate links.
My ASSumptions
There once was a hiker named Steve,
who had a minor pet-peeve.
When the ground was wet,
then you can bet,
the seat of his pants was soaked!
– The world’s worst limerick writer
To me a sit pad is a needless luxury. Trade weight and space for comfort? That’s unmanly!
So I never carried one, even in poor weather. When I sat on fallen logs after rain, or wet grass, or cold/wet/icy rocks, I’d just tolerate a cold wet butt.
And I never liked those closed-cell foam pads. Although lightweight, they are bulky. The foam invariably disintegrates as I travel through dense brush. And that blue color! I might as well wave a flag so wildlife can hide from my camera.
The new inflatable sit pads are not for me. First, I’m a cheapskate. Why waste money on “needless luxury?” Second, I don’t want to huff and puff into a plastic cushion when I arrive at a lunch stop or scenic vista.
So I vowed to make my sit pad from materials already laying about my home. And as luck would have it, I had just what I needed.
I picked up a warm and cozy sheepskin on sale from a leather supply store. It had a thin backing that would provide extra padding.
I found several yards of olive-green 1000 Denier Nylon Fabric (Mil-Spec GL/PD-10-07) half-forgotten on a dusty closet shelf. The polyurethane coated nylon would act as an abrasion layer and a waterproof barrier.
So I imposed the following rules on my project: I would not spend money on materials, and I would do all the work myself.
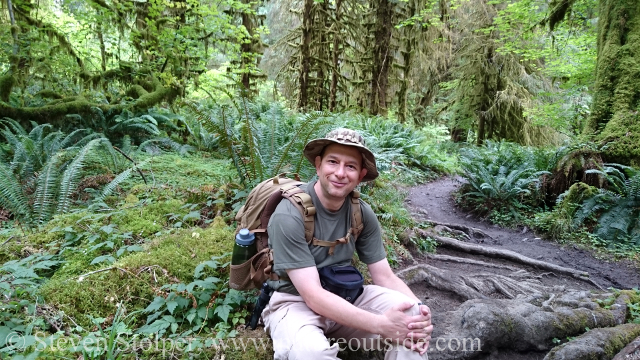
I’m sitting on a moss-covered tree root in the Hoh Rain Forest. Wet Butt for sure!!!
Butt Problem
But I had a problem: How do I attach the sheepskin to polyurethane coated nylon?
The best approach was to sew the two materials together and seam-seal the stitching. But heavy nylon and sheepskin are tough materials to hand-sew. I could try to glue the two together. But would the adhesive hold in rugged outdoor conditions?
Rather than stumble blindly ahead, I chose to crowd-source the answer. I posted messages on Facebook and two bushcraft forums asking for advice. Could I glue the two materials? Am I foolish to do this myself? Should I find someone to sew it for me?
I received a number of creative solutions. Here are some of the best.
- Carpet Adhesive
- Pay an auto apholstery shop to sew it for me
- Take it to a saddle shop and pay them to sew it for me
- Pay a cobbler to sew it for me
- Find a seamstress and pay her to sew it for me
- Buck-up and sew it myself!
- Use Velcro to join the two materials
- Employ a stitching awl to sew the two materials
- Use Barge Cement as an adhesive
- Rivet the two materials
- Set snaps to hold the two materials together
- Use an automotive spray-adhesive like 3M 8088
Of all the suggestions, the automotive spray adhesive seemed easiest. Unfortunately, the adhesive suggested is unavailable in California. This is probably because of our pollution standards for Volatile Organic Compounds (VOCs). Fortunately I found a can of automotive adhesive at a local parts store that’s very similar. It’s used to glue headliners and interior fabric (3M 38088). My plan was to spray both pieces with the adhesive and then mate the sheepskin to the nylon backing.
Getting to the Bottom
I cut the sheepskin into a rectangle (16 inches x 14 inches). I left the nylon two inches wider in each dimenstion (18 inches x 16 inches). When joined, the nylon would protrude by 1 inch around the perimeter of the sheepskin. I would fold-over the nylon and glue it to make a 1/2-inch border around the sheepskin.
I put 1/2-inch notches in the corners of the nylon so that the seam would be even after I folded-over the edges.
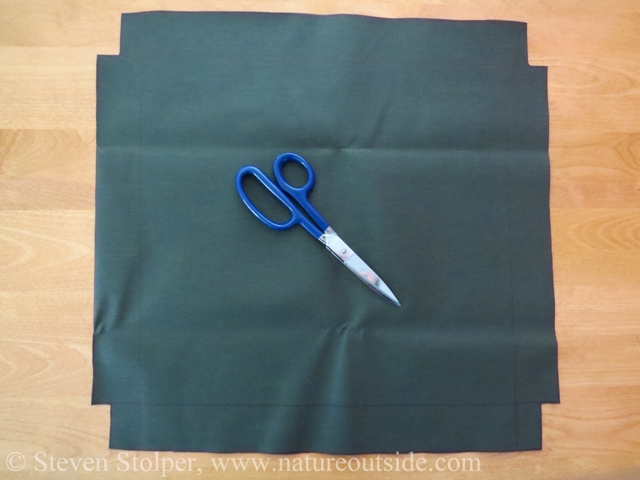
I cut the nylon backing 2 inches larger than the sheepskin. I cut notches at the corners so I can fold-over the material and have a nice even-width seam running around the sheepskin.
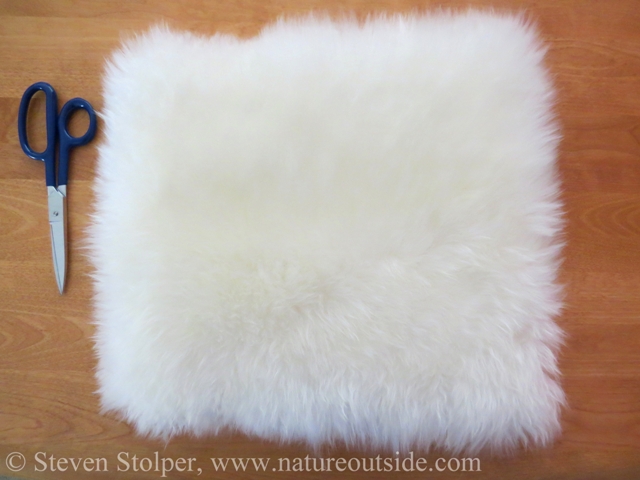
I cut the sheepskin into a rectangle (16 x 14 inches).
Everything went according to plan. I took the materials outside and laid them on a plastic tarp to spray-on the adhesive. I must have looked like Darth Vader wearing protective clothing, goggles, and an N-95 respirator.
The adhesive went on evenly to both the nylon and the sheepskin. I wait for the adhesive to become tacky and then place the sheepskin on the nylon.
This is when I screw up! I rushed. I drop the sheepskin off-center onto the nylon. I totally blow it. I hoped I could re-position the sheepskin after I place it on the nylon. But the adhesive grips the two surfaces and threatens to separate from the nylon if I pull on the sheepskin.
After I fold-over the nylon, my sit pad has an uneven and ugly border. Oh well. Live and learn. At least no one will think I bought it at a store. 🙂
The Dry-Butt Test
A few days later I have a chance to try out my new sit pad. I head into the rolling hills of the Sunol Regional Wilderness. This area has beautiful grasslands that one time were oak forest. You can still find stands of grand oak trees that have all but disappeared from California.
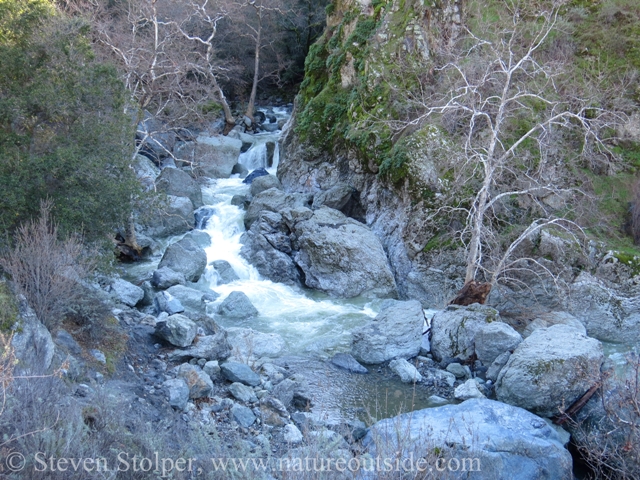
Today I plan something different. Instead of climbing the hills I hike up a river-carved canyon to an area known as “Little Yosemite.” Much like its namesake, the area features dramatic scenery. Alameda Creek spills noisily over granite boulders creating impressive cascades.
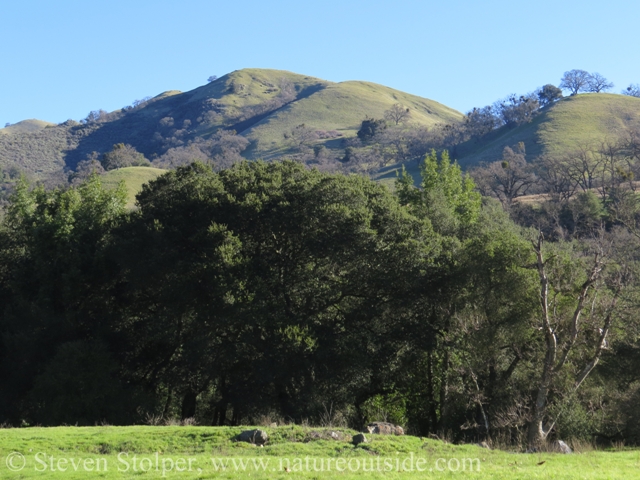
The rolling hills of Sunol Regional Wilderness
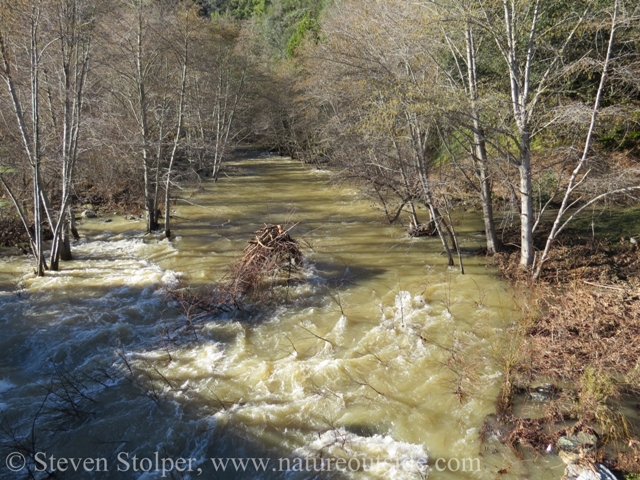
Alameda Creek swollen by recent rains.
It’s early morning as I start my hike. The sky is cloudless but the hills cast long shadows across the canyon. California Sagebrush (Artemisia californica) covers a steep slope beside the trail. It’s one of my favorite plants. The smell of “cowboy cologne” drifts through the still morning air.
The usually placid Alameda Creek is swollen by recent rains. It thunders through the canyon, greedily devouring the formerly parched creekside. Over the noise of the creek, birds start squawking alarm calls! There’s a commotion ahead to my right. Songbirds scatter and two delinquent Acorn woodpeckers break off their noisy conversation. There’s a predator about – and it’s not me! I’m too far from them to cause their distress.
The area is silent as I approach. Creeping slowly, I spot the source of the disturbance. Lurking thirty feet above the trail is a red tail hawk. I think it’s a juvenile because of the brown bands on its tail.
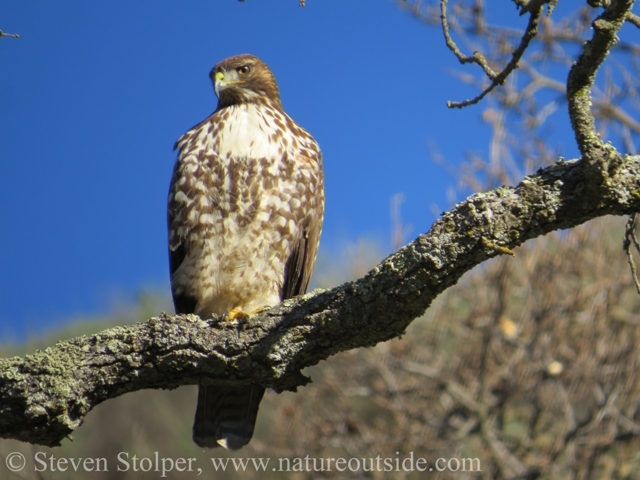
This Red-tailed hawk is hunting. Notice the belly band. I think it’s a juvenile because of the dark brown bands on the tail.
The hawk and I regard each other for a few minutes before I move on.
I cover a half mile before another commotion catches my attention. This time, it’s captivating birdsong that emanates from the rocks above my left shoulder. The song is loud and complex. Melodic notes descend the scale as I search for the singer. A flurry of motion catches my eye. It’s a bird I’ve never seen before! It’s beautifully camouflaged against the lichen-covered rocks. Later I learn that it’s a Canyon Wren (listen to its song).
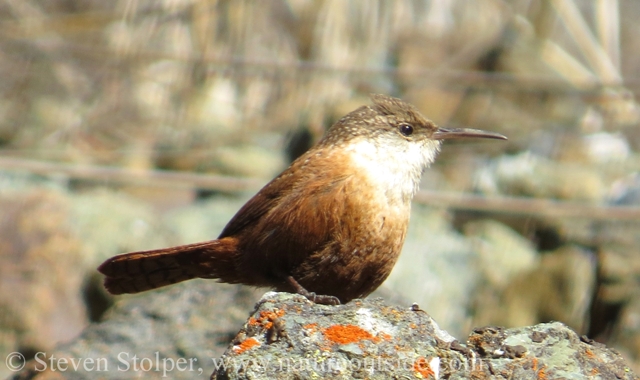
Canyon wren
I quarter-mile more and I can see my destination, Little Yosemite, in the bottom of canyon.
Little Yosemite seen from above
I leave the trail and descend a hillside to the creek. It’s muddy and the footing is treacherous. Two shoes tell a fascinating story of an ill-equiped hiker.
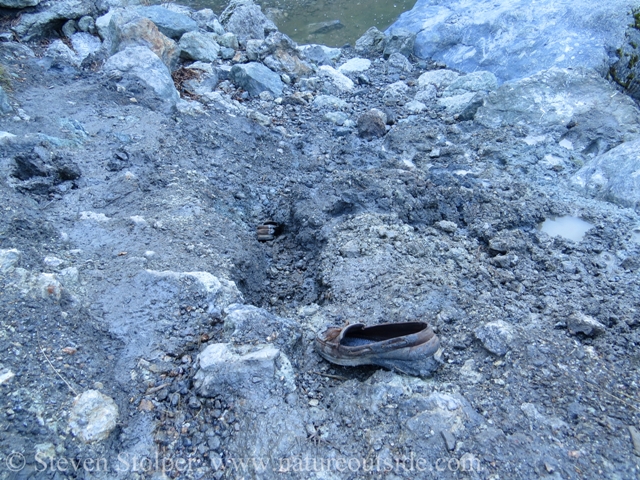
The treacherous descent claims two victims. I can only imagine the hike out of the canyon!
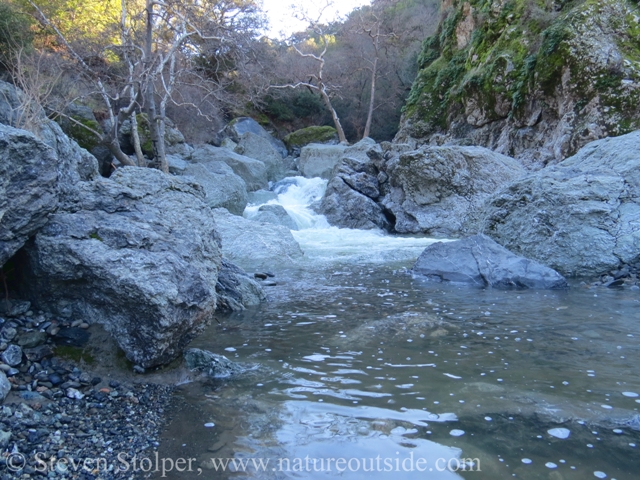
Little Yosemite
I stake out a high perch on a boulder and give my new sit pad a try. The warm sheepskin feels terrific! The cushy seat is comfortable and insulates me from the frigid rock.
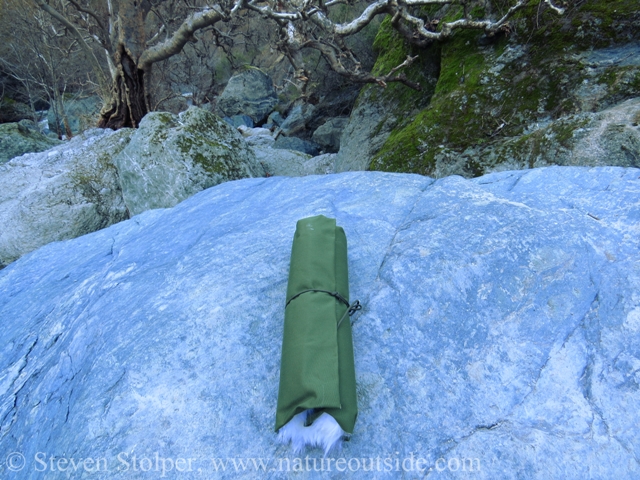
The sit pad rolled up. It is tied with a length of olive-green 550 paracord.
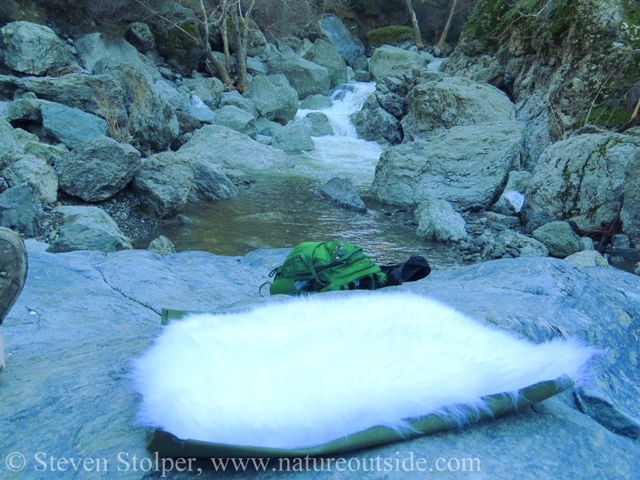
The bright color of the sheepskin causes my camera to underexpose the image.
Enjoying the brisk winter morning at the waterfall.
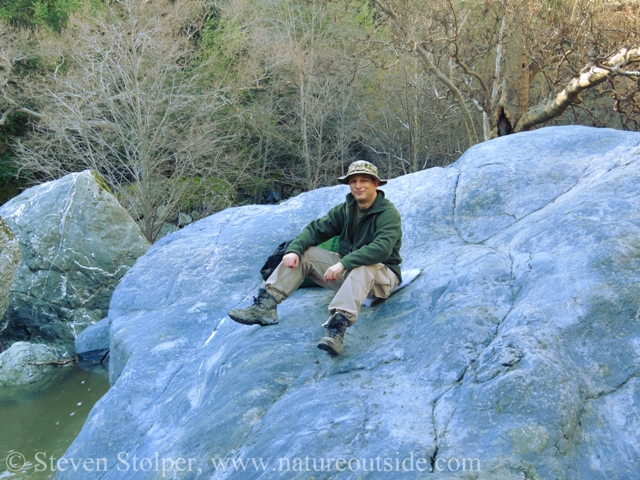
For once, my bony butt is comfortable sitting on rock!
Tying the Knot
Before we talk about “lessons learned,” I want to share how I tie the sit pad with paracord for transport and storage. I have not seen others write about this technique. But then again, I’m so bad with knots that perhaps there’s a reason for that. 🙂
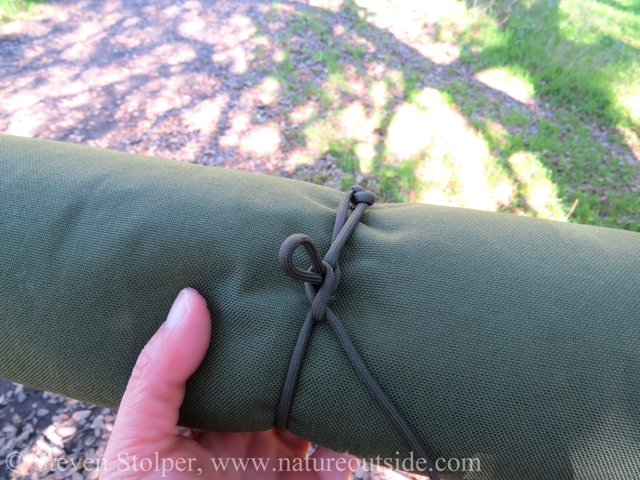
Here is the completed knot, with safety, tied around the sit pad.
In the pictures below, I wrap a white handkerchief around the rolled-up sit pad to make it easier to see the paracord knot.
Step 1 – Tie a Bowline in the end of the paracord
A bowline is a common knot. You can learn to tie it here.
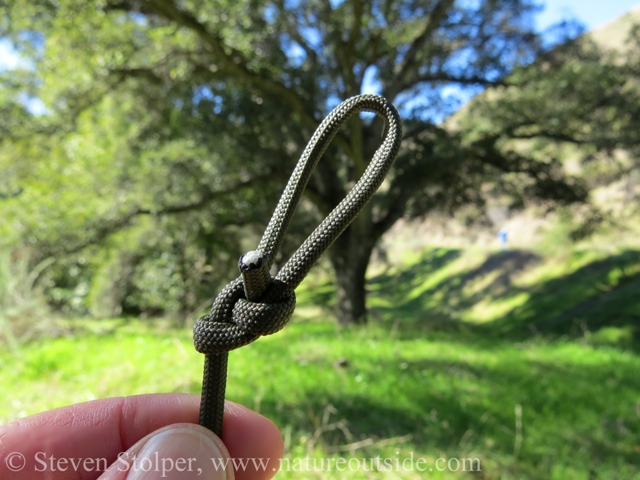
Tie a bowline in the end of the paracord.
Step 2 – Loop through the Bowline and Cinch
Wrap the running end of the paracord around the rolled-up sit pad. Thread the running end through the loop in the bowline and pull firmly to cinch the cord tight around the sit pad. Use the loop as a pulley to cinch the cord tight.
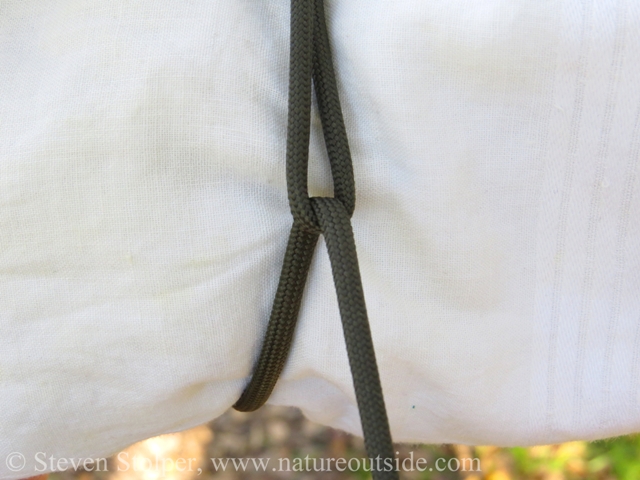
Wrap the paracord around and use the loop as a pully.
Step 3 – Pinch and Tie
Pinch the paracord against itself to create a loop next to the bowline. As long as you keep pinching, the paracord will not slip back through the bowline loop.
Keeping the paracord pinched, use your other hand to make a loop in the running strand of paracord. Put the loop over the static paracord and draw it through the loop you made by pinching. Pull on the loop and let go with your pinching hand. You have just made a quick-release knot.
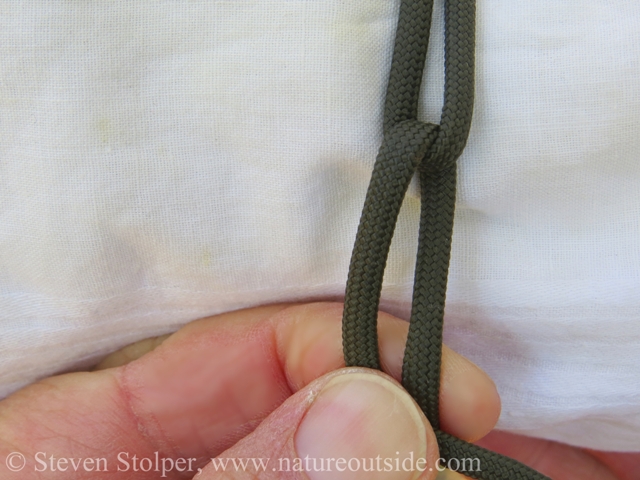
Pinch the paracord so that the running end does not slip back through the bowline loop. This creates a new loop below the bowline.

Make a new loop in the running strand below where you’ve pinched. Thread the new loop through the loop you created below the bowline. Pull it through as you stop pinching. This creates a quick-release knot below the bowline loop.
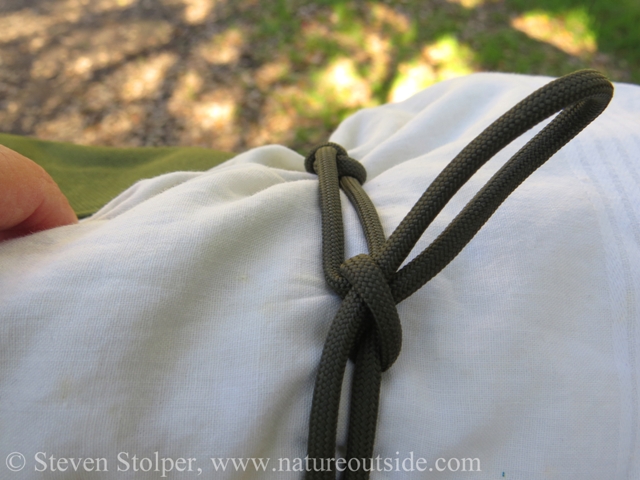
After you release your pinch and pull the loop through, you get this quick release knot. This picture shows the knot rotated from the way it would be in the previous pictures.
Step 4 – Tie a Safety
We don’t want the quick release knot to come undone accidentally. So we tie a “safety” to prevent it. With the running end of the paracord make a loop. Slide the loop over the previous loop from the quick release knot and pull tight. Now, in order to untie the knot, you must first slide the new loop over the loop from the quick release knot.
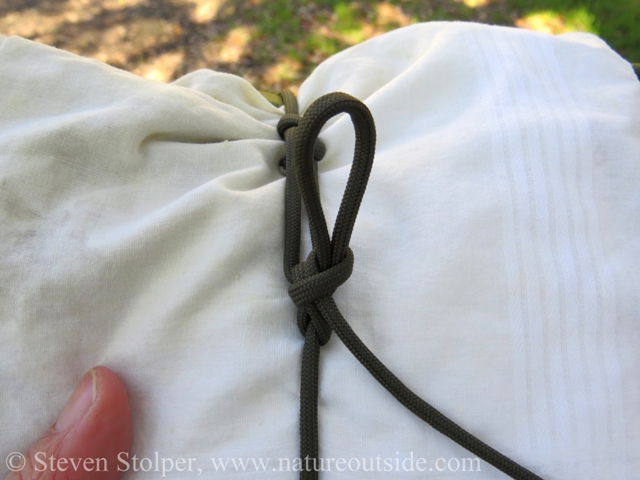
The completed knot with safety.
Lessons Learned
I learned several lessons from making the sit pad.
I made the sit pad too big. Instead of cutting the sheepskin to 16×14 inches, I should have trimmed it to 14×12 inches. The smaller pad would have been easier to fit in my pack. And it still would have been a fine fit for my medium sized bottom.
I also learned to take my time. In my eagerness to mate the two materials, I did a shoddy job of aligning the sheepskin with the nylon. I was lucky I could still use the result.
And in retrospect, I should have glued the sheepskin to a much larger piece of nylon and trimmed the nylon to size afterward. I should have designed my project so that I did not need to glue the two materials so precisely.
But the most important lesson I learned is that it’s fun to make your own gear, even if it’s not perfect!
Have you made your own outdoor gear? Tell me about it in the comments below.
Related Articles on NatureOutside
How to Make a Deerskin Pouch – 5 Easy Steps!
Earth Day Project 2014 – The Bottle Bag
Don’t be a Fool, Carry this Tool – A Store Discount Card and Duct Tape!
For fun facts and useful tips, join the free Bushcraft Newsletter.


i love, love, love it! Personally, I would take it to a leather shop and ask them to do it. I would always opt to have it sewn over gluing it together. I would had also gone for grey or brown wool (because I am so practical)
Polly, taking it to a leather shop is a good idea! I might have found a saddlery shop that would do it. And while white is not practical, it just called to me… 🙂