

This article contains affiliate links.
How can anyone get so excited over a hunk of glass?
That was my thought as I started shopping for new binoculars.
I’ve mentioned before that I hate to replace equipment that isn’t worn-out or broken. But I suddenly found myself lusting after a new pair of field glasses. I rarely carried mine — they were too heavy and bulky. And when I looked through them I found myself wishing for MORE POWER!
It was time to get a new pair. I had started to lead hikes for the US Fish and Wildlife Service at a wildlife refuge on San Francisco Bay. Visitors invariably ask, “What kind of duck is that?” And I’d stare through my binoculars struggling to make out the field marks. Sometimes I couldn’t see the bird clearly enough to answer.
My Old Pair fit like Comfortable Shoes
My old binoculars fit like your favorite pair of comfortable shoes. And they had sentimental value. I purchased them for $39 in 1993. This was at a time in my life when any purchase over $20 was a major budget decision.
I was proud of my binoculars. They looked just like my father’s. They had the characteristic shape of Porro prism binoculars. I bet you recognize the shape without even realizing it. Two 45° prisms reflect incoming light so it enters the eyes parallel to the incoming beam. As a result, the objective lenses are further apart than the eye pieces.
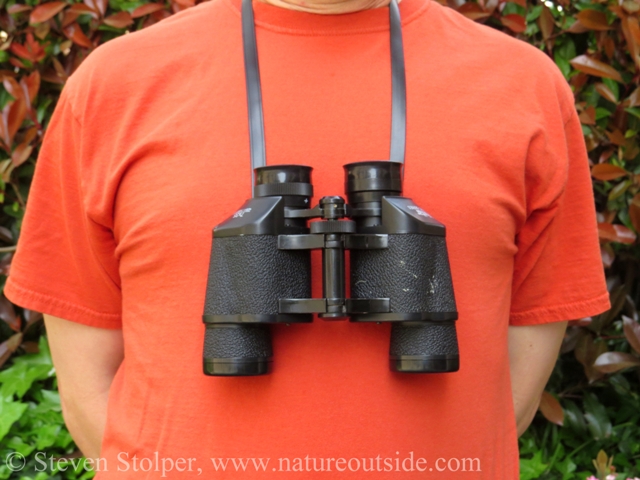
My old Porro prism binoculars. Note the “classic” binocular shape. The eyepieces are closer together than the objective lenses.
Porro prism binoculars are simpler to make than modern roof prism binoculars. So at a given price point you can buy a higher quality pair of Porro prisms than you can roof prisms. Porro prisms also yield good contrast and depth-of-field for a low price.
But Porro prism binoculars are heavy and bulky due to their design. They’re also more susceptible to going out of alignment when they suffer mechanical shock. And it’s difficult for manufacturers to make them waterproof.
On balance, I loved my old Vivitar 7×35 Porro prism binoculars. The metal frame is scuffed from years of use. But 24 years have passed and technology has advanced considerably. It was time for new binoculars!
Magnification

Magnification comes in handy when looking at small or distant objects
Binocular magnification is often referred to as “power.” It’s the number of times binoculars enlarge the image compared to what you see with your unaided eyes. When you read advertisements for binoculars, you will see numbers like 7×35 or 8×42 or 10×42. Power is the first number. A 7x binocular magnifies the image seven times more than your unaided eye. A 10x binoculars has greater magnification than an 8x pair.
But hold your horses! That doesn’t mean that more magnification is better. When the image is magnified, so is the shaking of your hands while holding the binoculars. Small tremors can cause a large motion of the image. Magnification of more than 10x usually requires a tripod to hold the binoculars steady.
Also, higher magnification binoculars generally have a smaller field of view (discussed below). You see a larger image, but a smaller amount of the area around what you’re looking at.
Birders generally use 8x or 10x binoculars. If you want to start a religious war, stand in the middle of a bunch of birders and proclaim that one is better than the other. It doesn’t matter which you choose. You will have fanatical devotees of the other leap to set you straight. Wear flame retardant underwear. 🙂
Light Gathering
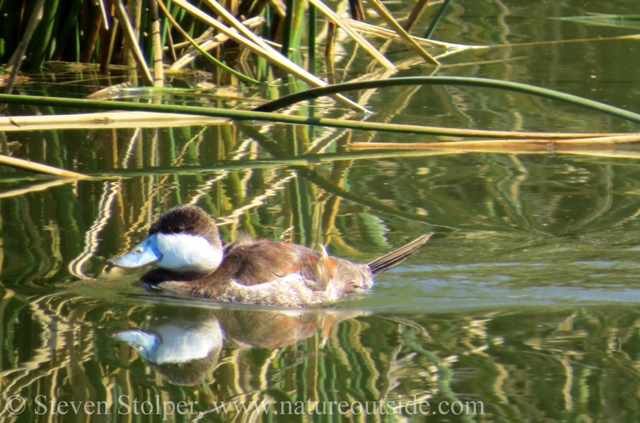
Light gathering is important for looking at birds at dawn and dusk. This male Ruddy duck is beginning to show breeding plumage, including a striking blue beak.
The second number you see in advertisements refers to the size of the objective lenses. When you read advertisements for 7×35, 8×42 or 10×42 binoculars, the second number is the diameter of the objective lenses in millimeters.
Light enters the binoculars through the objective lenses. So larger objectives gather more light for your eyes. Binoculars with larger objective lenses generally produce brighter images and perform better in low light.
If you do all your viewing during the day in bright sunlight, light gathering is less important. But it can be critical if you search for wildlife at dusk and dawn, or deep within dark forests.
Once again there’s a tradeoff. The larger the objective lenses, the larger the binoculars. Binoculars with smaller objectives are more compact and portable.
Field of View
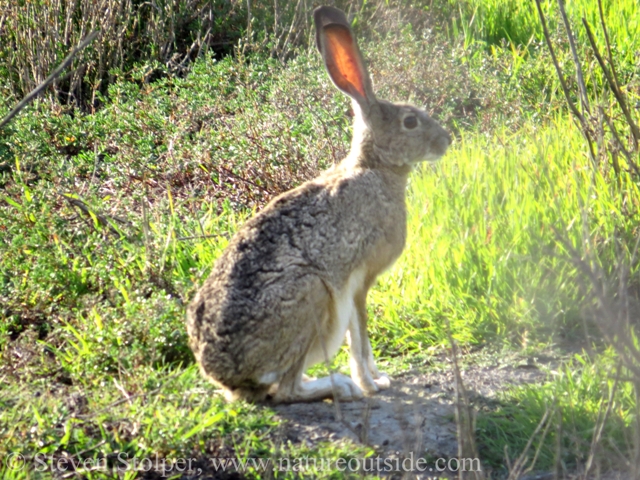
Field of view is important when you watch birds in wooded areas or try to find a bird in flight. It also helps when you search for small mammals, reptiles, and other animals that blend into the terrain.
Field of view is a measure of how much of the world you see when you look through your binoculars. Hold out your hand and look at it. How much of it do you see in focus? Most of us see our entire hand. Now bring your hand close to your face. Although your hand is magnified, you see a much smaller portion of it.
Field of view is important when you look at distant objects. If you are not looking in exactly the right direction, the object may not appear in your field of view. If you have a wider field of view, it is more likely that you will see the object through your binoculars.
You can employ skill to quickly acquire a distant object. Look at the distant object with your unaided eyes. Then bring the binoculars to your face while continuing to look at the object. This technique helps put the object in the center of your binoculars’ field of view.
You can learn to do this reliably. But if you are not precise, you benefit from having a wider field of view. The wider field of view also helps when you are looking for animals hidden among tree branches or tall grass. You see more of the surroundings so you have a better chance of seeing the animal if your gaze is not precise.
Different brands advertise different sized fields of view for their products. The size is a function of the manufacturer’s optics. Advertisements generally express field of view as the number of feet you will see when looking at an object 1,000 yards away. For example, my new pair of binoculars shows 330 feet at 1,000 yards. The larger the number, the larger area you will see.
When you try different pairs of binoculars, you will get a feeling of what size field of view is best for you. But there is another aspect that demands attention. I call it “usable” field of view. The images you see will have some distortion around the edges. So try to notice the size of the “sweet spot,” where the image is in perfect focus. You can try looking at street signs to help gauge the size of the sweet spot.
Most of us won’t notice the difference between a larger or smaller sweet spot. But try several different models and choose the one you like best.
Eye Relief
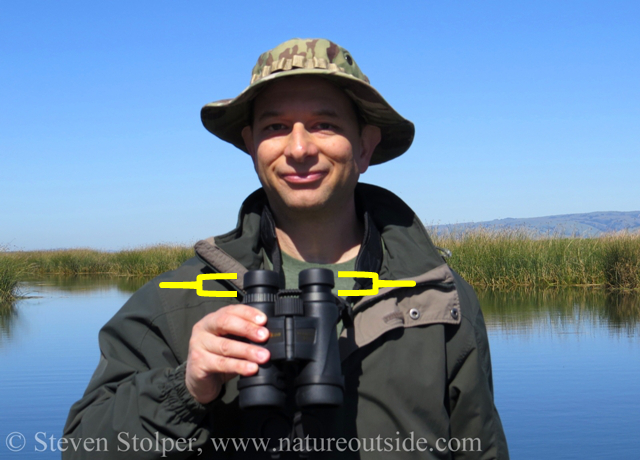
The yellow lines show the portion of the tubes that adjust in and out to provide eye relief.
If you wear glasses, you’ll be interested in eye relief. This is a feature offered by modern binoculars priced in the mid-range and above. Eye relief lets you use your binoculars while wearing eyeglasses.
If you don’t wear eyeglasses, your eyes will be up against the eyecups (the end of the eyepieces). This is where binoculars focus the image. But if you wear glasses, your eyes will be further back from the eyepieces. This extra distance is from the outside of the lenses of your glasses to the tip of your pupils.
So binoculars with eye relief let you adjust the length of the tubes that hold the eyepieces. You can move them in to make them shorter. This brings your eyes forward to the point where the binoculars focus the image.
Eye relief is a great feature because it allows anyone wearing glasses to use the binoculars without having to remove their eyeglasses.
Stray Light
Stray light is light that “leaks” into your binoculars from directions other than the one you are looking. Manufacturers add coatings to the objective lenses to control stray light. They also have a baffle (lip) around the objective lenses to help control stray light.
Some designs handle stray light better than others. The only way to tell is to try the binoculars before you buy them.
Lens Caps, Rain Guards, and Straps
The rain guard on my new binoculars.
Manufacturers use all sorts of designs for lens caps. Be sure you like using the ones that come with your new binoculars before you buy them.
For example, my new binoculars have a rain guard that covers the eyepieces. The shoulder straps run through eyelets on each side of the rain guard. When you lift the binoculars to look through them, the rain guard slides down the straps and away from the eyepieces.
This is a nice design. But it prevents me from using the rain guard with the third-party binocular harness I like to use. The harness straps will not fit through the eyelets on the rain guard.
Lens caps that cover the objective lenses also affect your enjoyment. My new binoculars have lens caps attached to the binocular body. I like this design because they are easy to take on and off and I won’t lose them. With my previous pair, I always had to carry the lens caps in my pocket.
Roof Prism Binoculars
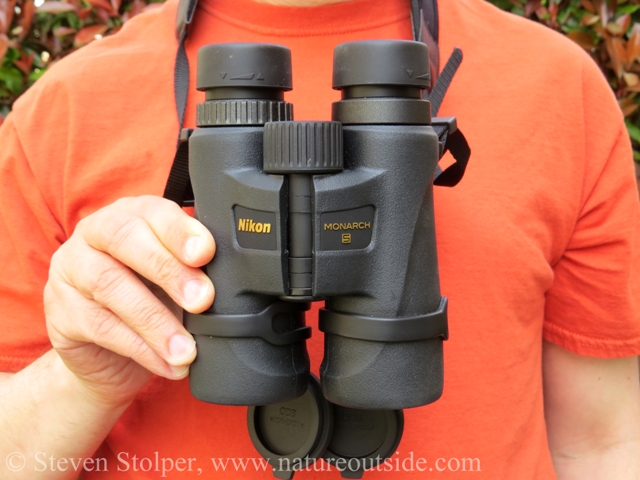
My new roof prism binoculars
Nowadays, most mid-level and high-end binoculars use roof prisms. You can identify roof prism binoculars by their shape. They look like two tubes have been joined together.
Roof prism binoculars are lighter and more compact than Porro prism binoculars. And it is easier for manufacturers to make them waterproof. They are not as susceptible to mechanical shock and are often encased in a rubberized body.
But roof prism binoculars are more expensive to make. And they require sophisticated coatings to perform as well as comparable Porro prism binoculars.
Try before you Buy
It is extremely important to try different pairs of binoculars before you buy. This may sound like common sense. But in the Internet age it is difficult to find a brick-and-mortar store that carries all the top brands.
I know of some people who purchase multiple brands online and then return the ones they don’t want. But I choose to look for a nearby camera store or birding shop so that I can try them before selecting one to buy.
I cannot emphasize enough how important it is to try different pairs before you buy one. I selected a pair that had a smaller field of view than competing brands because I “liked” the optics better. You must see the image, work the controls, and feel its weight and construction. Only then can you truly make an informed purchase.
1. Configure the Binoculars for Your Eyes
The first step in trying binoculars is to adjust them for your eyes. You do this with the diopter adjustment ring, usually located on the right eyepiece. If you are borrowing someone else’s binoculars, you may not be able to do this because it will ruin their settings.
Pick an object in the middle distance and look at it. Place the objective lens cover on the side that has the diopter adjustment ring. This is usually the right objective lens. Now focus the binoculars using the main focus ring until the image appears sharp in the left eye.
Now remove the cover from the side with the diopter adjustment ring. Place the cover over the objective lens on the opposite side. This is usually the left objective lens. Without touching the main focus ring, adjust the diopter ring while looking through the uncovered side until that eye is sharply in focus.
Remove the cover and look through the binoculars with both eyes. Is the image sharp? Can you read writing on a distant street sign?
2. Play with the Binoculars
This is a straightforward process. Look at close objects and adjust the focus. Look at distant objects and adjust the focus. Notice the size of the field of view around distant objects. Does the image look bright or dull? Do the colors look true? Is it easy to adjust the focus knob to see a sharply defined image? Can you hold the image steady? Is the neck strap comfortable? Do you like the design of the lens caps?
You repeat this process with different models of binoculars until you discover the one that’s right for you. Take your time and play with each one. If you wear glasses, make sure to try the eye relief.
And don’t be afraid to stop fellow hikers on the trail and ask them about their binoculars! More often than not, they’ll be happy to expound on what they like and let you look through their pair.
My Choice of Binoculars

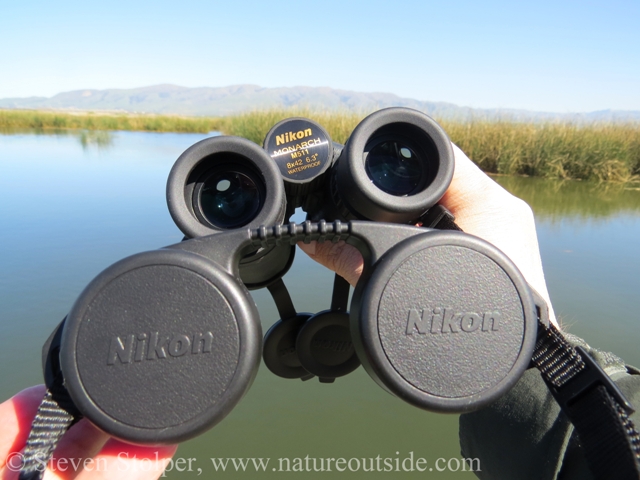
I chose the Nikon Monarch 5 8×42 binoculars.
For my new pair of binoculars, I selected the Nikon Monarch 5 8×42. These are well regarded “classics” among birders. Other popular brands have wider fields of view, but I just liked the quality of the images I saw through the Monarch 5.
These are relatively inexpensive mid-level binoculars. There are higher quality binoculars out there, but you can easily spend 2x-4x the price of the Monarch 5. The Nikon Monarch 7 binoculars were tempting because of their wider field of view and premium Extra-low Dispersion (ED) glass. But they were beyond my budget.
I chose the 8x power instead of 10x because I felt the wider field of view is more flexible for watching birds, reptiles, mammals, and for land navigation. Some brands had 10x binoculars with a comparable field of view, but they were not available for me to try before my purchase. I also like the 8×42’s compact size.
One of the Monarch 5’s useful features is its close focus distance is 7.8 feet. This means I can focus on birds and butterflies very close to me on the ground or feeding on plants alongside the trail. Close focus is a feature you should pay attention to if you like to watch songbirds or insects just outside your window.
Other brands I considered were the Carson 3D 8×42 and the Eagle Optics Ranger ED 8×42.
Enjoy

The most important thing about binoculars is to use them!
Good luck searching for your new binoculars! I’m certain that whichever you buy, they will be the right ones. Remember that good binoculars will last decades. So invest some extra time to select a pair you really like.
Do you have a brand or model you love? Let me know in the comments below.
Related Articles on NatureOutside
My Most Popular First Aid Supply of the Year – 2016
XYZ –How to Fix Your Zippers (Video)
Don’t use a Condom when a Chicken Bag will do! (for wilderness survival)
For fun facts and useful tips, join the free Bushcraft Newsletter.


Nice tradeoffs and benefits review, thx! I use a smallish monocular. These are so much smaller than a binocular & and so I can always have a monocular with me. & much cheaper too (pay for what you get…). Having the monocular with me always (nearly) has come in quite handy for scouting during hikes on unfamiliar trails. Of course, with the small monoculars that I use, image quality (in particular light gathering) suffers, but that’s a compromise that I quite readily accept in return for small size. I use the Brunton 10-30X21 Echo Zoom Monocular.
With a clear night sky, I can make out Jupiter’s moons with this scope.
I’m glad you brought this up, Ron. It’s a good idea to consider a monocular if you want an inexpensive, compact scope that is easy to carry on your person.
Hi I am a wounded disabled veteran would you gift a used or otherwise binocular to be used for my therapy and recovery in birding. Thank you Mel Commeree
Hi Melvin, I will contact you by Email.
Superb article.
Thanks, Mel! I’m glad you enjoyed it.
We’re planning a trip to South Africa and I want to bring binoculars with us. After reading your article I feel like I have a better idea of what to get. Thanks!
Siroli, I’m glad the article was helpful. Have fun on safari! Binoculars will be useful when you’re not able to get close to an animal. Or you’re viewing a smaller animal from an open vehicle.
Thanks for this post! It helped me pick out my first pair of binoculars over the weekend. I am signed up for a CCN course that begins in a couple of weeks, so I am gathering my supplies.
Terrific, Jennifer! Congratulations on your new pair of binoculars and for signing up for a Certified California Naturalist course. I think you’ll have a blast!
I like the tip that said I should play with the binoculars. I tried it in the shop and u really get some feeling about it if it suits you. Thank you for the tips the pictures are amazing.
You’re welcome, Adam!
very clear and good article easy to understand. Thank you
You’re welcome, Zidane!