
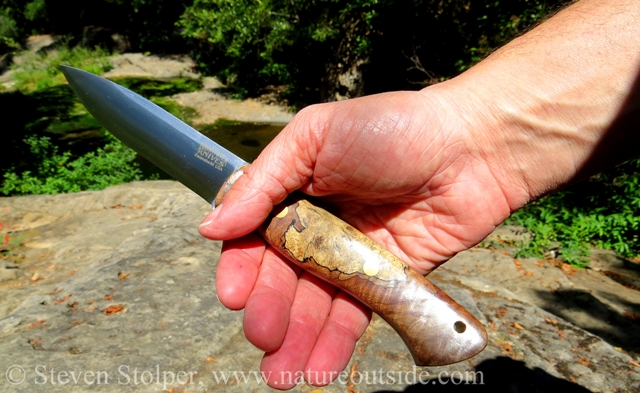
It’s so shiny!
The smooth grip feels like it was made for your hand. The lustrous blade playfully reflects trees and sky. You heft it gently, gauging its weight and balance. Your bushcraft knife feels like an extension of your arm.
And it’s razor sharp! Too many of us forget that. Bushcraft has a way of dealing overconfidence, or even a moment’s inattention. Your bushcraft knife is a loyal friend. But it can bite! So let’s invest a moment to talk about bushcraft knife safety.
It Begins with Attitude
When I was starting out, old-timers said I was certain to cut myself. Everyone does.
“If you use your bushcraft knife long enough, you’re bound to cut yourself.” It’s inevitable, they explained, so get used to it. “And carry some Band-aids and gauze with you whenever you use your knife.”
After many years of trial and error, I respectfully disagree. Cutting yourself is not inevitable. Nor should it be acceptable. I have picked up my fair share of nicks and scratches. I’ve even had a hairy close call or two. But I believe that if you follow a few simple practices, you can reduce the chance of serious injury to almost zero.
With that said, the old-timers did me a service. I had the expectation of cutting myself. So whenever a minor nick occurred I took it in stride. I considered it my initiation into the Distinguished Club of Bushcrafters, Whittlers, and Craftsman. I also heed their advice to have my first aid kit nearby whenever I use my knife. Most important, the stories they shared sensitized me to the dangers of using a knife while fatigued, in poor light, or while distracted. Because of the safety-first attitude they instilled, I still have the ability to high-five!
So cultivate an attitude of safety. This means work slowly and concentrate on what you’re doing. Don’t cut safety corners for convenience. Combine this attitude with the nine tips below, and after many years of happy carving you will still be able to extend your pinky at high tea.
My 9 Knife Safety Tips
Below are nine knife safety tips designed to keep you safe while you use your bushcraft knife. These tips are especially useful for beginners. But everyone can benefit from a review now and then. So exercise good judgment, follow the tips, and have fun!
1. A sharp knife is safer than a dull one
Sharpen your blade and then maintain it.
A sharp blade is safer than a dull one. Many beginners have trouble with this seeming paradox.
You never want your knife to slip off what you’re cutting and flail out of control. Imagine you are carving a tree branch. If your knife is dull, you must exert a lot of force to cut into the wood. Your knife is more like a spoon! Exerting force is more likely to cause the blade to slip. And when it does it is more likely to be out of control.
The other problem with a dull blade is that it is more likely to slip because it is dull. A sharp blade bites into the medium you’re cutting. A dull one is more likely to cut loose (excuse the pun).
Keep your knife sharp. Learn how to sharpen your blade and maintain the edge by stropping it after use. I talk a little bit about how to keep your knife sharp in this knife review.
2. Watch your Blood Bubble
It is your responsibility to monitor your blood bubble. Stop working if anyone enters. Stay out of others’ blood bubbles.
I first heard the term “blood bubble” many years ago. My first thought was there must be a better name for this. But after many years I cannot conceive of a name so apt.
Your blood bubble is an invisible sphere that emanates from the center of your body. Its radius stretches to the tip of your blade with your arm fully extended. It’s your own personal “no fly zone.” Your blade can reach anything or anyone within this radius. It is your job to monitor your blood bubble. If anyone enters, stop using your knife. When you are walking near people using their knives, display courtesy (and common sense) by avoiding their blood bubbles.
This precaution ensures a safe environment, even when many people are using knives side-by-side.
3. Don’t push on the point
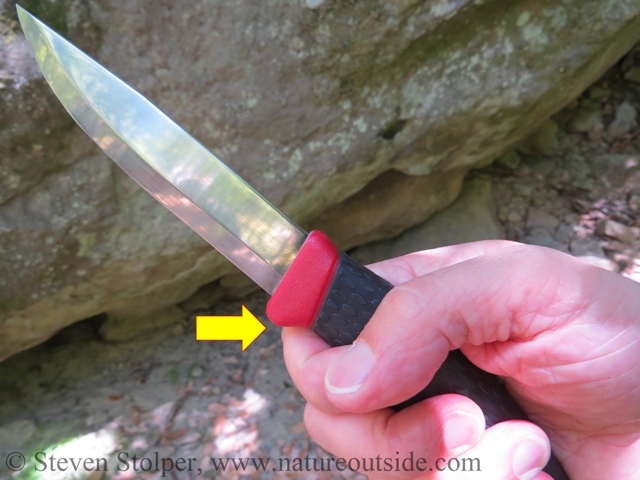
Have you heard the expression, “You can’t push on a rope”? The bushcraft version is, “Don’t push on the point!”
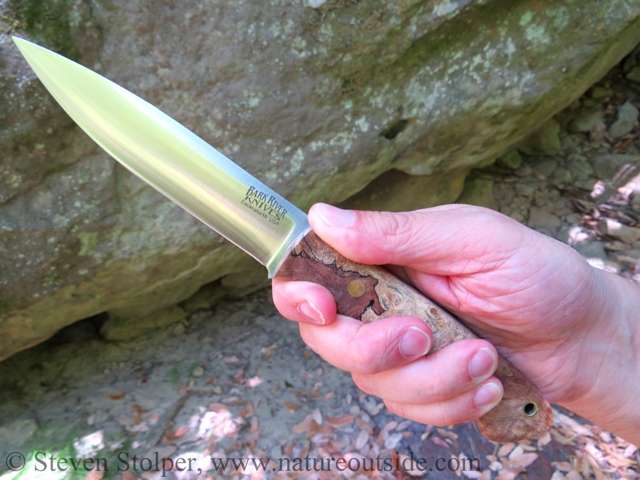
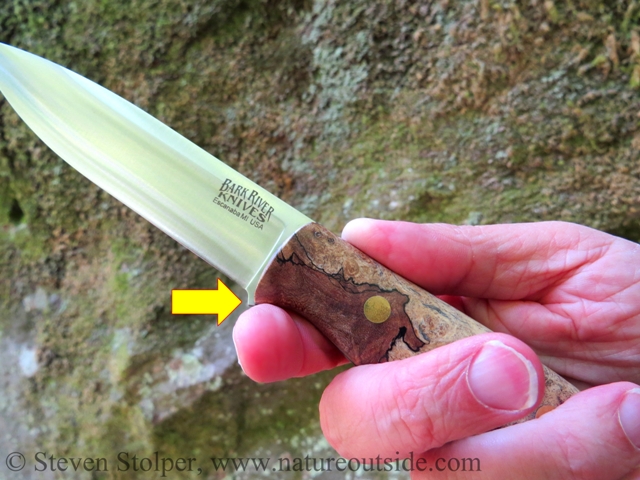
Bushcraft knives are designed to slice. Their finger guards are tiny if they even have one. The thought is that a finger guard makes it difficult to choke up on the knife and to hold it in certain grips.
Knives with Scandinavian heritage in particular seem to have little or no finger guards. I’ve heard that in some regions people believe finger guards are for children. When a child comes of age, the finger guard is removed from their knife. I don’t know if this is true.
What I do know is that pushing on the point of your knife makes it likely that your fingers will slide onto the blade. And there is no reason to do it! I tell students that anything they want to accomplish by pushing on the point they can do using a different technique.
So if you find yourself stabbing point-first with your bushcraft knife, STOP! Use a safer technique that accomplishes what you want.
Many bushcraft knives have a small finger guard or no guard at all. Many believe a finger guard makes it harder to use certain cutting grips.
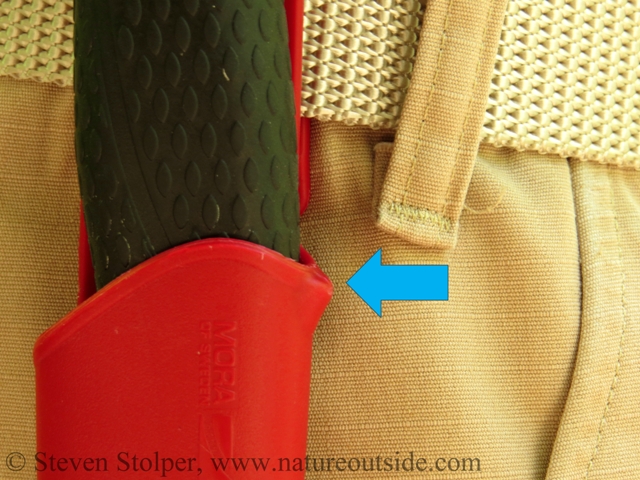
This inexpensive Mora knife also has a small guard. It is consistent with the Scandinavian approach to knife design.
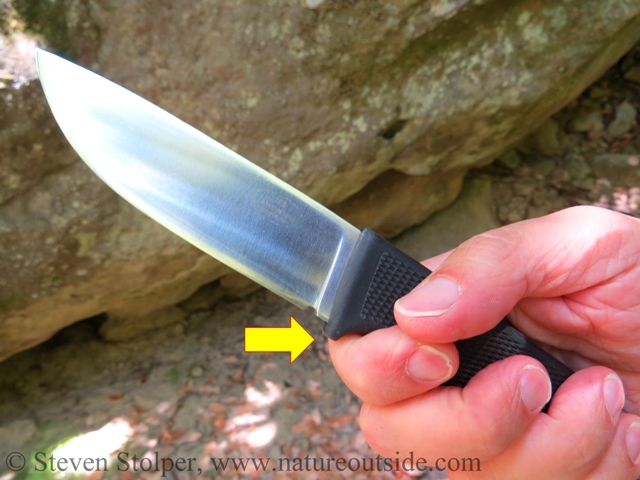
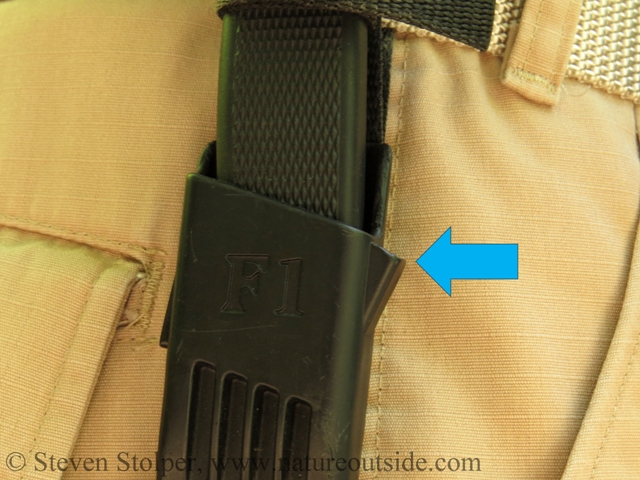
The Swedish designed Fallkniven F1 is a “survival knife.” But even so, it has a modest finger guard.
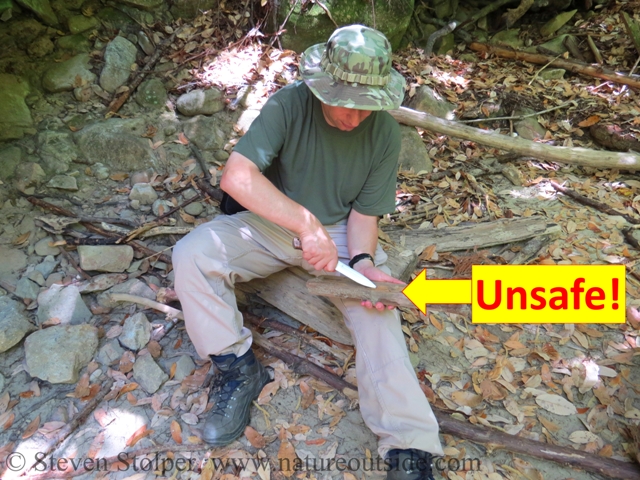
4. Never use your body as a backstop
Never use your body as a backstop. If the knife slips, it will enter your flesh. Instead, put the wood you’re carving against a tree. Put it down on a table. Put it on the ground. Or, reposition your hand so it is safely out of harm’s way.
Many of us use our bodies as a backstop without even thinking about it. So think! Always consider where your knife will go if it slips when you make your next cut. Ensure the knife does not enter your body or your buddies’.
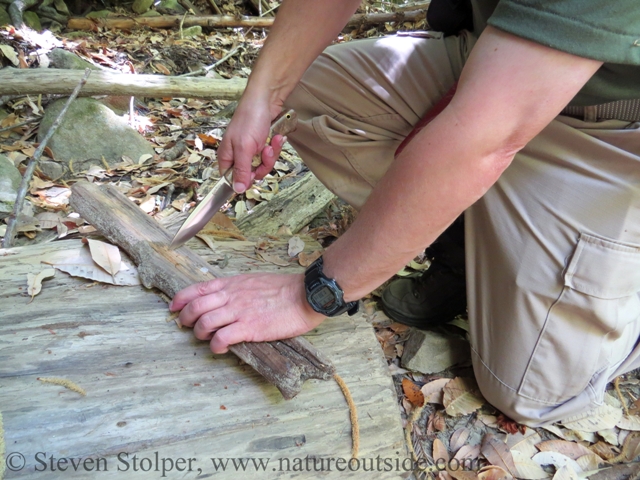
Fallen trees make good work areas.
Don’t use your body as a backstop! Here my leg is the backstop.
Don’t use your body as a backstop! Here my left hand is the backstop.
5. Never try to catch a falling knife
Whether it’s an inexpensive Mora or an expensive semi-custom knife, no cutting tool is worth your fingers or toes.
There is so much good sense in this axiom that traders on Wall Street adopted it for the stock market. When we lose our grip on our knife or we see it slip off a table, our natural instinct is to grab for it. Don’t do it! Train yourself to jump clear of the falling blade. Even if you’re sure you can save it, resist temptation. The most expensive knife in the world is not worth the pain of slashed fingers or bloody toes. Take the money you would spend on emergency room bills and buy yourself a new knife.
6. Take special care when sheathing
Many times, students draw their knives with the utmost care. They concentrate and work conscientiously. But as they return their knife to its sheath they relax. Their guard is down and they don’t pay attention.
It’s human nature to relax at this point. But wait until your knife is safely home in its sheath! Look at what you’re doing. Is your shirt covering the sheath? Is the blade gliding between the sheath and its belt loop? Are you about to stick yourself in the leg?
When I was learning to fly airplanes. I spent time “under the hood” recovering the plane from unusual attitudes. The student wears a visor that blocks his view out the windows. While the student’s eyes are closed, the instructor maneuvers the airplane to disorient the student. Then the instructor places the aircraft in an unusual attitude. For example, the nose may be extremely high with the wings steeply banked.
On his command, the student takes over. The student can only see the instrument panel. The visor blocks his view out the windows. The student must recover the aircraft to a normal attitude solely using instruments.
One day my instructor was working me over good! For an hour we repeated the drill, with me recovering the airplane from all sorts of mayhem. Sweat poured from my brow. When it was finally over, I removed the hood and relaxed.
Still in this relaxed state, I made a big mistake. When the instructor commanded a descent, I reached for the carburetor heat control. Instead I pulled the mixture control. I cut off the flow of fuel to the engine! The silence from the engine was deafening and the nose pitched down steeply. You should have seen my instructor’s face! The look of shock and astonishment was almost worth it.
I instantly re-started the flow of fuel to the engine and we flew back to the airfield. I felt ashamed. I ruined a good day’s work by making a stupid mistake. I relaxed too early. The time to relax is when you’re safely on the ground.
The time to relax is when your knife is safely in its sheath.
7. Work slowly, concentrate
Distraction, rain, mosquitoes, fatigue, cold, dehydration. All cause accidents.
Have you ever used your knife and a mosquito lands on your face? I have! My arm began its swatting motion before my mind even realized what I was doing. I halted my arm much too close for comfort.
When you use your knife, work deliberately. Concentrate on what you are doing. Be mindful. Notice your surroundings. Be aware of who or what is in your blood bubble. Don’t chit-chat with onlookers.
You owe it to yourself and to others to be fully engaged when you use your bushcraft knife.
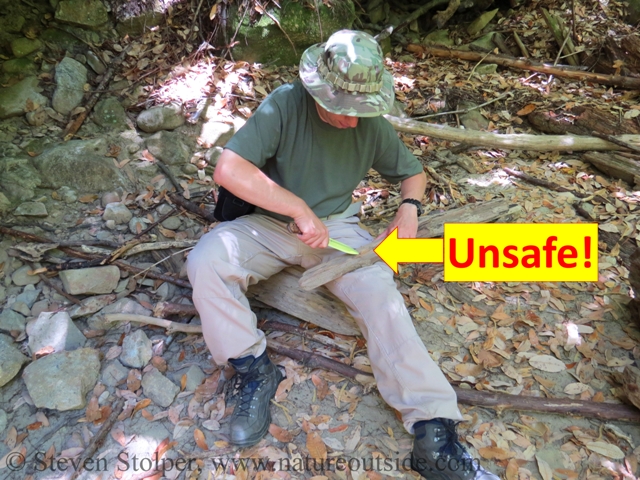
8. Put your elbows on your knees
Human bodies are remarkable. As machines, we’re so well adapted to our environment. For example, the femoral artery is the large artery in the thigh that supplies blood to the leg. It runs down the inside of the thigh so the femur protects it from trauma and from attack by predators. Both are likely to come from the outside of the leg.
But evolution didn’t count on the bushcraft knife! When you’re carving in a sitting position, do not use your knife directly over your legs. It exposes your femoral artery to grave injury. If your knife should slip, you risk puncturing this vital artery.
Instead, rest your elbows on your knees. This extends your knife and the material you’re carving out in front of your legs.
When sitting, rest your elbows on your knees. Carve in front of you.
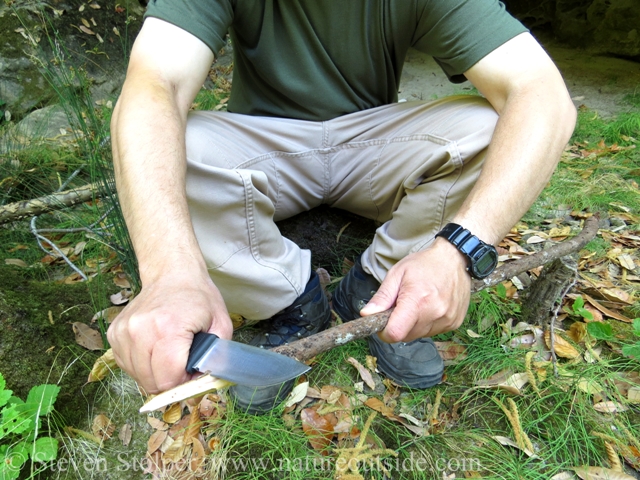
Carve in front of you so you DO NOT carve above your femoral arteries.
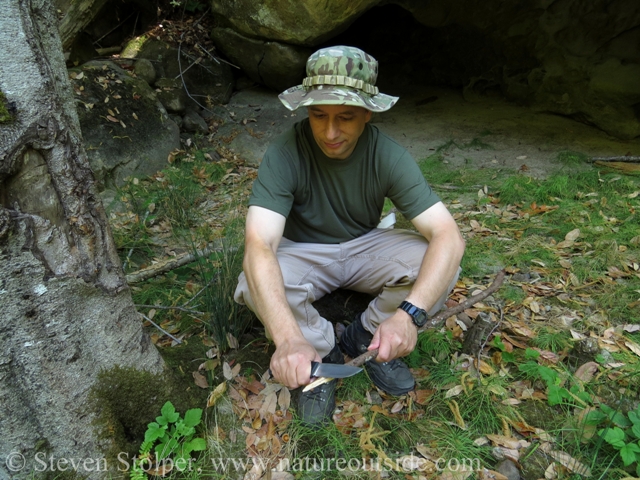
9. Unsheathe your knife in two steps
Many sheaths have a nub or button. Press it with your thumb to overcome static friction, or the locking mechanism. Then draw the knife clear of the sheath.
Another sheath with a nub. If the sheath does not have a nub, you can extend your thumb against the top edge of the sheath.
Most knives are held in the sheath by friction. Although some sheaths have a locking mechanism that holds the knife in place. To unsheathe the knife, you must overcome the static friction or the locking mechanism. This requires considerably more force than needed to draw it the rest of the way out of the sheath.
If you draw the knife in one motion, the large force you exert increases the chance that the knife will emerge from the sheath out of control. To avoid this danger, unsheathe your knife in two steps.
In the first step, overcome static friction or the locking mechanism using your thumb. Place your thumb against the nub or button built-in to many sheaths. If your sheath does not have one, use the top edge of the leather or plastic above the spine of the knife. Your thumb will be flexed. Grip the handle of your knife and extend your thumb until it is straight. As your thumb straightens, your hand draws the knife enough to overcome the static friction.
In a second motion, slowly draw the knife until it is entirely clear of the sheath.
Remember not to grasp the sheath with your other hand around the part with the blade’s edge underneath. The most likely time for a sheath to fail is when you are drawing or sheathing your knife.
Technique for beginners
So those are my nine bushcraft knife safety tips. I hope to get around to writing an article that shows you how to practice good knife technique. But in the meantime, here’s a short video by bushcraft instructor Ray Mears. It’s from his DVD, Ray Mears’ Bushcraft Survival – Series 1. It shows cuts where the knife moves away from your body: forehand grip, chest lever grip, and push cut. These are fundamental for anyone just starting out.
If you’re nervous, use safety equipment
Several manufacturers make Kevlar gloves to protect your non-dominant hand from being sliced. You can also purchase a thumb guard for your cutting hand.
These provide some psychological comfort. But they are a little clunky to use.
My book recommendation
If you want to learn more advanced knife technique, read Wille Sundqvist ‘s excellent book, Swedish Carving Techniques (Fine Woodworking). It’s terrific book for learning to use your knife.
Tell me about your safety tips
Have I left out an important tip? Share your favorite knife safety tip in the comments section below.
Related Articles
For fun facts and useful tips, join the free Bushcraft Newsletter.


Hi, Steven. Thanks a lot for your great tips for bushcraft knife. This also helps us to avoid any accident when outdoor.
I’m glad you enjoyed the article, Sandra.
Great article Steven. I’m 48 years old but consider myself still a child when it comes to experience with knives. I had just about settled on the Fallkniven H1 for a hunting knife, to be used primarily for field dressing and skinning (skills for which I’m still a beginner), but I’m hesitant to start with that knife given the absence of the thumb guard. Do you have any suggestions for something comparable – with a thumb guard? I figure I can always “graduate” to the H1 when I’m more familiar with the tasks.
Ed, it’s difficult for me to advise you because I am not a hunter. If you know other hunters, check to see what they’re using and even handle their knives to see if you might like them.
You may want to look at two models from Bark River. The “Classic Drop Point Hunter” and the “Classic Clip Point Hunter” each has a finger guard. The drop point has a slightly shorter blade than the H1. The clip point has a slightly longer one. Both models have much thinner blades than the H1. The type of game you’re hunting may influence your choice of blade length, thickness, and steel.
As of this writing, I saw good prices for these knives at DLT Trading (https://www.dlttrading.com/). KnivesShipFree (https://www.knivesshipfree.com/) also carries some models.
Wonderful information, Concise and creative, thank you
You’re welcome, Mazer!